starrocksТў»СИђСИфmppуџёТЋ░ТЇ«т║Њ
 1
 2
 3
 4
 5
 6
 7
 8
 9
10
11
12
13
14
15
16
17
18
19
20
21
22
23
|
StarRocks Тў»СИђуДЇТќ░СИђС╗БТъЂжђЪтЁетю║ТЎ» MPP№╝ѕMassively Parallel Processing№╝ЅТЋ░ТЇ«т║Њ№╝їСИЊСИ║жФўТђДУЃйТЋ░ТЇ«тѕєТъљУђїУ«ЙУ«Асђѓт«ЃуџёТъХТъёУъЇтљѕС║є MPP ТЋ░ТЇ«т║ЊтњїтѕєтИЃт╝Ју│╗у╗ЪуџёУ«ЙУ«АТђЮТЃ│№╝їтЁиТюЅС╗ЦСИІуЅ╣уѓ╣№╝џ
1. **жФўТђДУЃйТЪЦУ»б**№╝џ
- StarRocks Сй┐ућетЁежЮбтљЉжЄЈтїќт╝ЋТЊјтњїтЪ║С║јС╗БС╗иуџёС╝ўтїќтЎе№╝ѕCBO№╝Ѕ№╝їУЃйтцЪт«ъуј░С║џуДњу║ДТЪЦУ»бжђЪт║д№╝їуЅ╣тѕФТў»тюетцџУАетЁ│УЂћТЪЦУ»бСИГУАеуј░тЄ║УЅ▓сђѓ
2. **т«ъТЌХТЋ░ТЇ«тѕєТъљ**№╝џ
- Тћ»ТїЂт«ъТЌХТЏ┤Тќ░ТЋ░ТЇ«т╣ХУ┐ЏУАїжФўТЋѕТЪЦУ»б№╝їжђѓућеС║јт«ъТЌХТЋ░ТЇ«С╗Њт║Њтњїт«ъТЌХТїЄТаЄуЏЉТјДуГЅтю║ТЎ»сђѓ
3. **уЂхТ┤╗уџёТЋ░ТЇ«т╗║ТеА**№╝џ
- Тћ»ТїЂтцџуДЇТЋ░ТЇ«ТеАтъІ№╝їтїЁТІгт«йУАесђЂТўЪтъІТеАтъІтњїжЏфУі▒ТеАтъІ№╝їТ╗АУХ│тцЇТЮѓуџёТЋ░ТЇ«тѕєТъљжюђТ▒ѓсђѓ
4. **Т╣ќС╗ЊСИђСйЊ**№╝џ
- у╗ЊтљѕТЋ░ТЇ«Т╣ќуџёуЂхТ┤╗ТђДтњїТЋ░ТЇ«С╗Њт║ЊуџётѕєТъљУЃйтіЏ№╝їТЈљСЙЏу╗ЪСИђуџёТЋ░ТЇ«т╣│тЈ░№╝їу«ђтїќТЋ░ТЇ«тГўтѓесђЂтцёуљєтњїтѕєТъљТхЂуеІсђѓ
5. **жФўт╣ХтЈЉТЪЦУ»б**№╝џ
- жђџУ┐ЄС╝ўтїќТЪЦУ»бУ░Ѓт║дтњїУхёТ║љтѕєжЁЇ№╝їуА«С┐ЮтюетцџућеТѕитљїТЌХУ«┐жЌ«ТЌХу│╗у╗ЪУЃйтцЪуе│т«џУ┐љУАїт╣Хт┐ФжђЪтЊЇт║ћсђѓ
6. **тЁ╝т«╣ТђД**№╝џ
- тЁ╝т«╣ MySQL тЇЈУ««№╝їТћ»ТїЂТаЄтЄє SQL У»ГТ│Ћ№╝їТўЊС║јСИјтИИуће BI тиЦтЁи№╝ѕтдѓ TableauсђЂPower BI№╝ЅжЏєТѕљсђѓ
StarRocks уџёУ«ЙУ«АуЏ«ТаЄТў»У«ЕТЋ░ТЇ«тѕєТъљтЈўтЙЌТЏ┤тіау«ђтЇЋтњїТЋЈТЇи№╝їжђѓућеС║јС╝ЂСИџу║ДућеТѕиуџётцџуДЇтѕєТъљжюђТ▒ѓ№╝їтїЁТІг OLAP тцџу╗┤тѕєТъљсђЂт«ъТЌХТЋ░ТЇ«тѕєТъљтњїжФўт╣ХтЈЉТЪЦУ»буГЅтю║ТЎ»сђѓтдѓТъюТѓеТЃ│С║єУДБТЏ┤тцџ№╝їтЈ»С╗ЦтЈѓУђЃ [т«ўТќ╣ТќЄТАБ](https://docs.starrocks.io/zh/docs/introduction/what_is_starrocks/) Тѕќ [уцЙтї║УхёТ║љ](https://docs.starrocks.io/zh/docs/introduction/StarRocks_intro/)сђѓ
тИїТюЏУ┐ЎС║ЏС┐АТЂ»т»╣ТѓеТюЅТЅђтИ«тіЕ№╝Ђ Ъўі
|
тГўу«Ќтѕєуд╗
StarRocks уџётГўу«Ќтѕєуд╗ТъХТъёТў»СИђуДЇтѕЏТќ░У«ЙУ«А№╝їТЌетюеС╝ўтїќУхёТ║љтѕЕућеујЄт╣ХТЈљтЇЄу│╗у╗Ъуџёт╝╣ТђДтњїТЅЕт▒ЋТђДсђѓС╗ЦСИІТў»тГўу«Ќтѕєуд╗уџёСИ╗УдЂуЅ╣уѓ╣№╝џ
-
тГўтѓеСИјУ«Ау«Ќтѕєуд╗№╝џ
- ТЋ░ТЇ«тГўтѓетюеУ┐юуеІтГўтѓеу│╗у╗ЪСИГ№╝їСЙІтдѓ Amazon S3сђЂGoogle Cloud StorageсђЂAzure Blob Storage ТѕќТћ»ТїЂ S3 тЇЈУ««уџётГўтѓе№╝ѕтдѓ MinIO№╝Ѕсђѓ
- У«Ау«ЌУіѓуѓ╣№╝ѕCN№╝ЅУ┤ЪУ┤БТЅДУАїТЪЦУ»б№╝їУђїСИЇтГўтѓеТЋ░ТЇ«сђѓ
-
Тюгтю░у╝ЊтГўТю║тѕХ№╝џ
- уЃГТЋ░ТЇ«С╝џУбФу╝ЊтГўтѕ░Тюгтю░уБЂуЏў№╝їтюеТЪЦУ»бтЉйСИГу╝ЊтГўуџёТЃЁтєхСИІ№╝їТђДУЃйСИјтГўу«ЌСИђСйЊТъХТъёуЏИтйЊсђѓ
- Тћ»ТїЂТЋ░ТЇ«у╝ЊтГўжбёуЃГтіЪУЃй№╝їтЈ»С╗ЦТЈљтЅЇтіаУййТЅђжюђТЋ░ТЇ«С╗ЦтіажђЪТЪЦУ»бсђѓ
-
т╝╣ТђДТЅЕт▒Ћ№╝џ
- У«Ау«ЌУіѓуѓ╣тЈ»С╗ЦТа╣ТЇ«жюђТ▒ѓт┐ФжђЪТЅЕу╝Ет«╣№╝їтЄауДњтєЁтЇ│тЈ»т«їТѕљсђѓ
- тГўтѓеТѕљТюгТЏ┤Сйј№╝їтљїТЌХС┐ЮУ»ЂУхёТ║љжџћуд╗ТђДУЃйсђѓ
-
Тћ»ТїЂтцџуДЇтГўтѓеу▒╗тъІ№╝џ
- тїЁТІг HDFSсђЂAzure BlobсђЂAWS S3 уГЅт»╣У▒АтГўтѓеТюЇтіАсђѓ
-
жђѓућетю║ТЎ»№╝џ
- тГўу«Ќтѕєуд╗ТъХТъёуЅ╣тѕФжђѓтљѕС║Љуј»тбЃ№╝їУЃйтцЪжЎЇСйјтГўтѓеТѕљТюгт╣ХС╝ўтїќУхёТ║љжџћуд╗сђѓ
тдѓТъюТѓеТЃ│С║єУДБТЏ┤тцџ№╝їтЈ»С╗ЦтЈѓУђЃ т«ўТќ╣ТќЄТАБ Тѕќ уЏИтЁ│ТЋЎуеІсђѓтИїТюЏУ┐ЎС║ЏС┐АТЂ»т»╣ТѓеТюЅТЅђтИ«тіЕ№╝Ђ Ъўі
ТѕЉТЮЦтѕЏт╗║СИђСИфdocker-composeтљ»тіеуџётГўу«Ќтѕєуд╗уЅѕТюг
  1
  2
  3
  4
  5
  6
  7
  8
  9
 10
 11
 12
 13
 14
 15
 16
 17
 18
 19
 20
 21
 22
 23
 24
 25
 26
 27
 28
 29
 30
 31
 32
 33
 34
 35
 36
 37
 38
 39
 40
 41
 42
 43
 44
 45
 46
 47
 48
 49
 50
 51
 52
 53
 54
 55
 56
 57
 58
 59
 60
 61
 62
 63
 64
 65
 66
 67
 68
 69
 70
 71
 72
 73
 74
 75
 76
 77
 78
 79
 80
 81
 82
 83
 84
 85
 86
 87
 88
 89
 90
 91
 92
 93
 94
 95
 96
 97
 98
 99
100
101
102
103
104
105
106
107
108
109
110
111
112
113
|
services:
  minio:
    container_name: minio
    environment:
      MINIO_ROOT_USER: miniouser
      MINIO_ROOT_PASSWORD: miniopassword
    image: minio/minio:latest
    ports:
      - "9001:9001"
      - "9000:9000"
    entrypoint: sh
    command: '-c ''mkdir -p /minio_data/starrocks && minio server /minio_data --console-address ":9001"'''
    healthcheck:
      test: ["CMD", "mc", "ready", "local"]
      interval: 5s
      timeout: 5s
      retries: 5

  minio_mc:
    # This service is short lived, it does this:
    # - starts up
    # - checks to see if the MinIO service `minio` is ready
    # - creates a MinIO Access Key that the StarRocks services will use
    # - exits
    image: minio/mc:latest
    entrypoint:
      - sh
      - -c
      - |
        until mc ls minio > /dev/null 2>&1; do
          sleep 0.5
        done

        mc alias set myminio http://minio:9000 miniouser miniopassword
        mc admin user svcacct add --access-key AAAAAAAAAAAAAAAAAAAA \
        --secret-key BBBBBBBBBBBBBBBBBBBBBBBBBBBBBBBBBBBBBBBB \
        myminio \
        miniouser
    depends_on:
        minio:
          condition: service_healthy

  starrocks-fe:
    image: starrocks/fe-ubuntu:3.3-latest
    hostname: starrocks-fe
    container_name: starrocks-fe
    user: root
    command:
      - /bin/bash
      - -c
      - |
        echo "# enable shared data, set storage type, set endpoint" >> /opt/starrocks/fe/conf/fe.conf
        echo "run_mode = shared_data" >> /opt/starrocks/fe/conf/fe.conf
        echo "cloud_native_storage_type = S3" >> /opt/starrocks/fe/conf/fe.conf
        echo "aws_s3_endpoint = minio:9000" >> /opt/starrocks/fe/conf/fe.conf

        echo "# set the path in MinIO" >> /opt/starrocks/fe/conf/fe.conf
        echo "aws_s3_path = starrocks" >> /opt/starrocks/fe/conf/fe.conf

        echo "# credentials for MinIO object read/write" >> /opt/starrocks/fe/conf/fe.conf
        echo "aws_s3_access_key = AAAAAAAAAAAAAAAAAAAA" >> /opt/starrocks/fe/conf/fe.conf
        echo "aws_s3_secret_key = BBBBBBBBBBBBBBBBBBBBBBBBBBBBBBBBBBBBBBBB" >> /opt/starrocks/fe/conf/fe.conf
        echo "aws_s3_use_instance_profile = false" >> /opt/starrocks/fe/conf/fe.conf
        echo "aws_s3_use_aws_sdk_default_behavior = false" >> /opt/starrocks/fe/conf/fe.conf

        echo "# Set this to false if you do not want default" >> /opt/starrocks/fe/conf/fe.conf
        echo "# storage created in the object storage using" >> /opt/starrocks/fe/conf/fe.conf
        echo "# the details provided above" >> /opt/starrocks/fe/conf/fe.conf
        echo "enable_load_volume_from_conf = true" >> /opt/starrocks/fe/conf/fe.conf

        /opt/starrocks/fe/bin/start_fe.sh --host_type FQDN
    ports:
      - 8030:8030
      - 9020:9020
      - 9030:9030
    healthcheck:
      test: 'mysql -u root -h starrocks-fe -P 9030 -e "show frontends\G" |grep "Alive: true"'
      interval: 10s
      timeout: 5s
      retries: 3
    depends_on:
        minio:
            condition: service_healthy

  starrocks-cn:
    image: starrocks/cn-ubuntu:3.3-latest
    command:
      - /bin/bash
      - -c
      - |
        sleep 15s;
        ulimit -u 65535;
        ulimit -n 65535;
        mysql --connect-timeout 2 -h starrocks-fe -P9030 -uroot -e "ALTER SYSTEM ADD COMPUTE NODE \"starrocks-cn:9050\";"
        /opt/starrocks/cn/bin/start_cn.sh
    environment:
      - HOST_TYPE=FQDN
    ports:
      - 8040:8040
    hostname: starrocks-cn
    container_name: starrocks-cn
    user: root
    depends_on:
      starrocks-fe:
        condition: service_healthy
        restart: true
      minio:
        condition: service_healthy
    healthcheck:
      test: 'mysql -u root -h starrocks-fe -P 9030 -e "SHOW COMPUTE NODES\G" |grep "Alive: true"'
      interval: 10s
      timeout: 5s
      retries: 3
|
тЁѕтљ»тіеcnуюІуюІ№╝џ
1
|
nerdctl run -p 9060:9060 -p 8040:8040 -p 9050:9050 -p 8060:8060 -p 9070:9070 -it --name cn -e "TZ=Asia/Shanghai" starrocks/cn-ubuntu:3.4-latest
|
У┐ЏтЁЦтѕ░cnт«╣тЎеСИГ№╝џ
1
2
3
|
 nerdctl exec -it cn /bin/bash
cd cn/conf
echo "priority_networks = 10.7.10.190/24" >>cn.properties
|
ТјЦСИІТЮЦжЄЇтљ»СИђСИІТюЇтіА
1
2
|
тЁѕТЮђТГ╗У┐ЏуеІ
bin/start_cn.sh --daemon
|
ТјЦСИІтюеideaСИГтљ»тіеfe
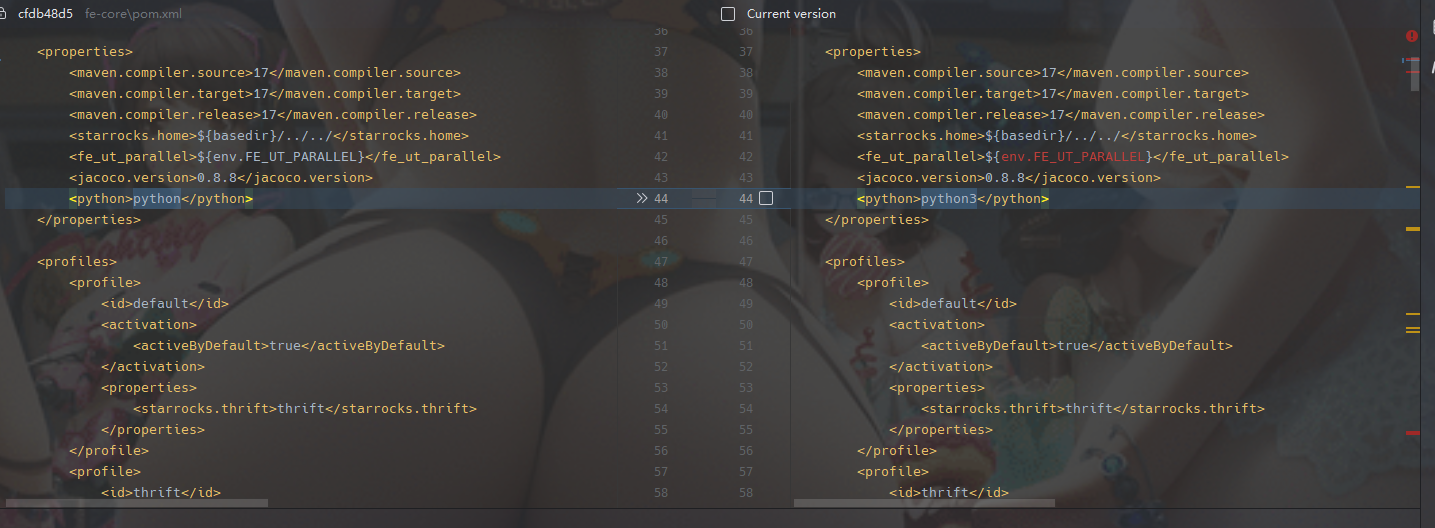
жюђУдЂС┐«Тћ╣pythonСИ║Python3
 ТјЦСИІТЮЦжюђУдЂт«ЅУБЁ- Protobufсђѓ
С╗ЦСИіТГЦжфцжЃйтЂџт«їС╣Ітљј№╝їУ┐ЏУАїу╝ќУ»Љ┬иmvn clean install -DskipTests=true┬и,СИЇТіЦжћЎтЇ│тЈ»сђѓ
ТјЦСИІТЮЦжюђУдЂт«ЅУБЁ- Protobufсђѓ
С╗ЦСИіТГЦжфцжЃйтЂџт«їС╣Ітљј№╝їУ┐ЏУАїу╝ќУ»Љ┬иmvn clean install -DskipTests=true┬и,СИЇТіЦжћЎтЇ│тЈ»сђѓ
ТјЦСИІТЮЦТюгтю░тљ»тіеfe
тєЇstarrocksуЏ«тйЋСИІТЊЇСйюС╗ЦСИІтЉйС╗ц№╝џ
1
2
3
4
5
6
7
|
cp -r conf fe/conf
cp -r bin fe/bin
cp -r webroot fe/webroot

cd fe
mkdir log
mkdir meta
|
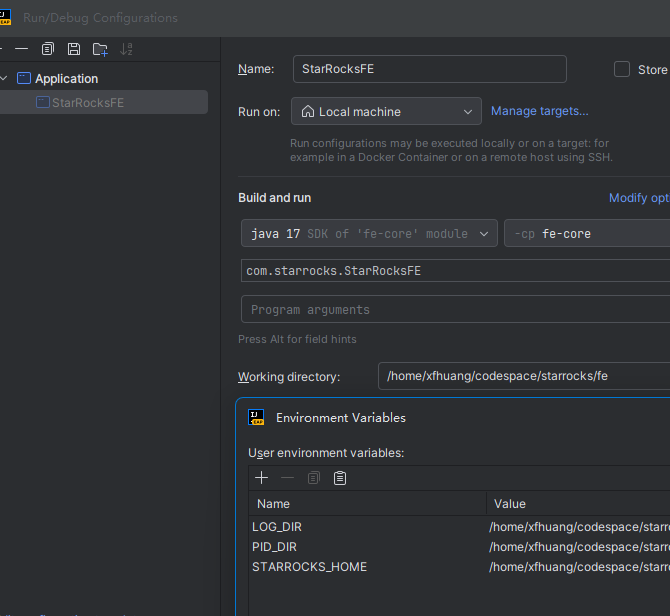
тљ»тіеуџёСИ╗у▒╗Тў»┬иcom.starrocks.StarRocksFE┬и№╝їтєЇтљ»тіежЁЇуй«ТќЄС╗ХСИГТи╗тіаС╗ЦСИІуј»тбЃтЈўжЄЈ
1
2
3
4
|
# С┐«Тћ╣СИ║УЄфти▒уџёуЏ«тйЋ
export PID_DIR=/Users/hxf/CodeSpace/starrocks/fe/bin
export STARROCKS_HOME=/Users/hxf/CodeSpace/starrocks/fe
export LOG_DIR=/Users/hxf/CodeSpace/starrocks/fe/log
|
ТјЦСИІТЮЦС┐«Тћ╣fe.conf
 1
 2
 3
 4
 5
 6
 7
 8
 9
10
11
12
13
14
15
16
17
18
19
20
21
22
23
24
25
26
27
28
29
30
31
32
33
34
35
36
37
38
39
40
41
42
43
44
45
46
47
48
49
50
51
52
53
54
55
56
57
58
59
60
61
62
63
64
65
66
67
68
69
70
71
72
73
74
75
76
77
78
79
80
81
82
83
|
# Licensed to the Apache Software Foundation (ASF) under one
# or more contributor license agreements. See the NOTICE file
# distributed with this work for additional information
# regarding copyright ownership. The ASF licenses this file
# to you under the Apache License, Version 2.0 (the
# "License"); you may not use this file except in compliance
# with the License. You may obtain a copy of the License at
#
# http://www.apache.org/licenses/LICENSE-2.0
#
# Unless required by applicable law or agreed to in writing,
# software distributed under the License is distributed on an
# "AS IS" BASIS, WITHOUT WARRANTIES OR CONDITIONS OF ANY
# KIND, either express or implied. See the License for the
# specific language governing permissions and limitations
# under the License.
#####################################################################
## The uppercase properties are read and exported by bin/start_fe.sh.
## To see all Frontend configurations,
## see fe/fe-core/src/main/java/com/starrocks/common/Config.java
# the output dir of stderr/stdout/gc
LOG_DIR = ${STARROCKS_HOME}/log
DATE = "$(date +%Y%m%d-%H%M%S)"
JAVA_OPTS="-Dlog4j2.formatMsgNoLookups=true -Xmx8192m -XX:+UseG1GC -Xlog:gc*:${LOG_DIR}/fe.gc.log.$DATE:time -XX:ErrorFile=${LOG_DIR}/hs_err_pid%p.log -Djava.security.policy=${STARROCKS_HOME}/conf/udf_security.policy"
##
## the lowercase properties are read by main program.
##
# DEBUG, INFO, WARN, ERROR, FATAL
sys_log_level = INFO
# store metadata, create it if it is not exist.
# Default value is ${STARROCKS_HOME}/meta
# meta_dir = ${STARROCKS_HOME}/meta
http_port = 8030
rpc_port = 9020
query_port = 9030
edit_log_port = 9010
mysql_service_nio_enabled = true
# Enable jaeger tracing by setting jaeger_grpc_endpoint
# jaeger_grpc_endpoint = http://localhost:14250
run_mode = shared_data
cloud_native_storage_type = S3
aws_s3_endpoint = 10.7.10.190:9000
# set the path in MinIO
aws_s3_path = starrocks
# credentials for MinIO object read/write
# У┐ЎжЄїуџё key СИ║тѕџТЅЇУ«Йуй«уџё access token
aws_s3_access_key = AAAAAAAAAAAAAAAAAAAA
aws_s3_secret_key = BBBBBBBBBBBBBBBBBBBBBBBBBBBBBBBBBBBBBBBB
aws_s3_use_instance_profile = false
aws_s3_use_aws_sdk_default_behavior = false
# Set this to false if you do not want default
# storage created in the object storage using
# the details provided above
enable_load_volume_from_conf = true
# Choose one if there are more than one ip except loopback address.
# Note that there should at most one ip match this list.
# If no ip match this rule, will choose one randomly.
# use CIDR format, e.g. 10.10.10.0/24
# Default value is empty.
priority_networks = 10.7.10.190/24
# Advanced configurations
# log_roll_size_mb = 1024
# sys_log_dir = ${STARROCKS_HOME}/log
# sys_log_roll_num = 10
# sys_log_verbose_modules =
# audit_log_dir = ${STARROCKS_HOME}/log
# audit_log_modules = slow_query, query
# audit_log_roll_num = 10
# meta_delay_toleration_second = 10
# qe_max_connection = 1024
# max_conn_per_user = 100
# qe_query_timeout_second = 300
# qe_slow_log_ms = 5000
|
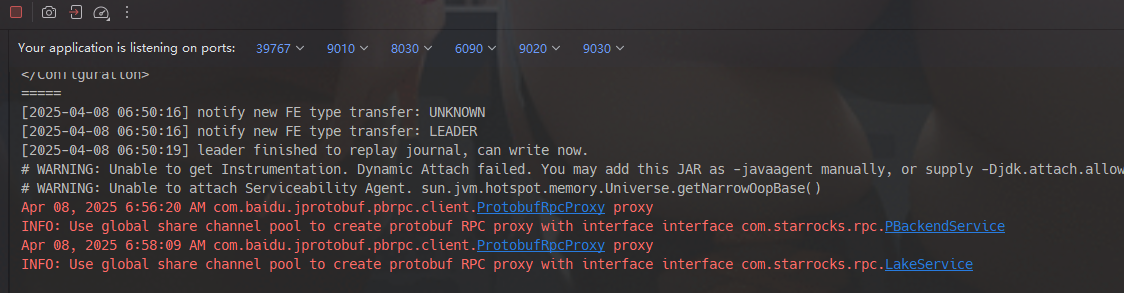
 тєЇideaСИГтљ»тіеуюІтѕ░consoleтдѓСИІУЙЊтЄ║
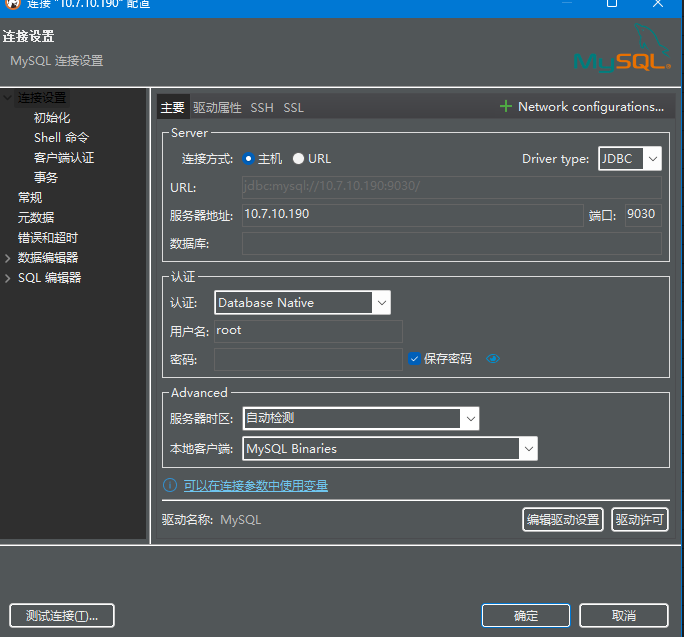
 ТѕЉС╗гТјЦСИІТЮЦтєЇdbeaverСИГУ»ЋУ»ЋУ┐ъТјЦУ┐ЎСИфТюЇтіА
 ТјЦСИІТЮЦТѕЉС╗гУдЂУ┐ъТјЦcnУіѓуѓ╣С║є
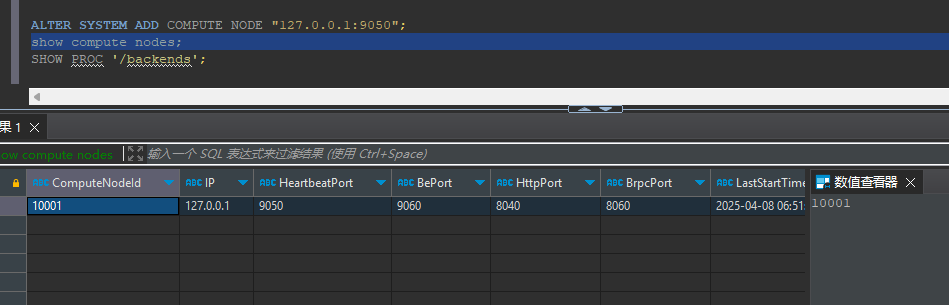 УЃйуюІтѕ░lastStartTimeТюЅТЋ░ТЇ«тЇ│тЈ»сђѓ
ТјЦСИІТЮЦТѕЉС╗гУ┐ЏУАїТхІУ»ЋСИђСИІ№╝џ
УЃйуюІтѕ░lastStartTimeТюЅТЋ░ТЇ«тЇ│тЈ»сђѓ
ТјЦСИІТЮЦТѕЉС╗гУ┐ЏУАїТхІУ»ЋСИђСИІ№╝џ
 1
 2
 3
 4
 5
 6
 7
 8
 9
10
11
12
13
14
15
16
17
18
19
20
21
22
23
24
25
26
27
28
29
30
31
32
33
34
35
36
37
38
39
40
41
|
create database test;

use test;

admin set frontend config("tablet_create_timeout_second"="100")


CREATE TABLE IF NOT EXISTS par_tbl1

(

datekey DATETIME,

k1 INT,

item_id STRING,

v2 INT

)PRIMARY KEY (`datekey`,`k1`)

PARTITION BY date_trunc('day', `datekey`)

PROPERTIES (

"compression" = "LZ4",

"datacache.enable" = "true",

"enable_async_write_back" = "false",

"enable_persistent_index" = "true",

"persistent_index_type" = "LOCAL",

"replication_num" = "1",

"storage_volume" = "builtin_storage_volume"

);
|
Т│еТёЈ
admin set frontend config(“tablet_create_timeout_second”=“100”),У┐ЎТЮАsqlТў»СИ║С║єУ«ЕтѕЏт╗║У»ГтЈЦТГБтИИУ┐љУАї№╝їСИЇуёХС╝џТіЦжћЎУХЁТЌХсђѓ
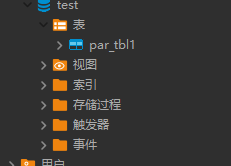
тѕЏт╗║ТѕљтіЪтљјтЈ»С╗ЦуюІтѕ░ТѕљтіЪтѕЏт╗║уџёУАеТа╝
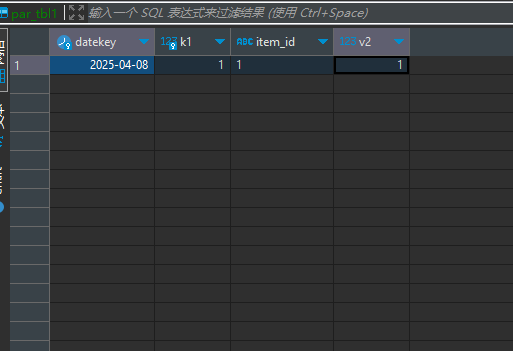
 ТЮЦТЅІтіеТЈњтЁЦСИђТЮАТЋ░ТЇ«уюІуюІ
тЈѓУђЃТќЄТАБ№╝џ
https://crossoverjie.top/2025/02/26/ob/StarRocks-dev-shard-data-build/