Kubernetes 持久化存储之 Rook Ceph
在 Kubernetes 生态系统中,持久化存储是支撑业务应用稳定运行的基石,对于维护整个系统的健壮性至关重要。对于选择自主搭建 Kubernetes 集群的运维架构师来说,挑选合适的后端持久化存储解决方案是关键的选型决策。目前,Ceph、GlusterFS、NFS、Longhorn 和 openEBS 等解决方案已在业界得到广泛应用。
为了丰富技术栈,并为容器云平台的持久化存储设计提供更广泛的灵活性和选择性,今天,我将带领大家一起探索,如何将 Ceph 集成到由 KubeSphere 管理的 Kubernetes 集群中。
集成 Ceph 至 Kubernetes 集群主要有两种方案:
- 利用 Rook Ceph 直接在 Kubernetes 集群上部署 Ceph 集群,这种方式更贴近云原生的应用特性。
- 手动部署独立的 Ceph 集群,并配置 Kubernetes 集群与之对接,实现存储服务的集成。
本文将重点实战演示使用 Rook Ceph 在 Kubernetes 集群上直接部署 Ceph 集群的方法,让您体验到云原生环境下 Ceph 部署的便捷与强大。
实战服务器配置
| 主机名 |
IP |
CPU |
内存 |
系统盘 |
数据盘 |
用途 |
| k-m1 |
10.7.20.26 |
4 |
32 |
40 |
200 |
主节点 |
| k-n1 |
10.7.20.42 |
4 |
32 |
40 |
100 |
sotage |
| k-n2 |
10.7.20.43 |
4 |
32 |
40 |
100 |
sotage |
| k-n3 |
10.7.20.5 |
4 |
32 |
40 |
100 |
sotage |
| k-n4 |
10.7.20.25 |
4 |
32 |
40 |
100 |
k8s-worke |
| k-n5 |
10.7.20.28 |
4 |
32 |
40 |
100 |
worker |
| 合计 |
15 |
56 |
152 |
600 |
2100+ |
|
| 实战环境涉及软件版本信息 |
|
|
|
|
|
|
- 操作系统:centos8
- Kubernetes:v1.24.2
- Containerd:1.7.13
- Ceph: v17.2.5
Ceph 是一个强大的分布式存储系统,由多个组件组成,每个组件负责不同的功能。以下是 Ceph 的主要组件:
-
RADOS (Reliable Autonomic Distributed Object Store):
- RADOS 是 Ceph 存储集群的基础。它负责存储所有对象,并确保数据的一致性和可靠性。RADOS 执行数据复制、故障检测和恢复。
-
OSD (Object Storage Daemon):
- OSD 是实际存储数据的进程。每个 OSD 守护进程通常绑定一个物理磁盘。客户端的读写操作最终都会通过 OSD 执行。
-
MON (Monitor):
- MON 组件在 Ceph 集群中扮演管理者的角色,维护整个集群的状态。它确保集群的相关组件在同一状态下运行,并提供集群的健康状态信息。
-
MDS (Metadata Server):
- MDS 负责管理 Ceph 文件系统 (CephFS) 的元数据。它允许客户端高效地访问文件系统中的数据。
-
RGW (RADOS Gateway):
- RGW 提供对象存储接口,支持 S3 和 Swift 协议。它允许用户通过 HTTP/HTTPS 访问存储在 Ceph 中的数据。
1. Rook 部署规划
为了更好地满足生产环境的实际需求,在规划和部署存储基础设施时,我增加了以下策略:
- 节点扩展:向 Kubernetes 集群中新增三个专用节点,这些节点将专门承载 Ceph 存储服务,确保存储操作的高效性和稳定性。
- 组件隔离:所有 Rook 和 Ceph 组件以及数据卷将被部署在这些专属节点上,实现组件的清晰隔离和专业化管理。
- 节点标签化:为每个存储节点设置了专门的标签
node.kubernetes.io/storage=rook,以便 Kubernetes 能够智能地调度相关资源。同时,非存储节点将被标记为 node.rook.io/rook-csi=true,这表明它们将承载 Ceph CSI 插件,使得运行在这些节点上的业务 Pod 能够利用 Ceph 提供的持久化存储。
- 存储介质配置:在每个存储节点上,我将新增一块 100G 的 Ceph 专用数据盘
/dev/sdd。为保证最佳性能,该磁盘将采用裸设备形态直接供 Ceph OSD 使用,无需进行分区或格式化。
重要提示:
- 本文提供的配置和部署经验对于理解 Rook-Ceph 的安装和运行机制具有参考价值。然而,强烈建议不要将本文描述的配置直接应用于任何形式的生产环境。
- 在生产环境中,还需进一步考虑使用 SSD、NVMe 磁盘等高性能存储介质;细致规划故障域;制定详尽的存储节点策略;以及进行细致的系统优化配置等。
2. 前置条件
2.1 Kubernetes 版本
- Rook 可以安装在任何现有的 Kubernetes 集群上,只要它满足最低版本,并且授予 Rook 所需的特权
- 早期 v1.9.7 版本的 Rook 支持 Kubernetes v1.17 或更高版本
- 现在的 v1.14.9 版本支持 Kubernetes v1.25 到 v1.30 版本(可能支持更低的版本,可以自己验证测试)
2.2 CPU Architecture
支持的 CPU 架构包括: amd64 / x86_64 and arm64。
2.3 Ceph 先决条件
为了配置 Ceph 存储集群,至少需要以下任意一种类型的本地存储:
- Raw devices (no partitions or formatted filesystems,没有分区和格式化文件系统,本文选择)
- Raw partitions (no formatted filesystem,已分区但是没有格式化文件系统)
- LVM Logical Volumes (no formatted filesystem)
- PVs available from a storage class in
block mode
使用以下命令确认分区或设备是否使用文件系统并进行了格式化:
$ lsblk -f
NAME FSTYPE FSVER LABEL UUID FSAVAIL FSUSE% MOUNTPOINTS
sda
├─sda1 ext4 1.0 b5e46d67-426b-476f-bd89-18137af7ff59 682.5M 23% /boot
└─sda2 LVM2_member LVM2 001 NepB96-M3ux-Ei6Q-V7AX-BCy1-e2RN-Lzbecn
├─openeuler-root ext4 1.0 0495bb1d-16f7-4156-ab10-5bd837b24de5 29.9G 7% /
└─openeuler-swap swap 1 837d3a7e-8aac-4048-bb7a-a6fdd8eb5931
sdb LVM2_member LVM2 001 Dyj93O-8zKr-HMah-hxjd-8IZP-IxVE-riWf3O
└─data-lvdata xfs 1e9b612f-dbd9-46d2-996e-db74073d6648 86G 14% /data
sdc LVM2_member LVM2 001 LkTCe2-0vp7-e3SJ-Xxzb-UzN1-sd2T-74TF3L
└─longhorn-data xfs 30a13ac0-6eef-433c-8d7e-d6776ec669ff 99.1G 1% /longhorn
sdd
- 如果 FSTYPE 字段不为空,说明该设备已经格式化为文件系统,对应的值就是文件系统类型
- 如果 FSTYPE 字段为空,说明该设备还没有被格式化,可以被 Ceph 使用
- 本例中可以使用的设备为 sdd
如果需要清理已有磁盘给 Ceph 使用,请使用下面的命令(生产环境请谨慎):
yum install gdisk
sgdisk –zap-all /dev/sdd
2.4 LVM 需求
Ceph OSDs 在以下场景依赖 LVM。
- If encryption is enabled (
encryptedDevice: "true" in the cluster CR)
- A
metadata device is specified
osdsPerDevice is greater than 1
Ceph OSDs 在以下场景不需要 LVM。
- OSDs are created on raw devices or partitions
- Creating OSDs on PVCs using the
storageClassDeviceSets
openEuler 默认已经安装 lvm2,如果没有装,使用下面的命令安装。
yum install -y lvm2
2.5 Kernel 需求
Ceph 需要使用构建了 RBD 模块的 Linux 内核。许多 Linux 发行版都有这个模块,但不是所有发行版都有。例如,GKE Container-Optimised OS (COS) 就没有 RBD。
在 Kubernetes 节点使用 lsmod | grep rbd 命令验证,如果没有任何输出,请执行下面的命令加载 rbd 模块。
在当前环境加载 rbd 和 nbd 模块
modprobe rbd
modprobe nbd
开机自动加载 rbd 和 nbd 模式(适用于 openEuler)
echo “rbd” » /etc/modules-load.d/rook-ceph.conf
echo “nbd” » /etc/modules-load.d/rook-ceph.conf
再次执行命令验证
lsmod | grep rbd
正确的输出结果如下
$ lsmod | grep rbd
rbd 135168 0
libceph 413696 1 rbd
如果您将从 Ceph shared file system (CephFS) 创建卷,推荐的最低内核版本是 4.17。如果内核版本小于 4.17,则不会强制执行请求的 PVC sizes。存储配额只会在更新的内核上执行。
注意: openEuler 22.03 SP3 目前最新的内核为 5.10.0-218.0.0.121,虽然大于 4.17 但是有些过于高了,在安装 Ceph CSI Plugin 的时候可能会遇到 CSI 驱动无法注册的问题。
3. 扩容集群节点
3.1 设置节点标签
按规划给三个存储节点和其它 Worker 节点打上专属标签。
设置 rook-ceph 部署和存储Osd 节点标签
1
2
3
4
5
|
kubectl label nodes k-n1 node.kubernetes.io/storage=rook

kubectl label nodes k-n2 node.kubernetes.io/storage=rook

kubectl label nodes k-n3 node.kubernetes.io/storage=rook
|
1
2
3
4
5
6
|
# 安装 ceph csi plugin 节点
kubectl label nodes  k-n1 node.rook.io/rook-csi=true

kubectl label nodes  k-n2 node.rook.io/rook-csi=true

kubectl label nodes  k-n3 node.rook.io/rook-csi=tru
|
不做任何设置,Ceph 的服务组件和 CSI 插件都不会安装在控制节点。网上也有人建议把 Ceph 的管理组件部署在 K8s 的控制节点,我是不赞同的。个人建议把 Ceph 的所有组件独立部署。
4. 安装配置 Rook Ceph Operator
4.1 下载部署代码
  1
  2
  3
  4
  5
  6
  7
  8
  9
 10
 11
 12
 13
 14
 15
 16
 17
 18
 19
 20
 21
 22
 23
 24
 25
 26
 27
 28
 29
 30
 31
 32
 33
 34
 35
 36
 37
 38
 39
 40
 41
 42
 43
 44
 45
 46
 47
 48
 49
 50
 51
 52
 53
 54
 55
 56
 57
 58
 59
 60
 61
 62
 63
 64
 65
 66
 67
 68
 69
 70
 71
 72
 73
 74
 75
 76
 77
 78
 79
 80
 81
 82
 83
 84
 85
 86
 87
 88
 89
 90
 91
 92
 93
 94
 95
 96
 97
 98
 99
100
101
102
103
104
105
106
107
108
109
110
111
112
113
114
115
116
117
118
119
120
121
122
123
124
125
126
127
128
129
130
131
|
# git clone --single-branch --branch v1.16.1 https://github.com/rook/rook.git
cd /srv
wget https://github.com/rook/rook/archive/refs/tags/v1.14.9.tar.gz
tar xvf v1.16.`.tar.gz
cd rook-1.16.1/deploy/examples/

[root@k-m1 examples]# tree
.
├── bucket-notification-endpoint.yaml
├── bucket-notification.yaml
├── bucket-topic.yaml
├── ceph-client.yaml
├── ceph-dashboard-external-https.yaml
├── cluster-external-management.yaml
├── cluster-external.yaml
├── cluster-multus-test.yaml
├── cluster-on-local-pvc.yaml
├── cluster-on-pvc.yaml
├── cluster-stretched-aws.yaml
├── cluster-stretched.yaml
├── cluster-test.yaml
├── cluster.yaml
├── common-external.yaml
├── common-second-cluster.yaml
├── common.yaml
├── crds.yaml
├── create-external-cluster-resources.py
├── create-external-cluster-resources-tests.py
├── csi
│   ├── cephfs
│   │   ├── kube-registry.yaml
│   │   ├── pod-ephemeral.yaml
│   │   ├── pod.yaml
│   │   ├── pvc-clone.yaml
│   │   ├── pvc-restore.yaml
│   │   ├── pvc.yaml
│   │   ├── snapshotclass.yaml
│   │   ├── snapshot.yaml
│   │   ├── storageclass-ec.yaml
│   │   └── storageclass.yaml
│   ├── nfs
│   │   ├── pod.yaml
│   │   ├── pvc-clone.yaml
│   │   ├── pvc-restore.yaml
│   │   ├── pvc.yaml
│   │   ├── rbac.yaml
│   │   ├── snapshotclass.yaml
│   │   ├── snapshot.yaml
│   │   └── storageclass.yaml
│   └── rbd
│       ├── pod-ephemeral.yaml
│       ├── pod.yaml
│       ├── pvc-clone.yaml
│       ├── pvc-restore.yaml
│       ├── pvc.yaml
│       ├── snapshotclass.yaml
│       ├── snapshot.yaml
│       ├── storageclass-ec.yaml
│       ├── storageclass-test.yaml
│       └── storageclass.yaml
├── csi-ceph-conf-override.yaml
├── dashboard-external-https.yaml
├── dashboard-external-http.yaml
├── dashboard-ingress-https.yaml
├── dashboard-loadbalancer.yaml
├── dashboard-np.yaml
├── direct-mount.yaml
├── filesystem-ec.yaml
├── filesystem-mirror.yaml
├── filesystem-test.yaml
├── filesystem.yaml
├── images.txt
├── import-external-cluster.sh
├── kube-registry.yaml
├── monitoring
│   ├── csi-metrics-service-monitor.yaml
│   ├── externalrules.yaml
│   ├── keda-rgw.yaml
│   ├── localrules.yaml
│   ├── prometheus-service.yaml
│   ├── prometheus.yaml
│   ├── rbac.yaml
│   └── service-monitor.yaml
├── myfs.yaml
├── mysql.yaml
├── nfs-load-balancer.yaml
├── nfs-test.yaml
├── nfs.yaml
├── object-bucket-claim-delete.yaml
├── object-bucket-claim-notification.yaml
├── object-bucket-claim-retain.yaml
├── object-ec.yaml
├── object-external.yaml
├── object-multisite-pull-realm-test.yaml
├── object-multisite-pull-realm.yaml
├── object-multisite-test.yaml
├── object-multisite.yaml
├── object-openshift.yaml
├── object-test.yaml
├── object-user.yaml
├── object.yaml
├── operator-openshift.yaml
├── operator.yaml
├── osd-env-override.yaml
├── osd-purge.yaml
├── pool-builtin-mgr.yaml
├── pool-ec.yaml
├── pool-mirrored.yaml
├── pool-test.yaml
├── pool.yaml
├── psp.yaml
├── radosnamespace.yaml
├── rbdmirror.yaml
├── README.md
├── rgw-external.yaml
├── rook-ceph.json
├── rook-ceph-latest.yaml
├── sqlitevfs-client.yaml
├── storageclass-bucket-delete.yaml
├── storageclass-bucket-retain.yaml
├── storageclass.yaml
├── subvolumegroup.yaml
├── temp.json
├── tmp.json
├── toolbox-job.yaml
├── toolbox.yaml
├── volume-replication-class.yaml
├── volume-replication.yaml
└── wordpress.yaml

5 directories, 116 files
|
4.2 修改镜像地址
可选配置,当 DockerHub 访问受限时,可以将 Rook-Ceph 需要的镜像离线下载到本地仓库,部署时修改镜像地址。
取消镜像注释
1
2
|
sed -i '125,130s/^.*#/ /g' operator.yaml
sed -i '506,506s/^.*#/ /g' operator.yaml
|
替换镜像地址前缀
1
2
3
4
|
sed -i 's#registry.k8s.io#registry.opsxlab.cn:8443/k8sio#g' operator.yaml
sed -i 's#quay.io#registry.opsxlab.cn:8443/quayio#g' operator.yaml
sed -i 's#rook/ceph:v1.14.9#registry.opsxlab.cn:8443/rook/ceph:v1.14.9#g' operator.yaml
sed -i '24,24s#quay.io#registry.opsxlab.cn:8443/quayio#g' cluster.yaml
|
4.3 修改自定义配置
修改配置文件 operator.yaml 实现以下需求:
- rook-ceph 所有管理组件部署在指定标签节点
- k8s 其他节点安装 Ceph CSI Plugin
CSI_PROVISIONER_NODE_AFFINITY: "node.kubernetes.io/storage=rook"
CSI_PLUGIN_NODE_AFFINITY: "node.rook.io/rook-csi=true,node.kubernetes.io/storage=rook"
4.4 部署 Rook Operator
kubectl create -f crds.yaml -f common.yaml -f operator.yaml
- 验证
rook-ceph-operator Pod 的状态是否为 Running
kubectl -n rook-ceph get pod -o wide
执行成功后,输出结果如下:
1
2
|
NAME                                 READY   STATUS    RESTARTS   AGE   IP              NODE            NOMINATED NODE   READINESS GATES
rook-ceph-operator-9bd897ff8-426mq   1/1     Running   0          40s   10.233.77.255   ksp-storage-3   <none>           <none>
|
4.5 kuboard控制台查看 Operator 资源
- 创建 Ceph 集群
5.1 修改集群配置文件
- 修改集群配置文件
cluster.yaml,增加节点亲和配置
 1
 2
 3
 4
 5
 6
 7
 8
 9
10
|
placement:
  all:
    nodeAffinity:
      requiredDuringSchedulingIgnoredDuringExecution:
        nodeSelectorTerms:
        - matchExpressions:
          - key: node.kubernetes.io/storage
            operator: In
            values:
            - rook
|
- 修改集群配置文件
cluster.yaml,增加存储节点和 OSD 磁盘配置
 1
 2
 3
 4
 5
 6
 7
 8
 9
10
11
12
13
14
15
16
|
storage: # cluster level storage configuration and selection
  useAllNodes: false  # 生产环境,一定要修改,默认会使用所有节点
  useAllDevices: false # 生产环境,一定要修改,默认会使用所有磁盘
  #deviceFilter:
  config:
    storeType: bluestore
  nodes:
    - name: "k-n1"
      devices:
        - name: "sda"
    - name: "k-n2"
      devices:
        - name: "sda"
    - name: "k-n3"
      devices:
        - name: "sda"
|
5.2 创建 Ceph 集群
1
|
kubectl create -f cluster.yaml
|
- 查看资源状态,确保所有相关 Pod 均为
Running
 1
 2
 3
 4
 5
 6
 7
 8
 9
10
11
12
13
14
15
16
17
18
19
20
21
22
23
24
25
26
27
28
29
30
|
$NAME                                             READY   STATUS      RESTARTS      AGE
csi-cephfsplugin-2rgqj                           2/2     Running     0             4m37s
csi-cephfsplugin-n8p6n                           2/2     Running     0             4m37s
csi-cephfsplugin-prk7p                           2/2     Running     0             4m37s
csi-cephfsplugin-provisioner-6cbcf55b59-7224f    5/5     Running     0             4m37s
csi-cephfsplugin-provisioner-6cbcf55b59-bt2v5    5/5     Running     0             4m37s
csi-rbdplugin-78jc6                              2/2     Running     0             4m37s
csi-rbdplugin-9pgmd                              2/2     Running     0             4m37s
csi-rbdplugin-provisioner-869c48b5b8-59w4s       5/5     Running     0             4m37s
csi-rbdplugin-provisioner-869c48b5b8-chb9w       5/5     Running     0             4m37s
csi-rbdplugin-t9rx8                              2/2     Running     0             4m37s
rook-ceph-crashcollector-k-n1-5d66864d9b-cxzhc   1/1     Running     0             3m6s
rook-ceph-crashcollector-k-n2-58f8744f4c-mczn8   1/1     Running     0             2m54s
rook-ceph-crashcollector-k-n3-6664d4cfc4-qqszq   1/1     Running     0             34s
rook-ceph-mgr-a-6d4b59dfc9-558dl                 1/1     Running     0             3m12s
rook-ceph-mon-a-84b69bff5-p9wjn                  1/1     Running     0             4m31s
rook-ceph-mon-b-7bccd7dd45-x9vbh                 1/1     Running     0             3m36s
rook-ceph-mon-c-696974954-5f8t8                  1/1     Running     0             3m24s
rook-ceph-operator-86c6d96dbc-8275j              1/1     Running     2 (18m ago)   40m
rook-ceph-osd-0-7b9c49cbd8-t64jg                 1/1     Running     0             35s
rook-ceph-osd-1-86654898f4-rmb68                 1/1     Running     0             34s
rook-ceph-osd-2-658b48d58b-gzl64                 1/1     Running     0             35s
rook-ceph-osd-prepare-k-n1-nl4x7                 0/1     Completed   0             48s
rook-ceph-osd-prepare-k-n2-psf75                 0/1     Completed   0             47s
rook-ceph-osd-prepare-k-n3-grhrv                 0/1     Completed   0             47s
rook-ceph-osd-prepare-k-n4-rlx2r                 0/1     Completed   0             46s
rook-ceph-osd-prepare-k-n5-2nh46                 0/1     Completed   0             46s
rook-discover-8tksk                              1/1     Running     0             40m
rook-discover-brpdg                              1/1     Running     0             40m
rook-discover-wbfj5                              1/1     Running     0             40m
|
通过 Rook 提供的 toolbox,我们可以实现对 Ceph 集群的管理。
1
|
kubectl apply -f toolbox.yaml
|
- 等待 toolbox pod 下载容器镜像,并进入 Running 状态:
1
|
kubectl -n rook-ceph rollout status deploy/rook-ceph-tools
|
6.2 常用命令
1
|
kubectl -n rook-ceph exec -it deploy/rook-ceph-tools -- bash
|
 1
 2
 3
 4
 5
 6
 7
 8
 9
10
11
12
13
14
15
16
|
$ kubectl -n rook-ceph exec -it deploy/rook-ceph-tools -- bash
bash-5.1$ ceph -s
  cluster:
    id:     e7913148-d29f-46fa-87a6-1c38ddb1530a
    health: HEALTH_OK

  services:
    mon: 3 daemons, quorum a,b,c (age 6m)
    mgr: a(active, since 5m), standbys: b
    osd: 3 osds: 3 up (since 5m), 3 in (since 5m)

  data:
    pools:   1 pools, 1 pgs
    objects: 2 objects, 577 KiB
    usage:   81 MiB used, 300 GiB / 300 GiB avail
    pgs:     1 active+clean
|
观察 Ceph 集群状态,需要满足下面的条件才会认为集群状态是健康的。
 1
 2
 3
 4
 5
 6
 7
 8
 9
10
11
12
|
# 查看 OSD 状态
ceph osd status
ceph osd df
ceph osd utilization
ceph osd pool stats
ceph osd tree
# 查看 Ceph 容量
ceph df
# 查看 Rados 状态
rados df
# 查看 PG 状态
ceph pg stat
|
1
|
kubectl -n rook-ceph delete deploy/rook-ceph-tools
|
7. Block Storage
7.1 Storage 介绍
Rock Ceph 提供了三种存储类型,请参考官方指南了解详情:
本文使用比较稳定、可靠的 Block Storage(RBD)的方式作为 Kubernetes 的持久化存储。
7.2 创建存储池
Rook 允许通过自定义资源定义 (crd) 创建和自定义 Block 存储池。支持 Replicated 和 Erasure Coded 类型。本文演示 Replicated 的创建过程。
- 创建一个 3 副本的 Ceph 块存储池,编辑
CephBlockPool CR 资源清单,vi ceph-replicapool.yaml
1
2
3
4
5
6
7
8
9
|
apiVersion: ceph.rook.io/v1
kind: CephBlockPool
metadata:
  name: replicapool
  namespace: rook-ceph
spec:
  failureDomain: host
  replicated:
    size: 3
|
1
|
kubectl create -f ceph-replicapool.yaml
|
1
2
3
|
$ kubectl get cephBlockPool -n rook-ceph -o wide
NAME          PHASE   TYPE         FAILUREDOMAIN   REPLICATION   EC-CODINGCHUNKS   EC-DATACHUNKS   AGE
replicapool   Ready   Replicated   host            3             0                 0               16s
|
- 在 ceph toolbox 中查看 Ceph 集群状态
 1
 2
 3
 4
 5
 6
 7
 8
 9
10
11
12
13
14
15
16
17
18
19
20
21
22
23
24
25
26
27
28
29
30
31
32
33
34
35
|
# 登录
kubectl -n rook-ceph exec -it deploy/rook-ceph-tools -- bash
# 查看集群
bash-5.1$ ceph -s
  cluster:
    id:     e7913148-d29f-46fa-87a6-1c38ddb1530a
    health: HEALTH_OK

  services:
    mon: 3 daemons, quorum a,b,c (age 10m)
    mgr: a(active, since 8m), standbys: b
    osd: 3 osds: 3 up (since 9m), 3 in (since 9m)

  data:
    pools:   2 pools, 2 pgs
    objects: 3 objects, 577 KiB
    usage:   81 MiB used, 300 GiB / 300 GiB avail
    pgs:     2 active+clean
# 查看集群存储池
bash-5.1$ ceph osd pool ls
.mgr
replicapool

bash-5.1$ rados df
POOL_NAME       USED  OBJECTS  CLONES  COPIES  MISSING_ON_PRIMARY  UNFOUND  DEGRADED  RD_OPS      RD  WR_OPS       WR  USED COMPR  UNDER COMPR
.mgr         1.7 MiB        2       0       6                   0        0         0     106  91 KiB     137  1.8 MiB         0 B          0 B
replicapool   12 KiB        1       0       3                   0        0         0       0     0 B       2    2 KiB         0 B          0 B

total_objects    3
total_used       81 MiB
total_avail      300 GiB
total_space      300 GiB
# 查看存储池的 pg number
bash-5.1$ ceph osd pool get replicapool pg_num
pg_num: 32
|
7.3 创建 StorageClass
- 编辑 StorageClass 资源清单,
vi storageclass-rook-ceph-block.yaml
 1
 2
 3
 4
 5
 6
 7
 8
 9
10
11
12
13
14
15
16
17
18
19
20
21
22
23
24
25
26
27
28
29
30
31
32
33
34
35
36
37
|
apiVersion: storage.k8s.io/v1
kind: StorageClass
metadata:
   name: rook-ceph-block
# Change "rook-ceph" provisioner prefix to match the operator namespace if needed
provisioner: rook-ceph.rbd.csi.ceph.com
parameters:
    # clusterID is the namespace where the rook cluster is running
    clusterID: rook-ceph
    # Ceph pool into which the RBD image shall be created
    pool: replicapool

    # RBD image format. Defaults to "2".
    imageFormat: "2"

    # RBD image features. Available for imageFormat: "2". CSI RBD currently supports only `layering` feature.
    imageFeatures: layering

    # The secrets contain Ceph admin credentials.
    csi.storage.k8s.io/provisioner-secret-name: rook-csi-rbd-provisioner
    csi.storage.k8s.io/provisioner-secret-namespace: rook-ceph
    csi.storage.k8s.io/controller-expand-secret-name: rook-csi-rbd-provisioner
    csi.storage.k8s.io/controller-expand-secret-namespace: rook-ceph
    csi.storage.k8s.io/node-stage-secret-name: rook-csi-rbd-node
    csi.storage.k8s.io/node-stage-secret-namespace: rook-ceph

    # Specify the filesystem type of the volume. If not specified, csi-provisioner
    # will set default as `ext4`. Note that `xfs` is not recommended due to potential deadlock
    # in hyperconverged settings where the volume is mounted on the same node as the osds.
    csi.storage.k8s.io/fstype: ext4

# Delete the rbd volume when a PVC is deleted
reclaimPolicy: Delete

# Optional, if you want to add dynamic resize for PVC.
# For now only ext3, ext4, xfs resize support provided, like in Kubernetes itself.
allowVolumeExpansion: true
|
1
2
|
kubectl create -f storageclass-rook-ceph-block.yaml
kubectl create  -f csi/rbd/storageclass.yaml
|
注意: examples/csi/rbd 目录中有更多的参考用例。
1
2
3
4
5
|
$ kubectl get sc
NAME               PROVISIONER                                   RECLAIMPOLICY   VOLUMEBINDINGMODE      ALLOWVOLUMEEXPANSION   AGE
local              openebs.io/local                              Delete          WaitForFirstConsumer   false                  76d
nfs-sc (default)   k8s-sigs.io/nfs-subdir-external-provisioner   Delete          Immediate              false                  22d
rook-ceph-block    rook-ceph.rbd.csi.ceph.com                    Delete          Immediate              true                   11s
|
8. 创建测试应用
8.1 使用 Rook 提供的测试案例
我们使用 Rook 官方提供的经典的 Wordpress 和 MySQL 应用程序创建一个使用 Rook 提供块存储的示例应用程序,这两个应用程序都使用由 Rook 提供的块存储卷。
1
2
|
kubectl create -f mysql.yaml
kubectl create -f wordpress.yaml
|
1
2
3
4
5
6
7
|
[root@k-m1 examples]# kubectl get pod
NAME                                               READY   STATUS             RESTARTS       AGE
mysql-rc-bj998                                     1/1     Running            37 (29h ago)   33h
nacos-operator-5cd94dd6c6-ksh9v                    0/1     ImagePullBackOff   0              33h
nfs-subdir-external-provisioner-5bc8d4db76-5rrmb   1/1     Running            0              33h
wordpress-dc8db66b-8cmd2                           1/1     Running            0              87m
wordpress-mysql-5b65684d5f-zqr2r                   1/1     Running            0              88m
|
 1
 2
 3
 4
 5
 6
 7
 8
 9
10
|
$ kubectl get svc
NAME                             TYPE        CLUSTER-IP      EXTERNAL-IP   PORT(S)                          AGE
blackbox-exporter                ClusterIP   10.233.58.3     <none>        9115/TCP                         476d
es-web                           NodePort    10.233.11.130   <none>        20501:58769/TCP,5005:36483/TCP   673d
flink-operator-webhook-service   ClusterIP   10.233.27.164   <none>        443/TCP                          2y36d
kubernetes                       ClusterIP   10.233.0.1      <none>        443/TCP                          2y88d
mysql                            NodePort    10.233.22.116   <none>        3306:30006/TCP                   2y33d
nacos-operator                   ClusterIP   10.233.6.58     <none>        8080/TCP                         2y87d
wordpress                        NodePort    10.233.20.149   <none>        80:53315/TCP                     3h30m
wordpress-mysql                  ClusterIP   None            <none>        3306/TCP                         3h30m
|
1
2
3
4
5
6
7
|
[root@k-m1 examples]# kubectl get pod -o wide
NAME                                               READY   STATUS             RESTARTS       AGE   IP              NODE   NOMINATED NODE   READINESS GATES
mysql-rc-bj998                                     1/1     Running            37 (29h ago)   33h   10.233.83.218   k-n1   <none>           <none>
nacos-operator-5cd94dd6c6-ksh9v                    0/1     ImagePullBackOff   0              33h   10.233.83.37    k-n1   <none>           <none>
nfs-subdir-external-provisioner-5bc8d4db76-5rrmb   1/1     Running            0              33h   10.233.83.55    k-n1   <none>           <none>
wordpress-dc8db66b-8cmd2                           1/1     Running            0              87m   10.233.99.55    k-n3   <none>           <none>
wordpress-mysql-5b65684d5f-zqr2r                   1/1     Running            0              89m   10.233.99.251   k-n3   <none>           <none>
|
8.2 指定节点创建测试应用
Wordpress 和 MySQL 测试用例中,pod 创建在了存储专用节点。为了测试集群中其它 Worker 节点是否可以使用 Ceph 存储,我们再做一个测试,在创建 Pod 时指定 nodeSelector 标签,将 Pod 创建在非 rook-ceph 专用节点的 ksp-worker-1 上。
- 编写测试 PVC 资源清单,
vi test-pvc-rbd.yaml
 1
 2
 3
 4
 5
 6
 7
 8
 9
10
11
12
13
14
15
16
17
18
19
20
21
22
23
24
25
26
|
apiVersion: v1
kind: PersistentVolumeClaim
metadata:
  name: test-pvc-rbd
spec:
  storageClassName: rook-ceph-block
  accessModes:
    - ReadWriteOnce
  resources:
    requests:
      storage: 2Gi
#用命令创建
[root@k-m1 examples]# cat << EOF | kubectl apply -f -
> apiVersion: v1
> kind: PersistentVolumeClaim
> metadata:
>   name: test-pvc-rbd
> spec:
>   storageClassName: rook-ceph-block
>   accessModes:
>     - ReadWriteOnce
>   resources:
>     requests:
>       storage: 2Gi
> EOF
persistentvolumeclaim/test-pvc-rbd created
|
1
|
kubectl apply -f test-pvc-rbd.yaml
|
1
2
3
4
5
|
$ kubectl get pvc -o wide
NAME             STATUS   VOLUME                                     CAPACITY   ACCESS MODES   STORAGECLASS      AGE   VOLUMEMODE
mysql-pv-claim   Bound    pvc-00c09bac-cee2-4a0e-9549-56f05b9c6965   20Gi       RWO            rook-ceph-block   77s   Filesystem
test-pvc-rbd     Bound    pvc-ad475b29-6730-4c9a-8f8d-a0cd99b12781   2Gi        RWO            rook-ceph-block   5s    Filesystem
wp-pv-claim      Bound    pvc-b3b2d6bc-6d62-4ac3-a50c-5dcf076d501c   20Gi       RWO            rook-ceph-block   76s   Filesystem
|
- 编写测试 Pod 资源清单,
vi test-pod-rbd.yaml
 1
 2
 3
 4
 5
 6
 7
 8
 9
10
11
12
13
14
15
16
17
18
19
20
21
22
23
24
25
26
27
28
29
30
31
32
33
34
35
36
37
38
39
40
41
42
43
44
45
46
47
48
49
50
|
kind: Pod
apiVersion: v1
metadata:
  name: test-pod-rbd
spec:
  containers:
  - name: test-pod-rb
    image: 10.7.20.12:5000/library/busybox:stable
    command:
      - "/bin/sh"
    args:
      - "-c"
      - "touch /mnt/SUCCESS && sleep 3600"
    volumeMounts:
      - name: rbd-pvc
        mountPath: "/mnt"
  restartPolicy: "Never"
  nodeSelector:
    kubernetes.io/hostname: k-n1
  volumes:
    - name: rbd-pvc
      persistentVolumeClaim:
        claimName: test-pvc-rbd
[root@k-m1 examples]# cat << EOF | kubectl apply -f -
> kind: Pod
> apiVersion: v1
> metadata:
>   name: test-pod-rbd
> spec:
>   containers:
>   - name: test-pod-rb
>     image: busybox:stable
>     command:
>       - "/bin/sh"
>     args:
>       - "-c"
>       - "touch /mnt/SUCCESS && sleep 3600"
>     volumeMounts:
>       - name: rbd-pvc
>         mountPath: "/mnt"
>   restartPolicy: "Never"
>   nodeSelector:
>     kubernetes.io/hostname: k-n1
>   volumes:
>     - name: rbd-pvc
>       persistentVolumeClaim:
>         claimName: test-pvc-rbd
> EOF
Warning: spec.imagePullSecrets[0].name: invalid empty name ""
pod/test-pod-rbd created
|
1
|
kubectl apply -f test-pod-rbd.yaml
|
- 查看 Pod( Pod 按预期创建在了 k-n1 节点,并正确运行)
1
2
3
4
5
6
7
8
9
|
$ kubectl get pods -o wide
// 输出
NAME                                               READY   STATUS             RESTARTS       AGE     IP              NODE   NOMINATED NODE   READINESS GATES
mysql-rc-bj998                                     1/1     Running            37 (29h ago)   33h     10.233.83.218   k-n1   <none>           <none>
nacos-operator-5cd94dd6c6-ksh9v                    0/1     ImagePullBackOff   0              33h     10.233.83.37    k-n1   <none>           <none>
nfs-subdir-external-provisioner-5bc8d4db76-5rrmb   1/1     Running            0              33h     10.233.83.55    k-n1   <none>           <none>
test-pod-rbd                                       1/1     Running            0              3m32s   10.233.83.231   k-n1   <none>           <none>
wordpress-dc8db66b-8cmd2                           1/1     Running            0              97m     10.233.99.55    k-n3   <none>           <none>
wordpress-mysql-5b65684d5f-zqr2r                   1/1     Running            0              98m     10.233.99.251   k-n3   <none>           <none>
|
 1
 2
 3
 4
 5
 6
 7
 8
 9
10
11
12
13
14
15
16
17
18
19
20
21
22
23
|
$ kubectl exec test-pod-rbd -- df -h
Filesystem                Size      Used Available Use% Mounted on
overlay                  99.9G     14.0G     85.9G  14% /
tmpfs                    64.0M         0     64.0M   0% /dev
tmpfs                     7.6G         0      7.6G   0% /sys/fs/cgroup
/dev/rbd0                 1.9G     24.0K      1.9G   0% /mnt
/dev/mapper/openeuler-root
                         34.2G      2.3G     30.1G   7% /etc/hosts
/dev/mapper/openeuler-root
                         34.2G      2.3G     30.1G   7% /dev/termination-log
/dev/mapper/data-lvdata
                         99.9G     14.0G     85.9G  14% /etc/hostname
/dev/mapper/data-lvdata
                         99.9G     14.0G     85.9G  14% /etc/resolv.conf
shm                      64.0M         0     64.0M   0% /dev/shm
tmpfs                    13.9G     12.0K     13.9G   0% /var/run/secrets/kubernetes.io/serviceaccount
tmpfs                     7.6G         0      7.6G   0% /proc/acpi
tmpfs                    64.0M         0     64.0M   0% /proc/kcore
tmpfs                    64.0M         0     64.0M   0% /proc/keys
tmpfs                    64.0M         0     64.0M   0% /proc/timer_list
tmpfs                    64.0M         0     64.0M   0% /proc/sched_debug
tmpfs                     7.6G         0      7.6G   0% /proc/scsi
tmpfs                     7.6G         0      7.6G   0% /sys/firmware
|
1
2
3
4
5
6
|
# 写入 1GB 的数据
$ [root@k-m1 examples]# kubectl exec test-pod-rbd -- dd if=/dev/zero of=/mnt/test-disk.img bs=1M  count=100
// 输出
100+0 records in
100+0 records out
104857600 bytes (100.0MB) copied, 0.545144 seconds, 183.4MB/s
|
查看结果
1
2
3
4
5
6
|
$
[root@k-m1 examples]# kubectl exec test-pod-rbd -- ls -lh /mnt/
total 100M
-rw-r--r--    1 root     root           0 Jan  9 07:01 SUCCESS
drwx------    2 root     root       16.0K Jan  9 06:58 lost+found
-rw-r--r--    1 root     root      100.0M Jan  9 07:04 test-disk.img
|
测试超限(再写入 1GB 数据,只能写入 929.8MB)
1
2
3
4
5
6
|
$ kubectl exec test-pod-rbd -- dd if=/dev/zero of=/mnt/test-disk2.img bs=1M count=1000
输出
[root@k-m1 examples]#  kubectl exec test-pod-rbd -- dd if=/dev/zero of=/mnt/test-disk2.img bs=1M count=1000
1000+0 records in
1000+0 records out
1048576000 bytes (1000.0MB) copied, 5.310649 seconds, 188.3MB/s
|
再次查看结果
1
2
3
4
5
6
|
$ [root@k-m1 examples]# kubectl exec test-pod-rbd -- ls -lh /mnt/
total 1G
-rw-r--r--    1 root     root           0 Jan  9 07:01 SUCCESS
drwx------    2 root     root       16.0K Jan  9 06:58 lost+found
-rw-r--r--    1 root     root      100.0M Jan  9 07:04 test-disk.img
-rw-r--r--    1 root     root     1000.0M Jan  9 07:05 test-disk2.img
|
注意: 测试时,我们写入了 1.1G 的数据量,当达过我们创建的 PVC 2G 容量上限时会报错(实际使用写不满 2G)。说明,Ceph 存储可以做到容量配额限制。
rbd 写入速度能达到188mB/s
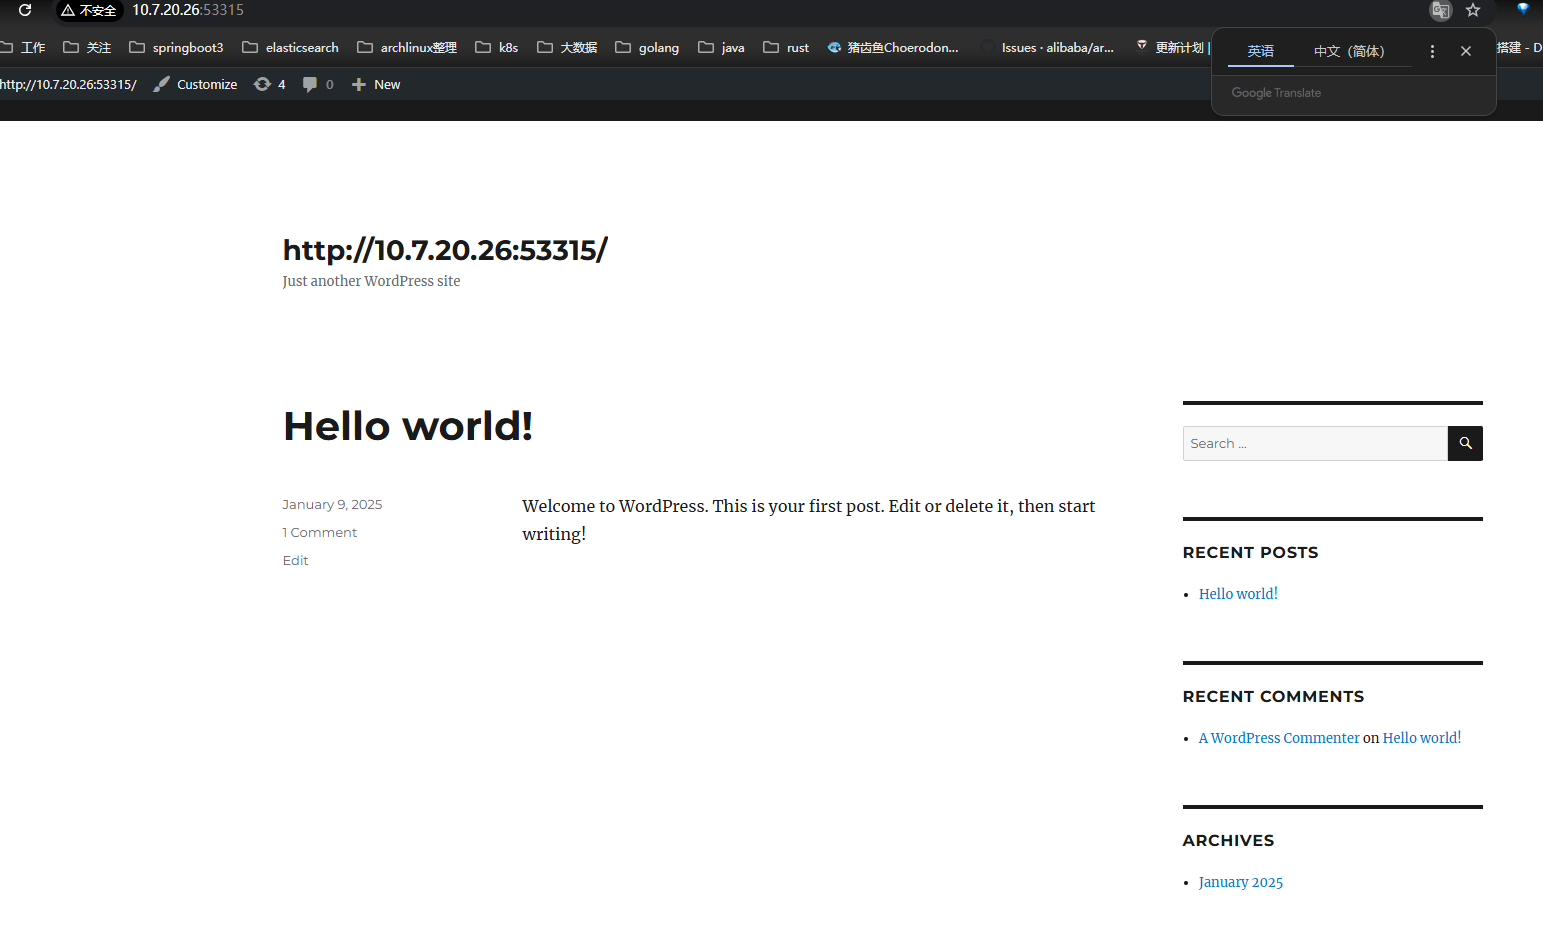
同时查看搭建wordpress
wordpress后端
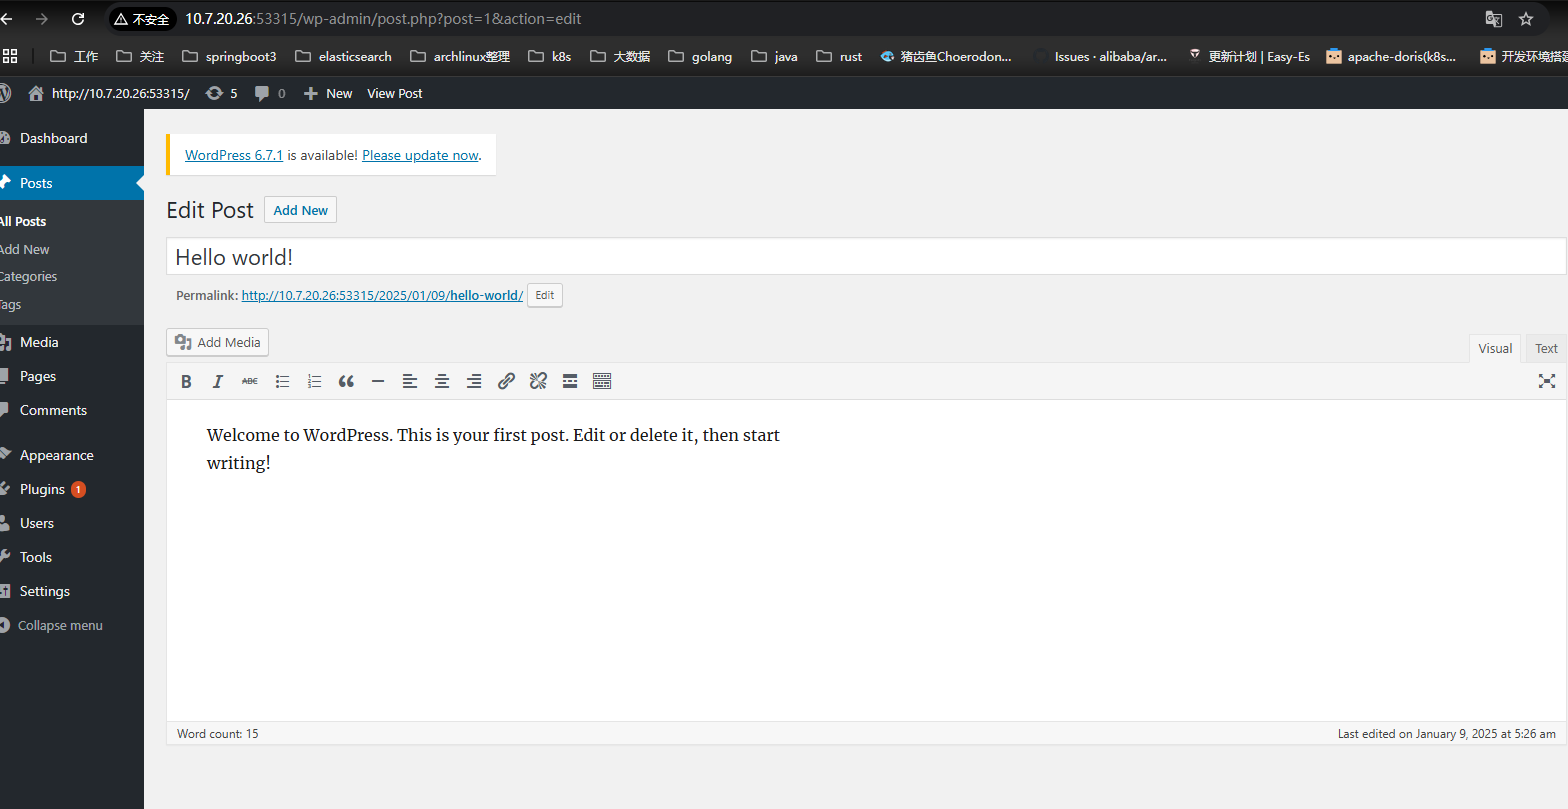
wordpress站点
9. Ceph Dashboard
Ceph 提供了一个 Dashboard 工具,我们可以在上面查看集群的状态,包括集群整体运行状态、Mgr、Mon、OSD 和其他 Ceph 进程的状态,查看存储池和 PG 状态,以及显示守护进程的日志等。
部署集群的配置文件 cluster.yaml ,默认已经开启了 Dashboard 功能,Rook Ceph operator 部署集群时将启用 ceph-mgr 的 Dashboard 模块。
9.1 获取 Dashboard 的 service 地址
 1
 2
 3
 4
 5
 6
 7
 8
 9
10
11
|
$ [root@k-m1 examples]# kubectl get svc -n rook-ceph
NAME                                     TYPE        CLUSTER-IP      EXTERNAL-IP   PORT(S)             AGE
rook-ceph-admission-controller           ClusterIP   10.233.14.107   <none>        443/TCP             6h26m
rook-ceph-mgr                            ClusterIP   10.233.24.31    <none>        9283/TCP            5h48m
rook-ceph-mgr-dashboard                  ClusterIP   10.233.3.107    <none>        8443/TCP            5h48m
rook-ceph-mgr-dashboard-external-https   NodePort    10.233.60.85    <none>        8443:31443/TCP      65s
rook-ceph-mon-a                          ClusterIP   10.233.36.135   <none>        6789/TCP,3300/TCP   5h50m
rook-ceph-mon-b                          ClusterIP   10.233.25.3     <none>        6789/TCP,3300/TCP   5h49m
rook-ceph-mon-c                          ClusterIP   10.233.11.90    <none>        6789/TCP,3300/TCP   5h49m
rook-ceph-rgw-my-store                   ClusterIP   10.233.4.21     <none>        80/TCP              5h36m
rook-ceph-rgw-my-store-external          NodePort    10.233.24.176   <none>        80:40976/TCP        158m
|
9.2 配置在集群外部访问 Dashboard
通常我们需要在 K8s 集群外部访问 Ceph Dashboard,可以通过 NodePort 或是 Ingress 的方式。
本文演示 NodePort 方式。
- 创建资源清单文件,
vi ceph-dashboard-external-https.yaml
 1
 2
 3
 4
 5
 6
 7
 8
 9
10
11
12
13
14
15
16
17
18
19
|
apiVersion: v1
kind: Service
metadata:
  name: rook-ceph-mgr-dashboard-external-https
  namespace: rook-ceph
  labels:
    app: rook-ceph-mgr
    rook_cluster: rook-ceph
spec:
  ports:
  - name: dashboard
    port: 8443
    protocol: TCP
    targetPort: 8443
    nodePort: 31443
  selector:
    app: rook-ceph-mgr
    rook_cluster: rook-ceph
  type: NodePort
|
1
|
kubectl create -f ceph-dashboard-external-https.yaml
|
1
2
3
|
$ kubectl -n rook-ceph get service rook-ceph-mgr-dashboard-external-https
NAME                                     TYPE       CLUSTER-IP     EXTERNAL-IP   PORT(S)          AGE
rook-ceph-mgr-dashboard-external-https   NodePort   10.233.5.136   <none>        8443:31443/TCP   5s
|
9.3 获取 Login Credentials
登陆 Dashboard 时需要身份验证,Rook 创建了一个默认用户,用户名 admin。创建了一个名为 rook-ceph-dashboard-password 的 secret 存储密码,使用下面的命令获取随机生成的密码。
1
2
3
|
[root@k-m1 examples]# kubectl -n rook-ceph get secret rook-ceph-dashboard-password -o jsonpath="{['data']['password']}" | base64 --decode && echo
0/EX&G6[jCeO\1aFGBI%
|
9.4 通过浏览器打开 Dashboard
访问 K8s 集群中任意节点的 IP,https://10.7.20.26:31443,默认用户名 admin,密码通过上面的命令获取。
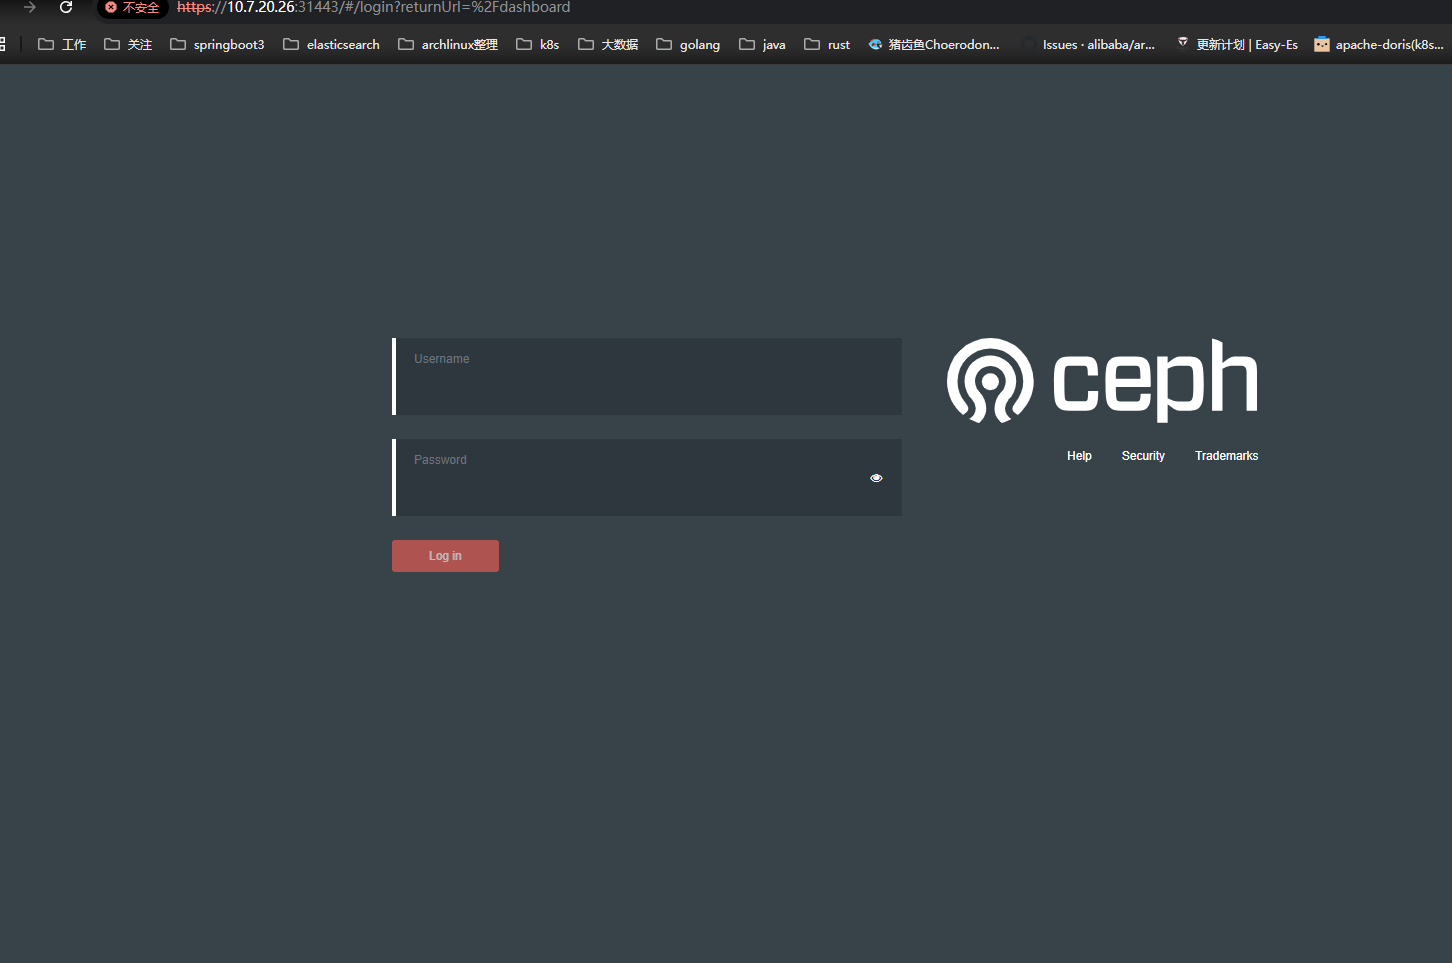
9.5 Ceph Dashboard 概览
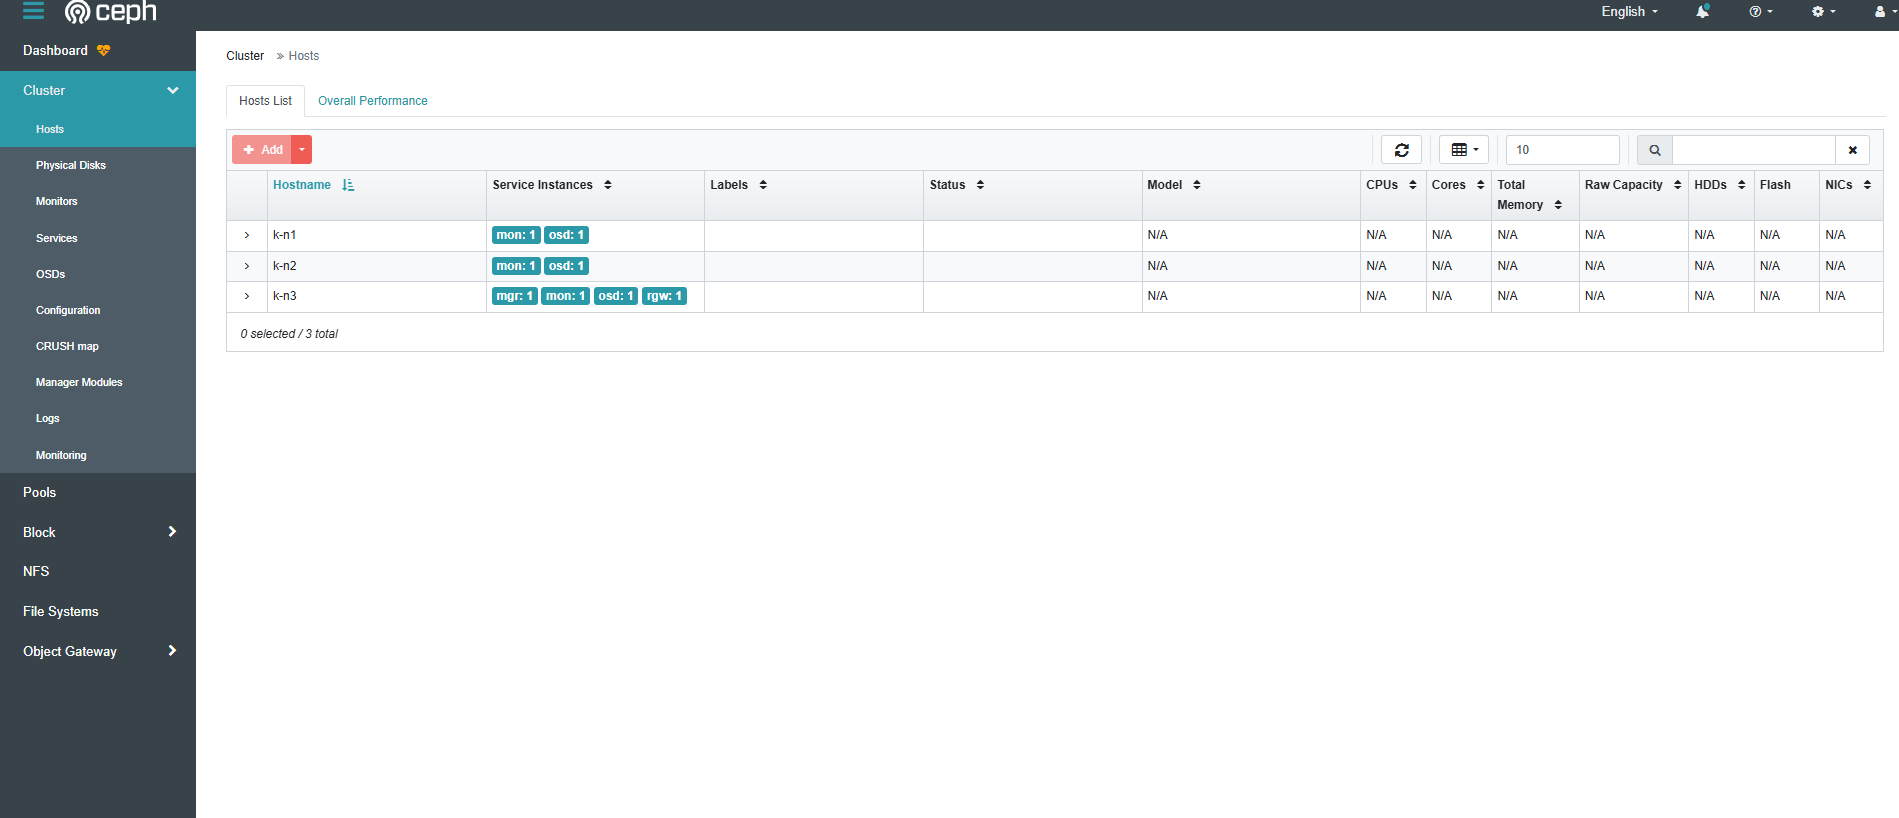
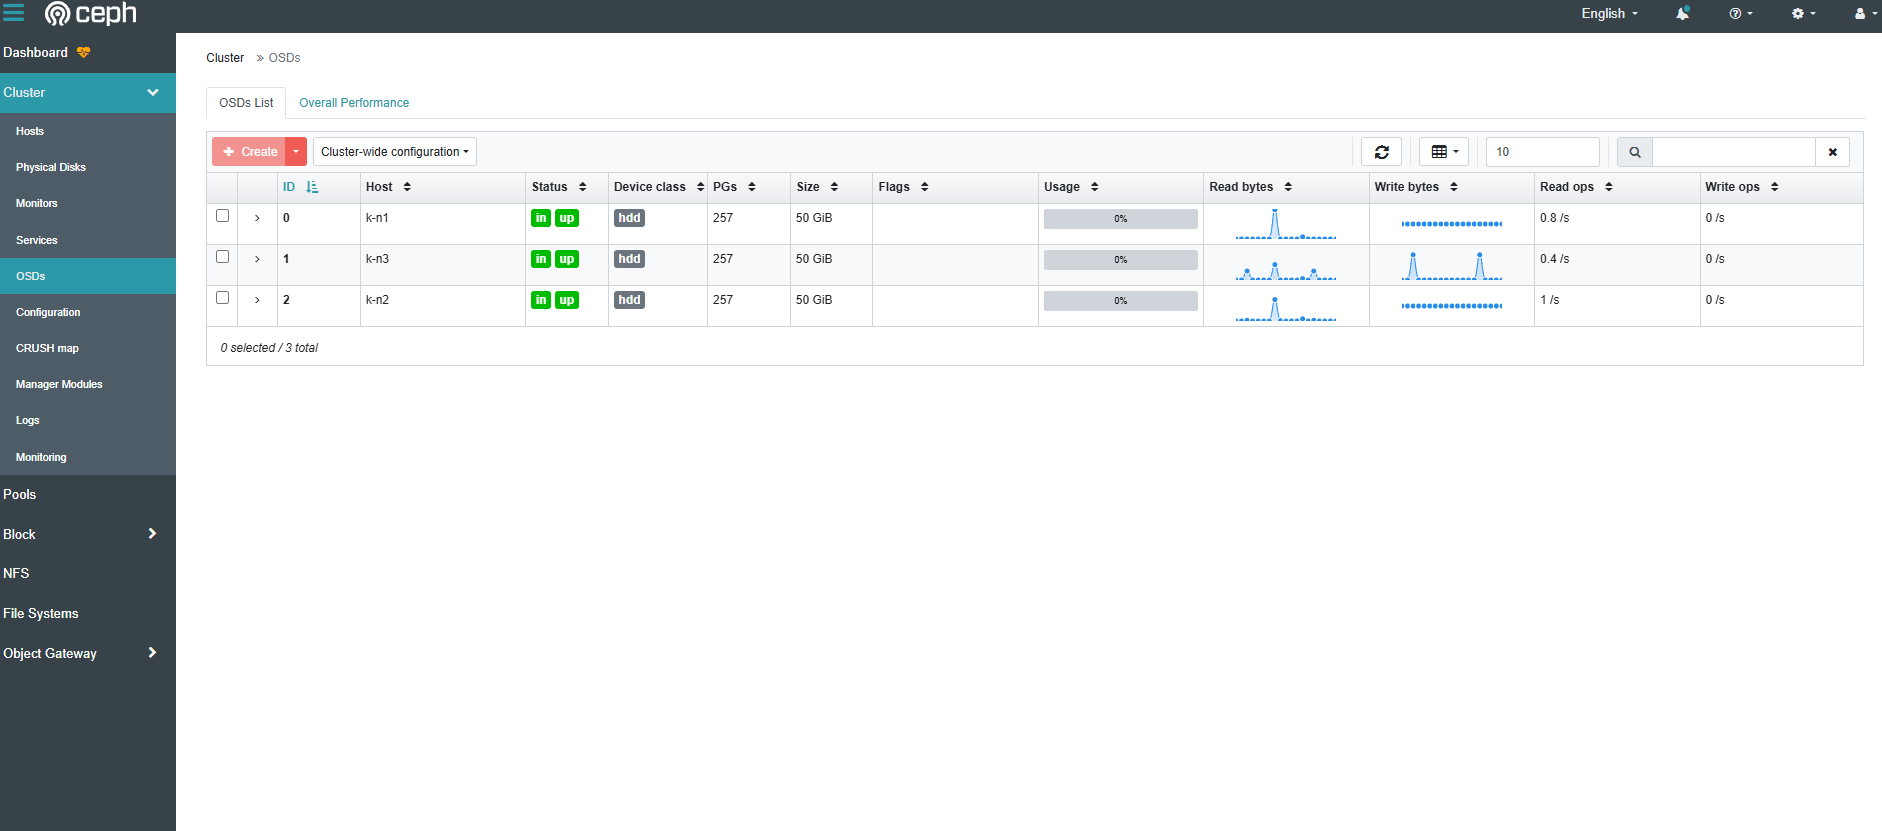
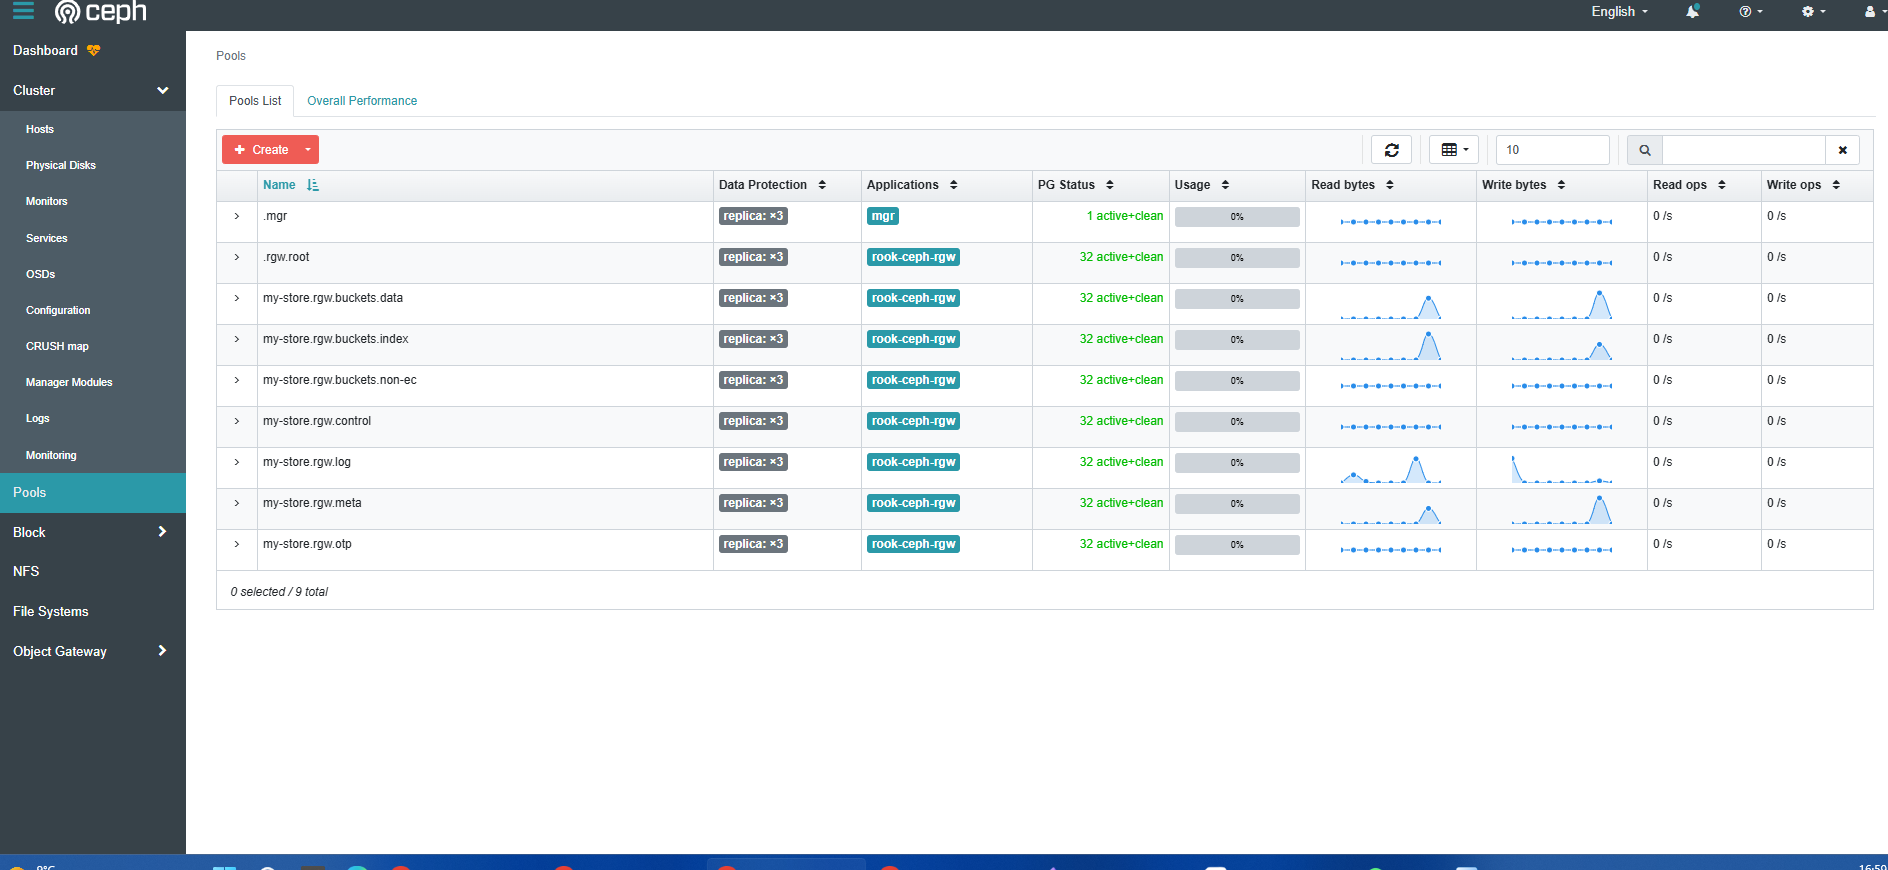
Ceph Dashboard 虽然界面简单,但是常用的管理功能都具备,能实现图形化管理存储资源。下面展示几张截图,作为本文的结尾。
-
Dashboard
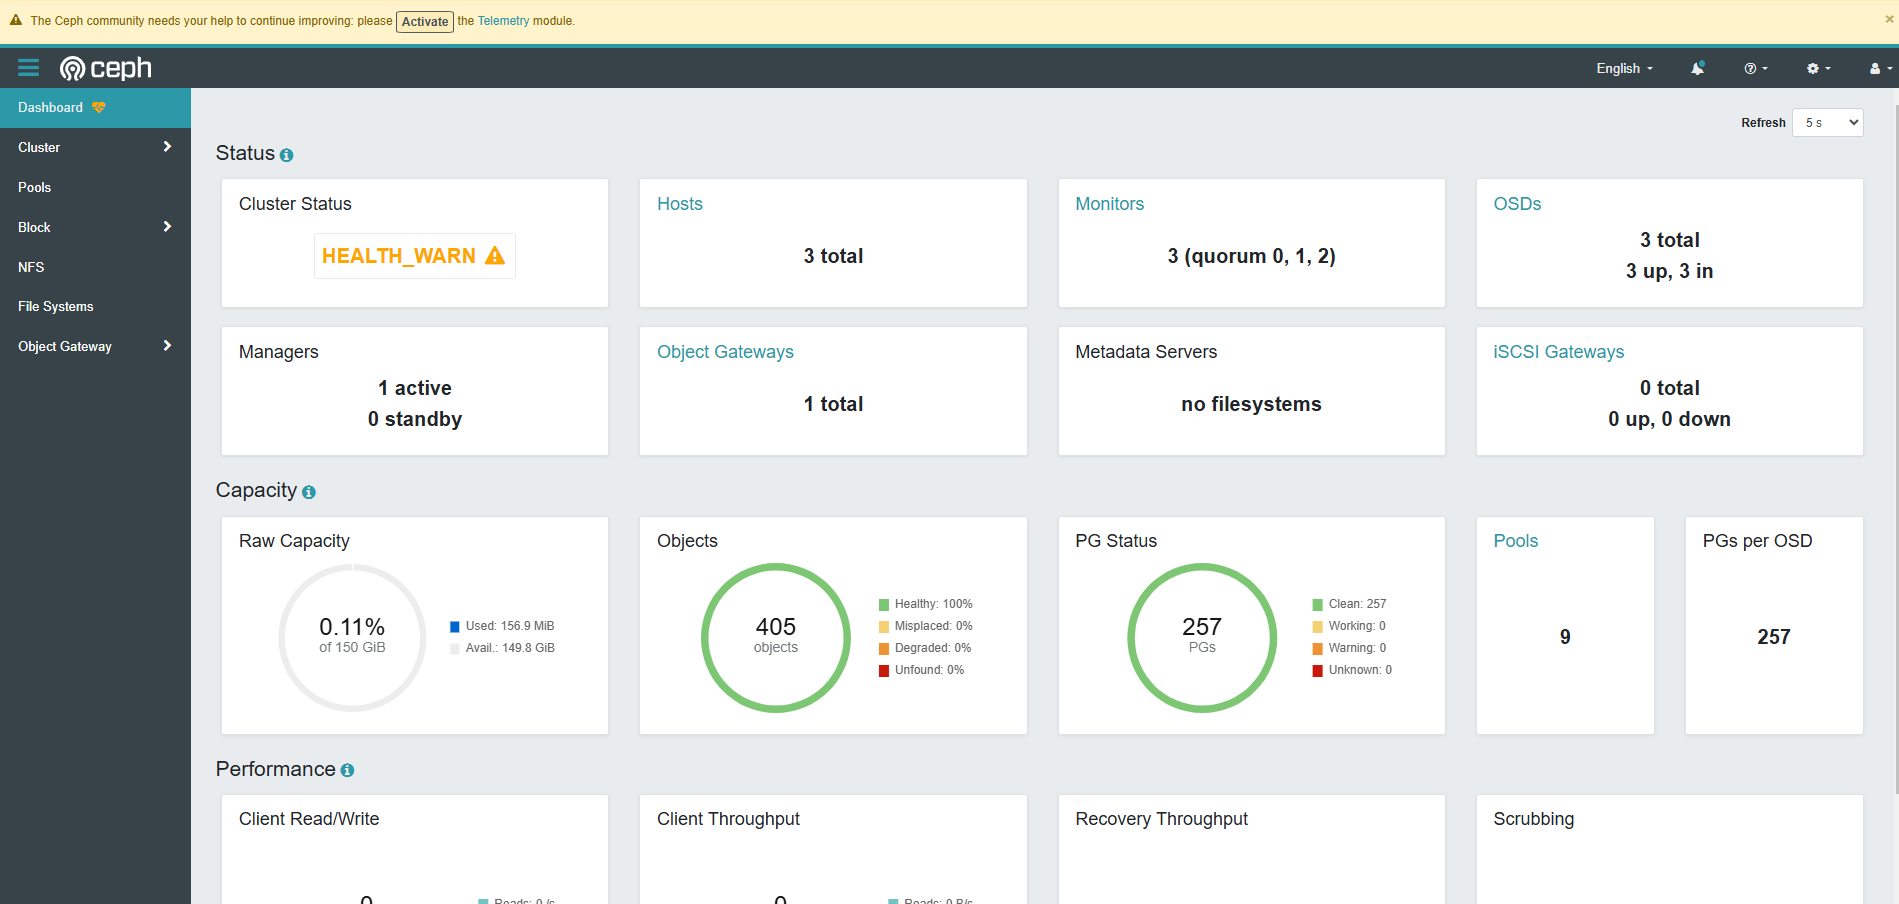
-
集群-主机
- 存储池(pools)

查看osd的类型可以通过以下命令
1
2
3
4
5
6
7
8
|
# Get OSD Pods
# This uses the example/default cluster name "rook"
OSD_PODS=$(kubectl get pods --all-namespaces -l \ app=rook-ceph-osd,rook_cluster=rook-ceph -o jsonpath='{.items[*].metadata.name}')
# Find node and drive associations from OSD pods
for pod in $(echo ${OSD_PODS})
   do
   echo "Pod: ${pod}"
   echo "Node: $(kubectl -n rook-ceph get pod ${pod} -o jsonpath='{.spec.nodeName}')" kubectl -n rook-ceph exec ${pod} -- sh -c '\ for i in /var/lib/ceph/osd/ceph-*; do [ -f ${i}/ready ] || continue echo -ne "-$(basename ${i}) " echo $(lsblk -n -o NAME,SIZE ${i}/block 2> /dev/null || \ findmnt -n -v -o SOURCE,SIZE -T ${i}) $(cat ${i}/type) done | sort -V echo' done
|
输出如下所示
 1
 2
 3
 4
 5
 6
 7
 8
 9
10
11
12
13
14
|
Pod:  rook-ceph-osd-0-7b9c49cbd8-t64jg
Node: k-n1
Defaulted container "osd" out of: osd, activate (init), chown-container-data-dir (init)
-ceph-0 sda 50G bluestore

Pod:  rook-ceph-osd-1-86654898f4-4lfw7
Node: k-n3
Defaulted container "osd" out of: osd, activate (init), chown-container-data-dir (init)
-ceph-1 sda 50G bluestore

Pod:  rook-ceph-osd-2-658b48d58b-gzl64
Node: k-n2
Defaulted container "osd" out of: osd, activate (init), chown-container-data-dir (init)
-ceph-2 sda 50G bluestore
|


