isitoctl 安装
|
|
-
安装目录中包含:
samples/中的示例应用程序bin/目录中的istioctl客户端二进制文件。
-
将
istioctl客户端添加到您的 Path 中(Linux 或 macOS):$ export PATH=$PWD/bin:$PATH开始部署
|
|
安装配置:
在安装 Istio 时所能够使用的内置配置文件,通过命令 istioctl profile list 可以查看有哪些内置配置。这些配置文件提供了对 Istio 控制平面和 Istio 数据平面 Sidecar 的定制内容。 您可以从 Istio 内置配置文件的其中一个开始入手,然后根据您的特定需求进一步自定义配置文件。当前提供以下几种内置配置文件:
- default: 根据默认的安装选项启用组件 (建议用于生产部署)。
- demo: 这一配置具有适度的资源需求,旨在展示 Istio 的功能。它适合运行 Bookinfo 应用程序和相关任务。 这是通过快速开始指导安装的配置,但是您以后可以通过自定义配置 启用其他功能来探索更高级的任务。此配置文件启用了高级别的追踪和访问日志,因此不适合进行性能测试。
- minimum:与默认配置文件相同,但仅安装控制平面组件。这允许您使用单独的配置文件配置控制平面和数据平面组件(例如,网关)。
- external: 用于配置一个远程集群,由一个外部控制平面或通过控制平面主集群的多集群网格。
- empty:不部署任何东西。这可以用作自定义配置的基本配置文件。
- preview:预览配置文件包含实验性功能。这是为了探索 Istio 的新功能。不保证稳定性、安全性和性能 - 使用风险自负。
组件对应关系表:
| default | demo | minimal | external | empty | preview | |
|---|---|---|---|---|---|---|
| istio-egressgateway | ✅ | |||||
| istio-ingressgateway | ✅ | ✅ | ✅ | |||
| istiod | ✅ | ✅ | ✅ | ✅ |
安全网关说明了如何为 HTTP 服务配置 HTTPS 访问入口。 而本示例将说明如何为 HTTPS 服务配置 HTTPS 访问入口, 即配置 Ingress Gateway 以执行 SNI 透传,而不是对传入请求进行 TLS 终止。
本任务中的 HTTPS 示例服务是一个简单的 NGINX 服务。在接下来的步骤中, 您首先在 Kubernetes 集群中创建一个 NGINX 服务。接着, 通过网关给这个服务配置一个域名是 nginx.example.com 的访问入口。
本文档使用实验性的 Gateway API 功能配置 Istio,在使用 Gateway API 指令之前,请确保:
-
安装 实验版本 的 Gateway API CRD:
1$ kubectl kustomize "github.com/kubernetes-sigs/gateway-api/config/crd/experimental?ref=v1.1.0" | kubectl apply -f - -
安装 Istio 时,通过将
PILOT_ENABLE_ALPHA_GATEWAY_API环境变量设置为true使 Istio 读取 Alpha 版本的 Gateway API 资源:1$ istioctl install --set values.pilot.env.PILOT_ENABLE_ALPHA_GATEWAY_API=true --set profile=minimal -y
准备工作
按照安装指南部署 Istio。
生成客户端和服务端的证书和密钥
对于此任务,您可以使用自己喜欢的工具来生成证书和密钥。以下命令使用 openssl:
-
创建根证书和私钥来为您的服务签名证书:
1$ openssl req -x509 -sha256 -nodes -days 365 -newkey rsa:2048 -subj '/O=example Inc./CN=example.com' -keyout example.com.key -out example.com.crt -
为
nginx.example.com创建证书和私钥:1 2$ openssl req -out nginx.example.com.csr -newkey rsa:2048 -nodes -keyout nginx.example.com.key -subj "/CN=nginx.example.com/O=some organization" $ openssl x509 -req -sha256 -days 365 -CA example.com.crt -CAkey example.com.key -set_serial 0 -in nginx.example.com.csr -out nginx.example.com.crt
部署一个 NGINX 服务
-
创建一个 Kubernetes 的 Secret 资源来保存服务的证书:
1$ kubectl create secret tls nginx-server-certs --key nginx.example.com.key --cert nginx.example.com.crt -
为 NGINX 服务创建一个配置文件:
1 2 3 4 5 6 7 8 9 10 11 12 13 14 15 16 17 18 19 20 21 22 23$ cat <<\EOF > ./nginx.conf events { } http { log_format main '$remote_addr - $remote_user [$time_local] $status ' '"$request" $body_bytes_sent "$http_referer" ' '"$http_user_agent" "$http_x_forwarded_for"'; access_log /var/log/nginx/access.log main; error_log /var/log/nginx/error.log; server { listen 443 ssl; root /usr/share/nginx/html; index index.html; server_name nginx.example.com; ssl_certificate /etc/nginx-server-certs/tls.crt; ssl_certificate_key /etc/nginx-server-certs/tls.key; } } EOF -
创建一个 Kubernetes 的 ConfigMap 资源来保存 NGINX 服务的配置:
1$ kubectl create configmap nginx-configmap --from-file=nginx.conf=./nginx.conf -
部署 NGINX 服务:
1 2 3 4 5 6 7 8 9 10 11 12 13 14 15 16 17 18 19 20 21 22 23 24 25 26 27 28 29 30 31 32 33 34 35 36 37 38 39 40 41 42 43 44 45 46 47 48$ cat <<EOF | istioctl kube-inject -f - | kubectl apply -f - apiVersion: v1 kind: Service metadata: name: my-nginx labels: run: my-nginx spec: ports: - port: 443 protocol: TCP selector: run: my-nginx --- apiVersion: apps/v1 kind: Deployment metadata: name: my-nginx spec: selector: matchLabels: run: my-nginx replicas: 1 template: metadata: labels: run: my-nginx spec: containers: - name: my-nginx image: nginx ports: - containerPort: 443 volumeMounts: - name: nginx-config mountPath: /etc/nginx readOnly: true - name: nginx-server-certs mountPath: /etc/nginx-server-certs readOnly: true volumes: - name: nginx-config configMap: name: nginx-configmap - name: nginx-server-certs secret: secretName: nginx-server-certs EOF -
要测试 NGINX 服务是否已成功部署,需要从其 Sidecar 代理发送请求, 并忽略检查服务端的证书(使用
curl的-k选项)。 确保正确打印服务端的证书,即common name (CN)等于nginx.example.com。1 2 3 4 5 6 7 8 9 10 11 12 13 14 15 16 17 18 19 20 21 22 23 24$ kubectl exec "$(kubectl get pod -l run=my-nginx -o jsonpath={.items..metadata.name})" -c istio-proxy -- curl -sS -v -k --resolve nginx.example.com:443:127.0.0.1 https://nginx.example.com ... SSL connection using TLSv1.2 / ECDHE-RSA-AES256-GCM-SHA384 ALPN, server accepted to use http/1.1 Server certificate: subject: CN=nginx.example.com; O=some organization start date: May 27 14:18:47 2020 GMT expire date: May 27 14:18:47 2021 GMT issuer: O=example Inc.; CN=example.com SSL certificate verify result: unable to get local issuer certificate (20), continuing anyway. > GET / HTTP/1.1 > User-Agent: curl/7.58.0 > Host: nginx.example.com ... < HTTP/1.1 200 OK < Server: nginx/1.17.10 ... <!DOCTYPE html> <html> <head> <title>Welcome to nginx!</title> ...
配置 Ingress Gateway
-
定义一个
server部分的端口为 443 的Gateway。 注意,PASSTHROUGH tlsTLS 模式, 该模式指示 Gateway 以 AS IS 方式传递入口流量,而不终止 TLS。1 2 3 4 5 6 7 8 9 10 11 12 13 14 15 16 17 18$ kubectl apply -f - <<EOF apiVersion: networking.istio.io/v1 kind: Gateway metadata: name: mygateway spec: selector: istio: ingressgateway # 使用 istio 默认的入口网关 servers: - port: number: 443 name: https protocol: HTTPS tls: mode: PASSTHROUGH hosts: - nginx.example.com EOF -
为通过
Gateway进入的流量配置路由:1 2 3 4 5 6 7 8 9 10 11 12 13 14 15 16 17 18 19 20 21$ kubectl apply -f - <<EOF apiVersion: networking.istio.io/v1 kind: VirtualService metadata: name: nginx spec: hosts: - nginx.example.com gateways: - mygateway tls: - match: - port: 443 sniHosts: - nginx.example.com route: - destination: host: my-nginx port: number: 443 EOF -
根据确定 Ingress IP 和端口中的指令来定义环境变量
SECURE_INGRESS_PORT和INGRESS_HOST。
|
|
-
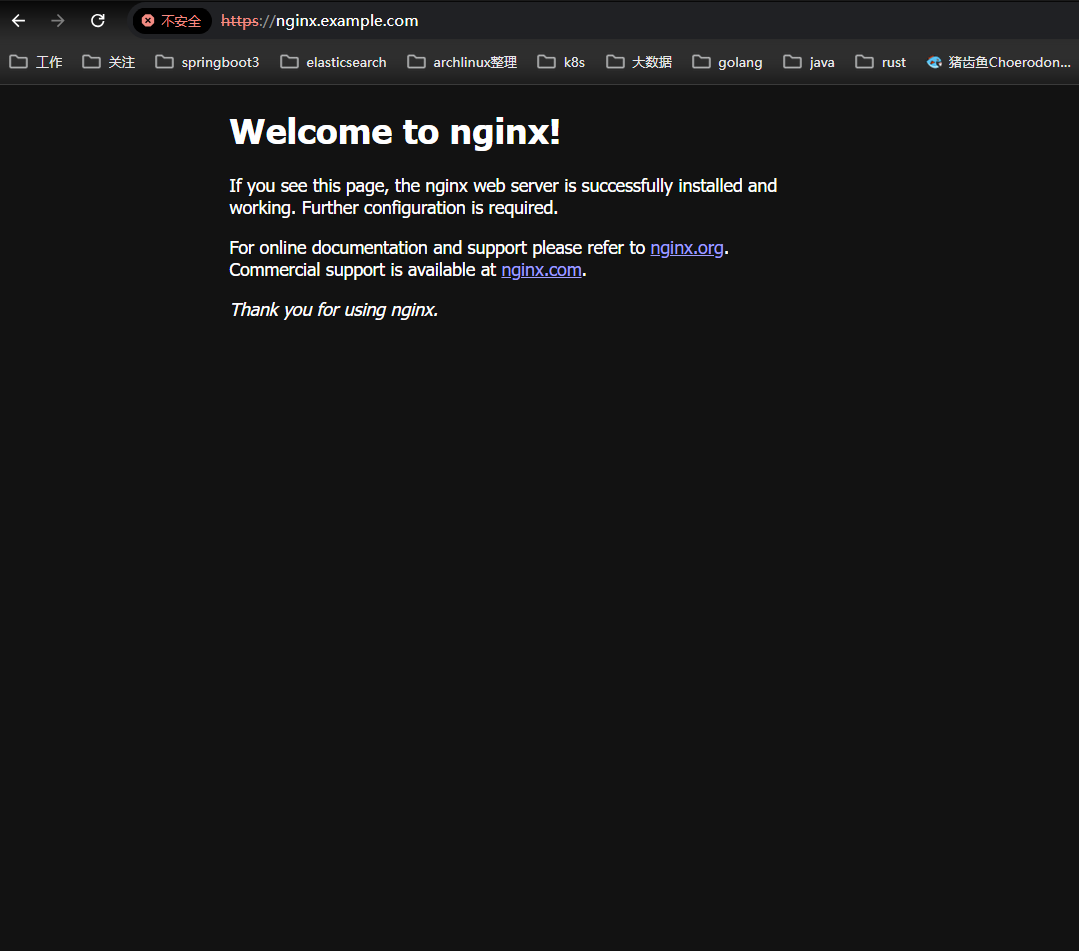
从集群外访问 NGINX 服务。注意,服务端返回了正确的证书, 并且该证书已成功验证(输出了 SSL certificate verify ok)。
1 2 3 4 5 6 7 8 9 10 11 12 13 14$ curl -v --resolve "nginx.example.com:$SECURE_INGRESS_PORT:$INGRESS_HOST" --cacert example.com.crt "https://nginx.example.com:$SECURE_INGRESS_PORT" Server certificate: subject: CN=nginx.example.com; O=some organization start date: Wed, 15 Aug 2018 07:29:07 GMT expire date: Sun, 25 Aug 2019 07:29:07 GMT issuer: O=example Inc.; CN=example.com SSL certificate verify ok. < HTTP/1.1 200 OK < Server: nginx/1.15.2 ... <html> <head> <title>Welcome to nginx!</title>

 可以看到 nginx 注入了其他两个端口。
清除
-
删除已创建的 Kubernetes 资源:
1
2
3
4
5
6
$ kubectl delete secret nginx-server-certs $ kubectl delete configmap nginx-configmap $ kubectl delete service my-nginx $ kubectl delete deployment my-nginx $ kubectl delete gateway mygateway $ kubectl delete virtualservice nginx -
删除证书和密钥:
1$ rm example.com.crt example.com.key nginx.example.com.crt nginx.example.com.key nginx.example.com.csr -
删除本示例中生成的配置文件:
1$ rm ./nginx.conf
卸载 istio
|
|
注意开启注入
|
|
运行 kubectl label namespace apps-gitlab istio-injection=enabled 命令会在 apps-gitlab 命名空间中启用 Istio 的自动 sidecar 注入功能。这意味着在该命名空间中创建的新 Pod 将自动注入 Istio sidecar 代理(通常是 Envoy 代理)。以下是一些可能的影响:
影响和注意事项
-
流量管理:
-
安全性:
-
资源开销:
-
配置复杂性:
-
调试和监控:
示例命令
|
|
希望这些信息对你有所帮助!如果你有更多具体问题或需要进一步的帮助,请随时告诉我。 通过多次服务部署发现 istio-gw 只能代理本身服务就是 https 或者 http 的服务,不能去替换掉 https 到 http 这种。 比如 gitlab 开启 https 校验,才可以用 istiogateway 去处理。
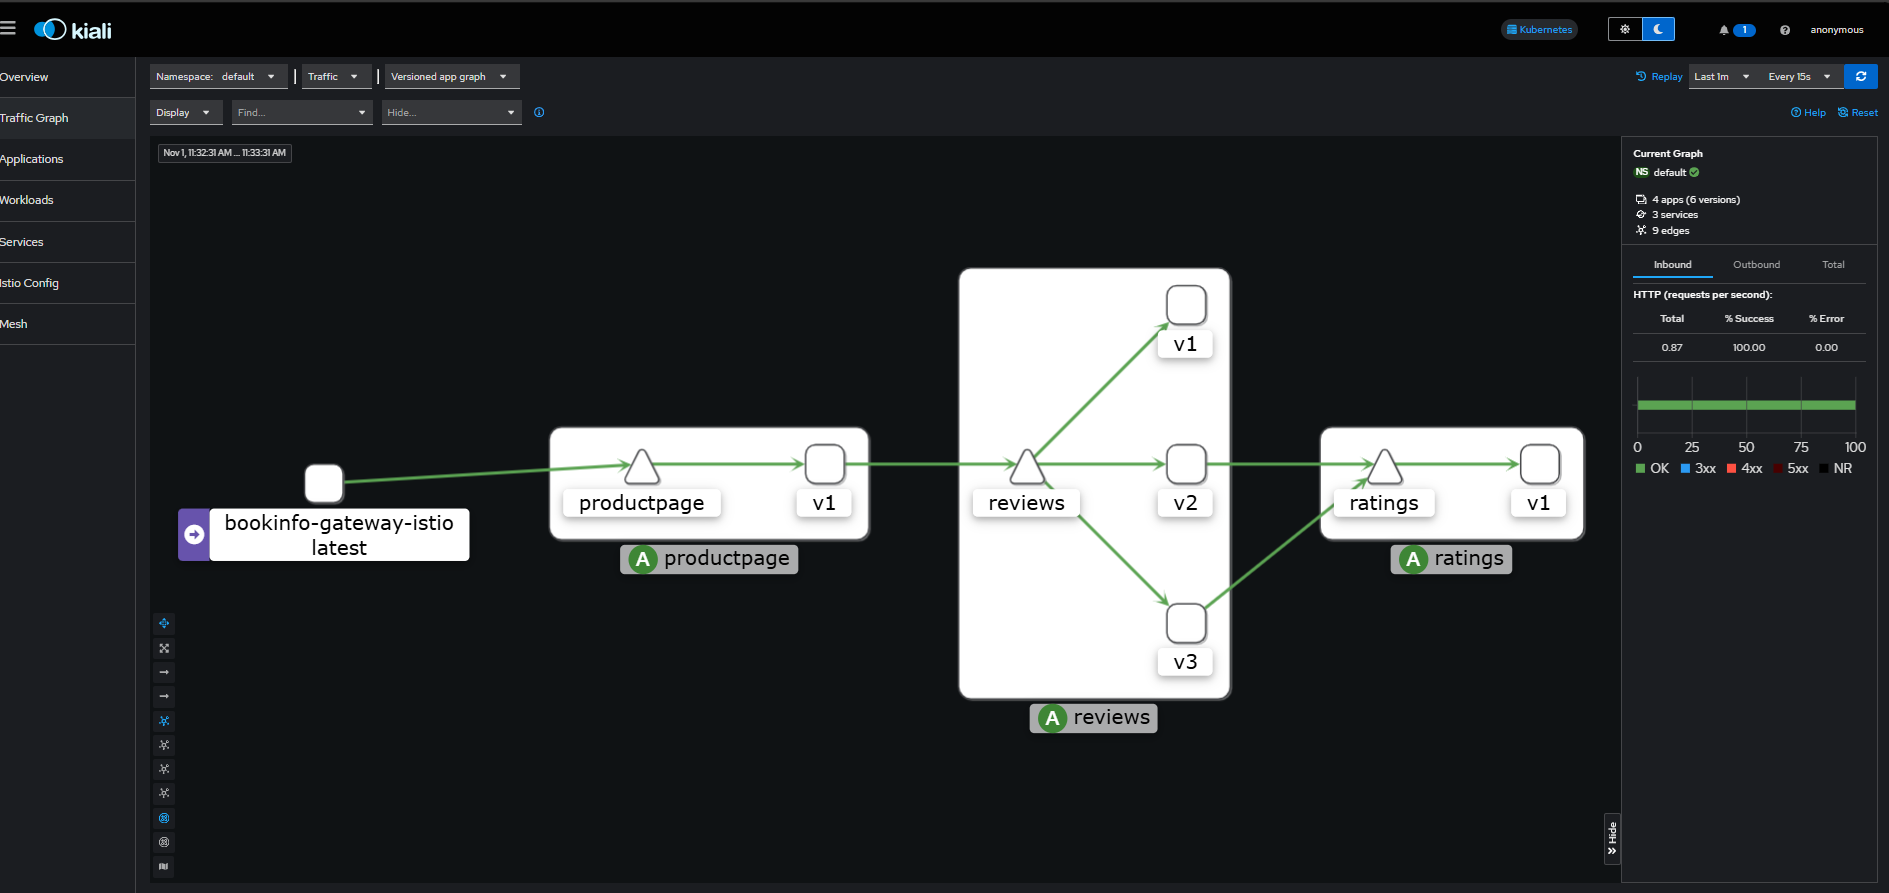
部署kali dashboard prometheus等观测性工具如下记录
|
|
|
|
