Why Flink Kubernetes Operator
The Apache Flink documentation highlights the key aspects of the Flink Kubernetes Operator:
The Flink Kubernetes Operator extends the Kubernetes API with the ability to manage and operate Flink Deployments. The operator features the following amongst others:
- Deploy and monitor Flink Application and Session deployments
- Upgrade, suspend and delete deployments
- Full logging and metrics integration
- Flexible deployments and native integration with Kubernetes tooling
- Flink Job Autoscaler
If you have previously managed on-premises Flink clusters, ad-hoc Flink clusters, or ephemeral Flink clusters, where you were responsible for all of the deployment and management tasks, then you understand the effort required to achieve such a solution without the capabilities provided by the Flink Operator.
Data as a Service: Integrating Apache Flink
In this hands-on guide, I will explain how to integrate Flink Kubernetes Operator and use it to manage the Flink Clusters. The focus here is to have a functional approach for executing Flink jobs, while further blog posts will show how we can leverage Apache Flink for concrete scenarios.
Versions
- Minikube: 1.32.0
- Kubernetes: 1.28.3
- Flink Operator: 1.7.0
- Apache Flink: 1.17.0
- MinIO: RELEASE.2024–01–13T07–53–03Z
- Helm: 3.13.3
Prerequisites
You need to start minikube to have a local setup of Kubernetes, as a prerequisite you need to install minikube and ensure that exists a Docker container or a Virtual Machine environment.
Execute:
Hands-on guide: Deploying MinIO
1 — Create a dedicated namespace on Kubernetes
1
|
kubectl create ns minio-dev
|
2 — Create the deployment of MinIO
 1
 2
 3
 4
 5
 6
 7
 8
 9
10
11
12
13
14
15
16
17
18
19
20
21
22
23
24
25
26
27
28
29
30
31
32
33
34
35
36
37
|
apiVersion: apps/v1
kind: Deployment
metadata:
  creationTimestamp: null
  labels:
    app: minio
  name: deploy-minio
  namespace: minio-dev
spec:
  replicas: 1
  selector:
    matchLabels:
      app: minio
  strategy: {}
  template:
    metadata:
      creationTimestamp: null
      labels:
        app: minio
    spec:
      volumes:
      - name: localvolume
        hostPath:
          path: /mnt/disk1/data
          type: DirectoryOrCreate
      containers:
      - name: minio
        image: quay.io/minio/minio:RELEASE.2024-01-13T07-53-03Z
        command:
        - /bin/bash
        - -c
        args:
        - minio server /data --address :9000 --console-address :9090
        volumeMounts:
        - mountPath: /data
          name: localvolume
status: {}
|
This deployment will create one instance of MinIO (replicas: 1), exposing the WebUi on port9090 and the rest api will be available on port 9000.
Execute:
1
|
kubectl -n minio-dev create -f <yaml_file_containing_the_example_above>
|
3 — Expose the WebConsole and the Rest Api of MinIO internally
 1
 2
 3
 4
 5
 6
 7
 8
 9
10
11
12
13
14
15
16
17
18
19
20
21
22
|
apiVersion: v1
kind: Service
metadata:
  labels:
    app: minio
  name: minio-svc
  namespace: minio-dev
spec:
  ports:
  - name: webconsole
    port: 9090
    protocol: TCP
    targetPort: 9090
  - name: api
    port: 9000
    protocol: TCP
    targetPort: 9000
  selector:
    app: minio
  type: ClusterIP
status:
  loadBalancer: {}
|
In Kubernetes, there are [several ways to expose a service](http://in kubernetes, there are several ways to expose a service, providing connectivity and access to applications within the cluster or from external sources. the two primary methods are clusterip and nodeport, and there’s also loadbalancer and ingress/), and in this guide is used the ClusterIP method which will expose the minIO on an internal IP address that is only reachable within the Kubernetes cluster.
Execute:
1
|
kubectl -n minio-dev create -f <yaml_file_containing_the_example_above>
|
4 — External access to MinIO WebConsole
 1
 2
 3
 4
 5
 6
 7
 8
 9
10
11
12
13
14
15
16
|
apiVersion: networking.k8s.io/v1
kind: Ingress
metadata:
  name: minio-ingress
  namespace: minio-dev
spec:
  rules:
    - http:
        paths:
          - path: /
            pathType: Prefix
            backend:
              service:
                name: minio-svc
                port:
                  number: 9090
|
To enable external access to the MinIO WebConsole, we will utilize an Ingress. There are more approaches, but we decided to use this one, due to the intrinsic advantages of using Ingress, which you can see here.
There is a requirement step to have the Ingress Controller enabled, you must execute the following command:
1
|
minikube addons enable ingress
|
Execute the following command to verify that the NGINX Ingress controller is running:
1
|
kubectl get pods -n ingress-nginx
|
Execute:
1
|
kubectl -n minio-dev create -f <yaml_file_containing_the_example_above>
|
5 — Accessing the MinIO WebConsole
1
2
3
4
5
|
kubectl -n minio-dev get ingress

# output
NAME            CLASS   HOSTS   ADDRESS        PORTS   AGE
minio-ingress   nginx   *       192.168.64.3   80      2d4h
|
Open your web browser and enter the provided address, in this example, is 192.168.64.3. The MinIO user interface will then become accessible.

MinIO WebConsole
The default credentials are user: minioadmin and password: minioadmin. If you pretend to modify these credentials, which is highly recommended, you must set those environment variables.
You might wonder about the choice of MinIO in our configuration. In this setup, MinIO serves as the external storage solution for saving checkpoints, savepoints, and managing information related to the setup of high availability. As always you have other options to store this information such as AWS S3, GCS, or Azure Blob Storage
Bonus
If you access the MinIO WebConsole through the Ingress, file uploads are limited to 1Mb and to overcome this restriction, modify the Ingress rule by adding the annotation nginx.ingress.kubernetes.io/proxy-body-size: 500m to allow uploads with a maximum file size of 500Mb
 1
 2
 3
 4
 5
 6
 7
 8
 9
10
11
12
13
14
15
16
17
18
|
apiVersion: networking.k8s.io/v1
kind: Ingress
metadata:
  name: minio-ingress
  namespace: minio-dev
  annotations:
    nginx.ingress.kubernetes.io/proxy-body-size: 500m
spec:
  rules:
    - http:
        paths:
          - path: /
            pathType: Prefix
            backend:
              service:
                name: minio-svc
                port:
                  number: 9090
|
Hands-on guide: Deploying Flink Jobs
The fun part starts here :).
1 — Install Flink Kubernetes Operator
To install the operator we will use Helm, which is an open-source package manager for Kubernetes. If you don’t have it you need to follow this guide to install Helm.
Once you have Helm installed, you need to add the Flink Operator chart repository:
1
|
helm repo add flink-kubernetes-operator-1.7.0 https://archive.apache.org/dist/flink/flink-kubernetes-operator-1.7.0/
|
Useful commands:
- Once the repository is added, you will be able to list the charts you can install:
1
|
helm search repo flink-kubernetes-operator-1.7.0
|
- List all possible value settings for the chart of Flink Operator
1
|
helm show values flink-kubernetes-operator-1.7.0/flink-kubernetes-operator
|
You can explore the settings here to understand better what they mean and the purpose of the configs.
In our setup, some values will be overridden:
1
2
3
4
5
6
7
|
operatorServiceAccount:
  create: true
  annotations: {}
  name: "flink-operator"

watchNamespaces:
    - "flink-jobs"
|
The Flink Operator listens for Flink Deployments only on the flink-jobs namespace, while the Flink Operator is installed in the flink-operator namespace. This separation allows the isolation of resources by being possible to apply restrictions to the namespaces to prevent future problems within the cluster. Keep in mind that deploying Flink jobs across multiple namespaces is also feasible, but insuch scenario it’s necessary to update the attribute watchNamespaces .
Storing the configuration above in a file named values.yaml you are able to finally create the Flink Operator by executing the following commands 🎉:
1
2
3
|
kubectl create ns flink-operator
kubectl create ns flink-jobs
helm -n flink-operator install -f values.yaml flink-kubernetes-operator flink-kubernetes-operator-1.7.0/flink-kubernetes-operator --set webhook.create=false
|
After executing the commands above, you will see the Flink Operator running with success:
 1
 2
 3
 4
 5
 6
 7
 8
 9
10
11
|
kubectl -n flink-operator get all

#output
NAME                                             READY   STATUS    RESTARTS        AGE
pod/flink-kubernetes-operator-5c46f67cd7-vrdpn   1/1     Running   6 (7h40m ago)   3d5h

NAME                                        READY   UP-TO-DATE   AVAILABLE   AGE
deployment.apps/flink-kubernetes-operator   1/1     1            1           3d5h

NAME                                                   DESIRED   CURRENT   READY   AGE
replicaset.apps/flink-kubernetes-operator-5c46f67cd7   1         1         1       3d5h
|
2 — Deploy a Flink Job
To deploy a simple Flink job using the Flink Operator with local disk storage for checkpoints/savepoints, please note that if the disk is ephemeral all state will be lost. Simply create a definition similar to the following:
 1
 2
 3
 4
 5
 6
 7
 8
 9
10
11
12
13
14
15
16
17
18
19
20
21
22
23
24
25
26
27
28
29
30
31
32
33
34
35
36
37
|
apiVersion: flink.apache.org/v1beta1
kind: FlinkDeployment
metadata:
  namespace: flink-jobs
  name: basic-example-1
spec:
  image: flink-1:1.17
  flinkVersion: v1_17
  flinkConfiguration:
    taskmanager.numberOfTaskSlots: "1"
    state.savepoints.dir: s3://test/savepoins
    state.checkpoints.dir: s3://test/checkpoints
    s3.endpoint: http://minio-svc.minio-dev:9000
    s3.path.style.access: "true"
    s3.path.style.access: "true"
    s3.access-key: minioadmin
    s3.secret-key: minioadmin
  serviceAccount: flink
  jobManager:
    resource:
      memory: "1000m"
      cpu: 0.5
  taskManager:
    resource:
      memory: "1000m"
      cpu: 0.5
  podTemplate:
    spec:
      containers:
        - name: flink-main-container
          env:
            - name: TZ  # 设置容器运行的时区
              value: Asia/Shanghai
  job:
    jarURI: local:///opt/flink/examples/streaming/StateMachineExample.jar
    parallelism: 1
    state: running
|
在上面添加时区即可,能保证打印的日志是正常的时间+8
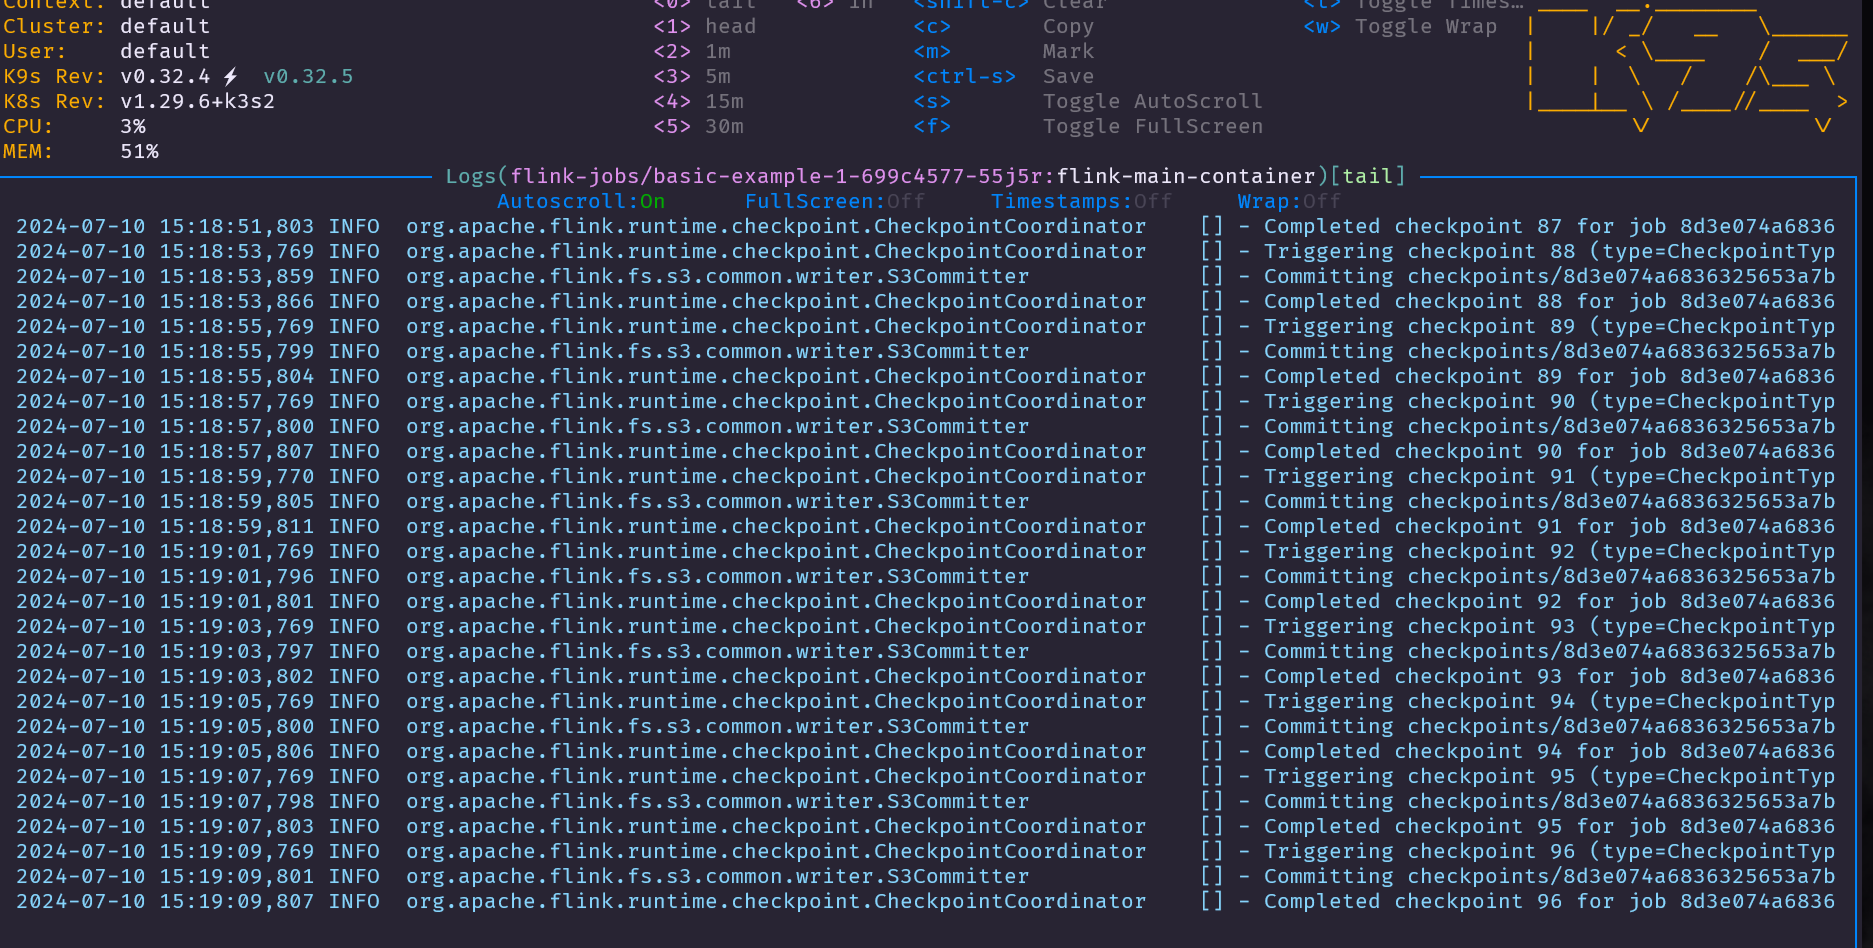
This definition will create a single JobManager, a TaskManager with one slot, and a Flink Job with a parallelism of 1. Due to the instantion of MinIO it’s possible to store the the checkpoints and savepoints in MinIO.
The Ingress section above is to automate the creation of the Ingress to allow the external UI access. To access the UI, open the browser and navigate to the endpoint http://ip/flink-jobs/basic-example/ .
note: To know the ip address double-check the section Accessing the MinIO WebConsole .
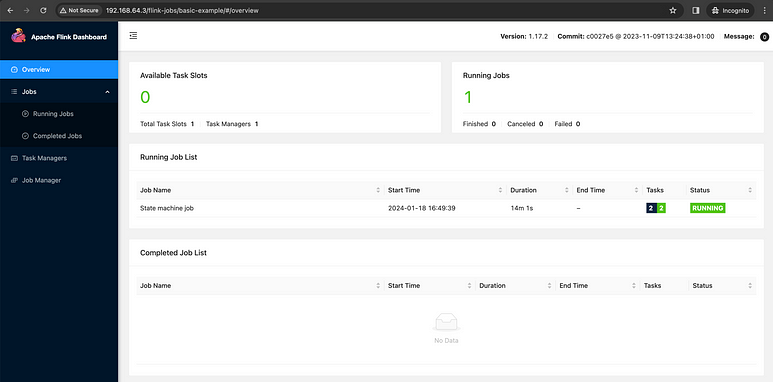
Flink UI
Congratulations! 🎉🥳 You now have a Flink Job running through Flink Operator. By using a similar setup, you unlock numerous advantages, ensuring a streamlined experience for your infrastructure clients and reducing their work a lot.
In this guide you are able to understand the internal concepts of Flink and Kubernetes.
Bonus 1
If you have an eagle eye, you notice that the image used is flink-1:1.17 . This is because the utilization of the S3 schema for storing checkpoints and savepoints, and to make use the S3 schema, it’s required to include the necessary plugins, flink-s3-fs-hadoop. In this scenario, it was used a custom Flink image to enable the mandatory plugins.
1
2
3
4
5
6
7
8
9
|
FROM flink:1.17

RUN mkdir -p /opt/flink/plugins/flink-s3-fs-hadoop/ &&\
    mv -v /opt/flink/opt/flink-s3-fs-hadoop-*.jar /opt/flink/plugins/flink-s3-fs-hadoop/ &&\
    chown -R flink:flink /opt/flink/plugins/flink-s3-fs-hadoop

USER flink

CMD exec /usr/share/flink/bin/flink-console.sh ${COMPONENT} ${ARGS}
|
In the documentation are explained the available approaches.
Bonus 2
If you don’t need to use a custom Flink image, it’s possible to enable the plugins using an environment variable, ENABLE_BUILT_IN_PLUGINS:
 1
 2
 3
 4
 5
 6
 7
 8
 9
10
11
12
13
14
15
16
17
18
19
20
21
22
23
24
25
26
27
28
29
30
31
32
33
34
35
36
37
38
39
40
41
42
43
44
45
|
apiVersion: flink.apache.org/v1beta1
kind: FlinkDeployment
metadata:
  namespace: flink-jobs
  name: basic-example
spec:
  image: flink:1.17
  flinkVersion: v1_17
  podTemplate:
    apiVersion: v1
    kind: Pod
    metadata:
      name: pod-template
    spec:
      containers:
        - name: flink-main-container
          env:
            - name: ENABLE_BUILT_IN_PLUGINS
              value: flink-s3-fs-hadoop-1.17.2.jar
  flinkConfiguration:
    taskmanager.numberOfTaskSlots: "1"
    state.savepoints.dir: s3://test/savepoins
    state.checkpoints.dir: s3://test/checkpoints
    s3.endpoint: http://minio-svc.minio-dev:9000
    s3.path.style.access: "true"
    s3.access-key: minioadmin
    s3.secret-key: minioadmin
  ingress:
    template: "/{{namespace}}/{{name}}(/|$)(.*)"
    className: "nginx"
    annotations:
      nginx.ingress.kubernetes.io/rewrite-target: "/$2"
  serviceAccount: flink
  jobManager:
    resource:
      memory: "1000m"
      cpu: 0.5
  taskManager:
    resource:
      memory: "1000m"
      cpu: 0.5
  job:
    jarURI: local:///opt/flink/examples/streaming/StateMachineExample.jar
    parallelism: 1
    state: running
|
Bonus 3
In order to simplify the management of Kubernetes Cluster and to be easy to undertand what going on, consider install the Kubernetes Dashboard and here exists a guide describing the steps to create an user to access the Kubernetes Dasboard.
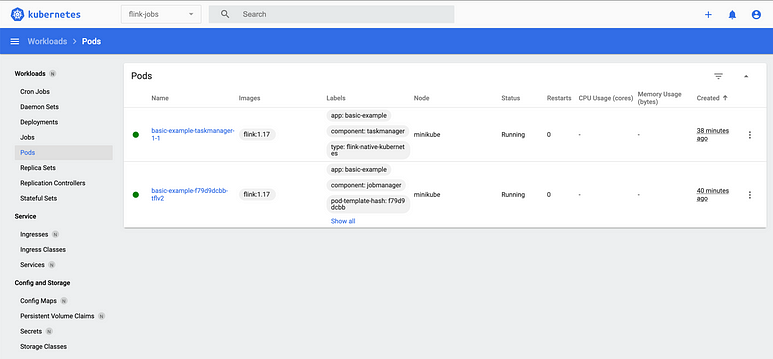
Kubernetes Dashboard
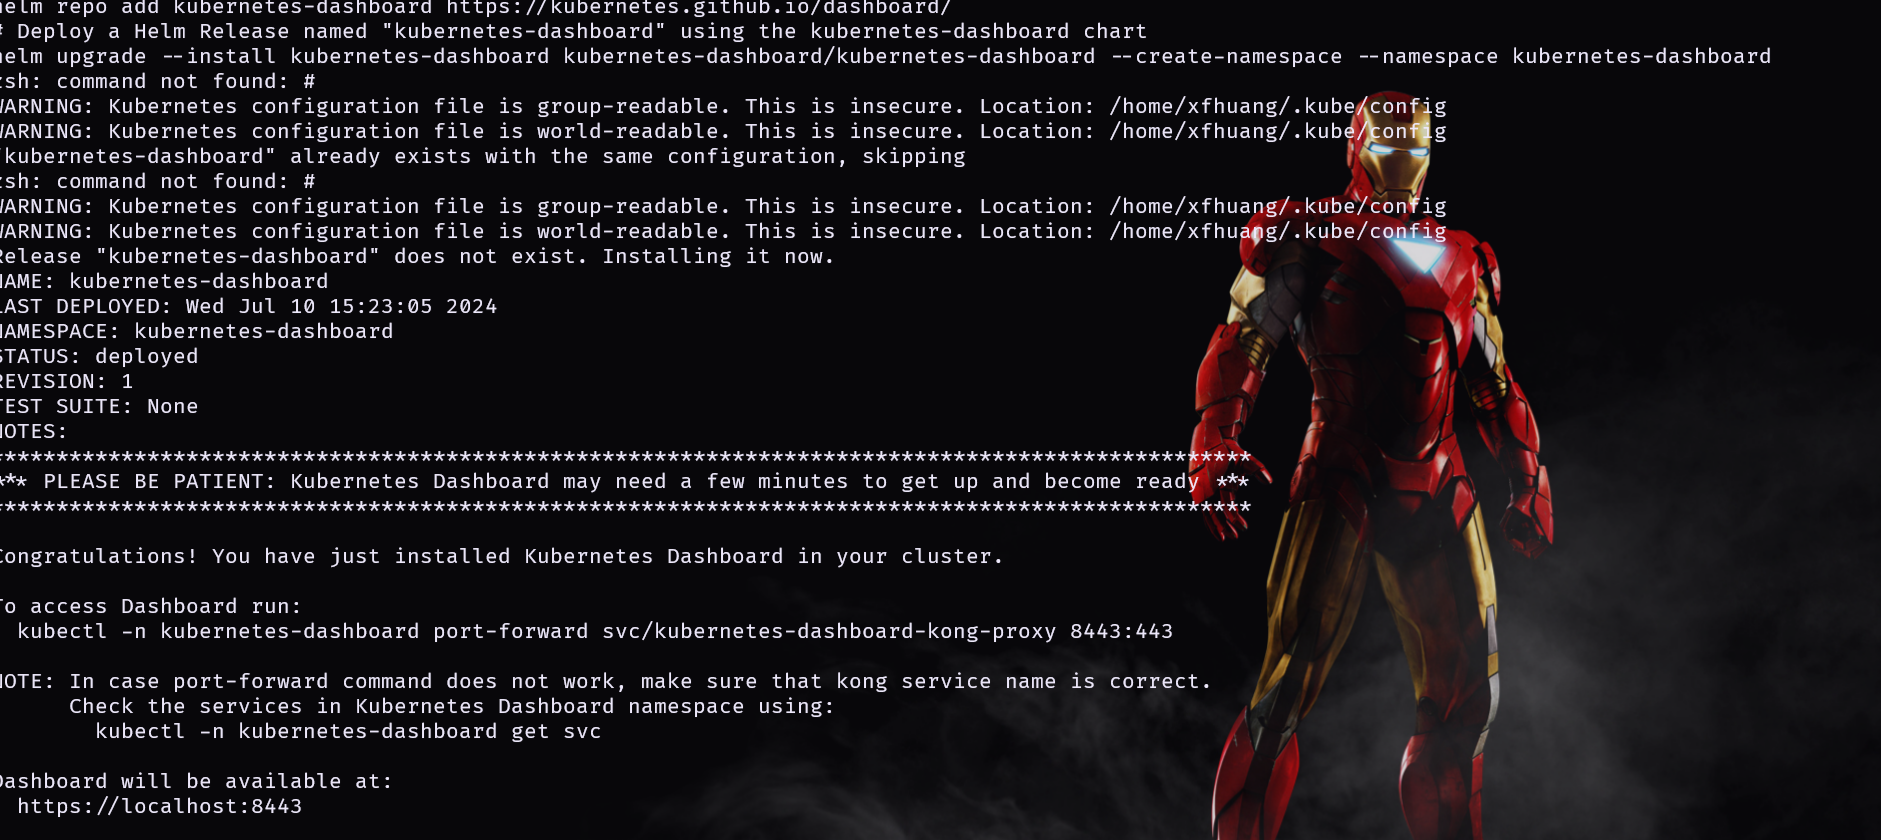
参考教程部署一下 kubernets-dashboard
1
2
3
4
|
# Add kubernetes-dashboard repository
helm repo add kubernetes-dashboard https://kubernetes.github.io/dashboard/
# Deploy a Helm Release named "kubernetes-dashboard" using the kubernetes-dashboard chart
helm upgrade --install kubernetes-dashboard kubernetes-dashboard/kubernetes-dashboard --create-namespace --namespace kubernetes-dashboard
|
In the next series I will delve into the common issues and tips for optimizing your Flink applications and deploys.
1
2
3
4
5
6
7
8
|
#下载镜像
kubectl -n kubernetes-dashboard get pods | awk '{print $1}' | xargs -r -I '{}' kubectl -n kubernetes-dashboard get pods {} -o=jsonpath='{.status.containerStatuses[0].image}{"\n"}'
Error from server (NotFound): pods "NAME" not found
docker.io/kubernetesui/dashboard-api:1.7.0
docker.io/kubernetesui/dashboard-auth:1.1.3
kong:3.6
docker.io/kubernetesui/dashboard-metrics-scraper:1.1.1
docker.io/kubernetesui/dashboard-web:1.4.0
|
traefik v3 对应的文件为
 1
 2
 3
 4
 5
 6
 7
 8
 9
10
11
12
13
14
15
16
17
18
19
20
21
22
23
24
25
26
27
28
29
30
|
 kubectl apply -f - <<EOF
∙ apiVersion: traefik.io/v1alpha1
kind: ServersTransport
metadata:
  name: skipverify
  namespace: kubernetes-dashboard
spec:
  insecureSkipVerify: true

∙ EOF
serverstransport.traefik.io/skipverify created

----
apiVersion: traefik.io/v1alpha1
kind: IngressRoute
metadata:
  name: dashboard-k8s
  namespace: kubernetes-dashboard
spec:
  entryPoints:
    - websecure
  routes:
    - match: "Host(`dashboard.traefik.k8s`)"
      kind: Rule
      services:
        - name: kubernetes-dashboard-kong-proxy
          port: 443
          serversTransport: skipverify
  tls:
    secretName: dashboard-tls
|
部署成功后访问一下页面
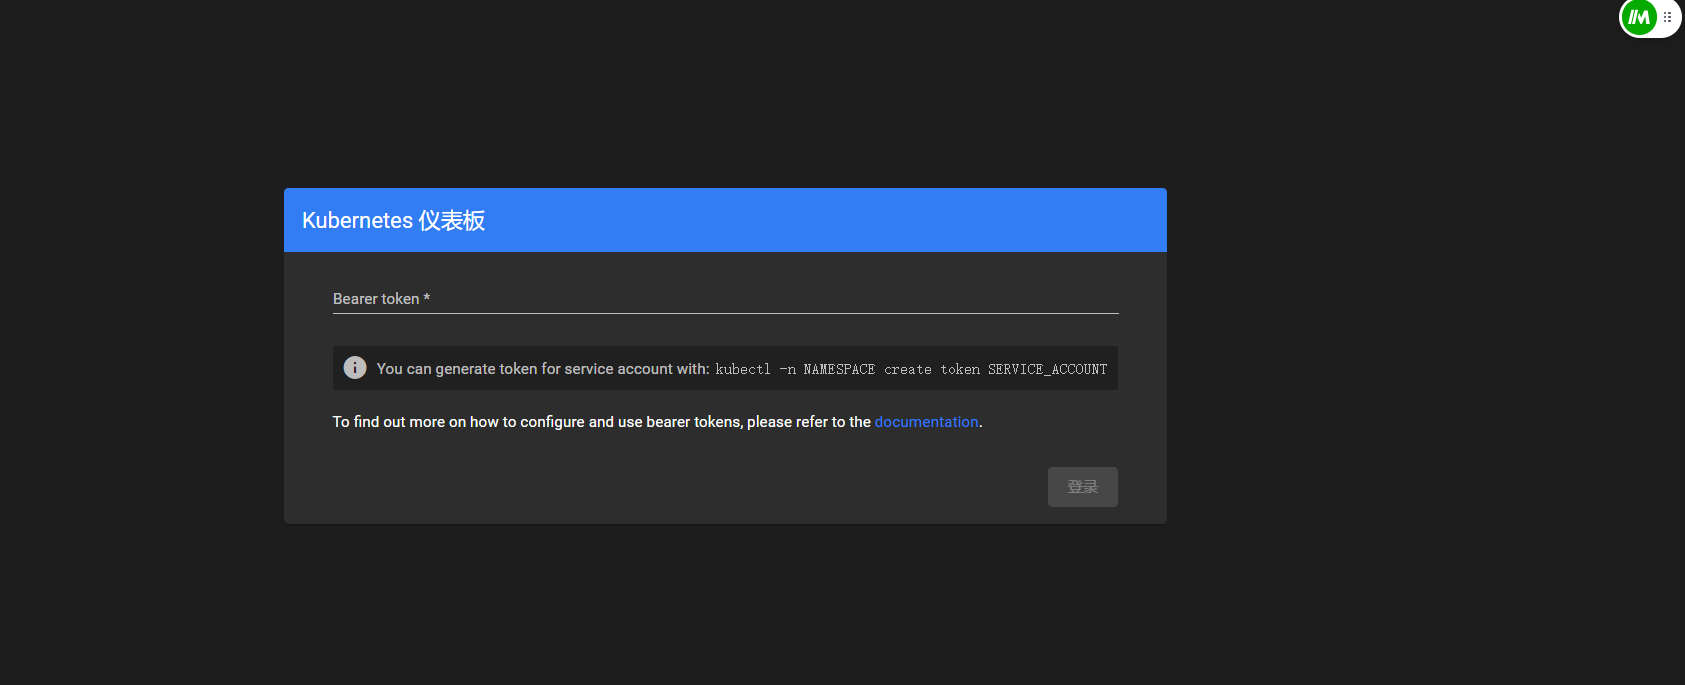
接下来获取密码
 1
 2
 3
 4
 5
 6
 7
 8
 9
10
11
12
13
14
15
16
17
18
19
20
21
22
23
24
25
|
cat > dashboard-user.yaml << EOF
apiVersion: v1
kind: ServiceAccount
metadata:
  name: admin-user
  namespace: kube-system
---
apiVersion: rbac.authorization.k8s.io/v1
kind: ClusterRoleBinding
metadata:
  name: admin-user
roleRef:
  apiGroup: rbac.authorization.k8s.io
  kind: ClusterRole
  name: cluster-admin
subjects:
- kind: ServiceAccount
  name: admin-user
  namespace: kube-system
EOF

kubectl  apply -f dashboard-user.yaml

# 创建token
kubectl -n kube-system create token admin-user
|
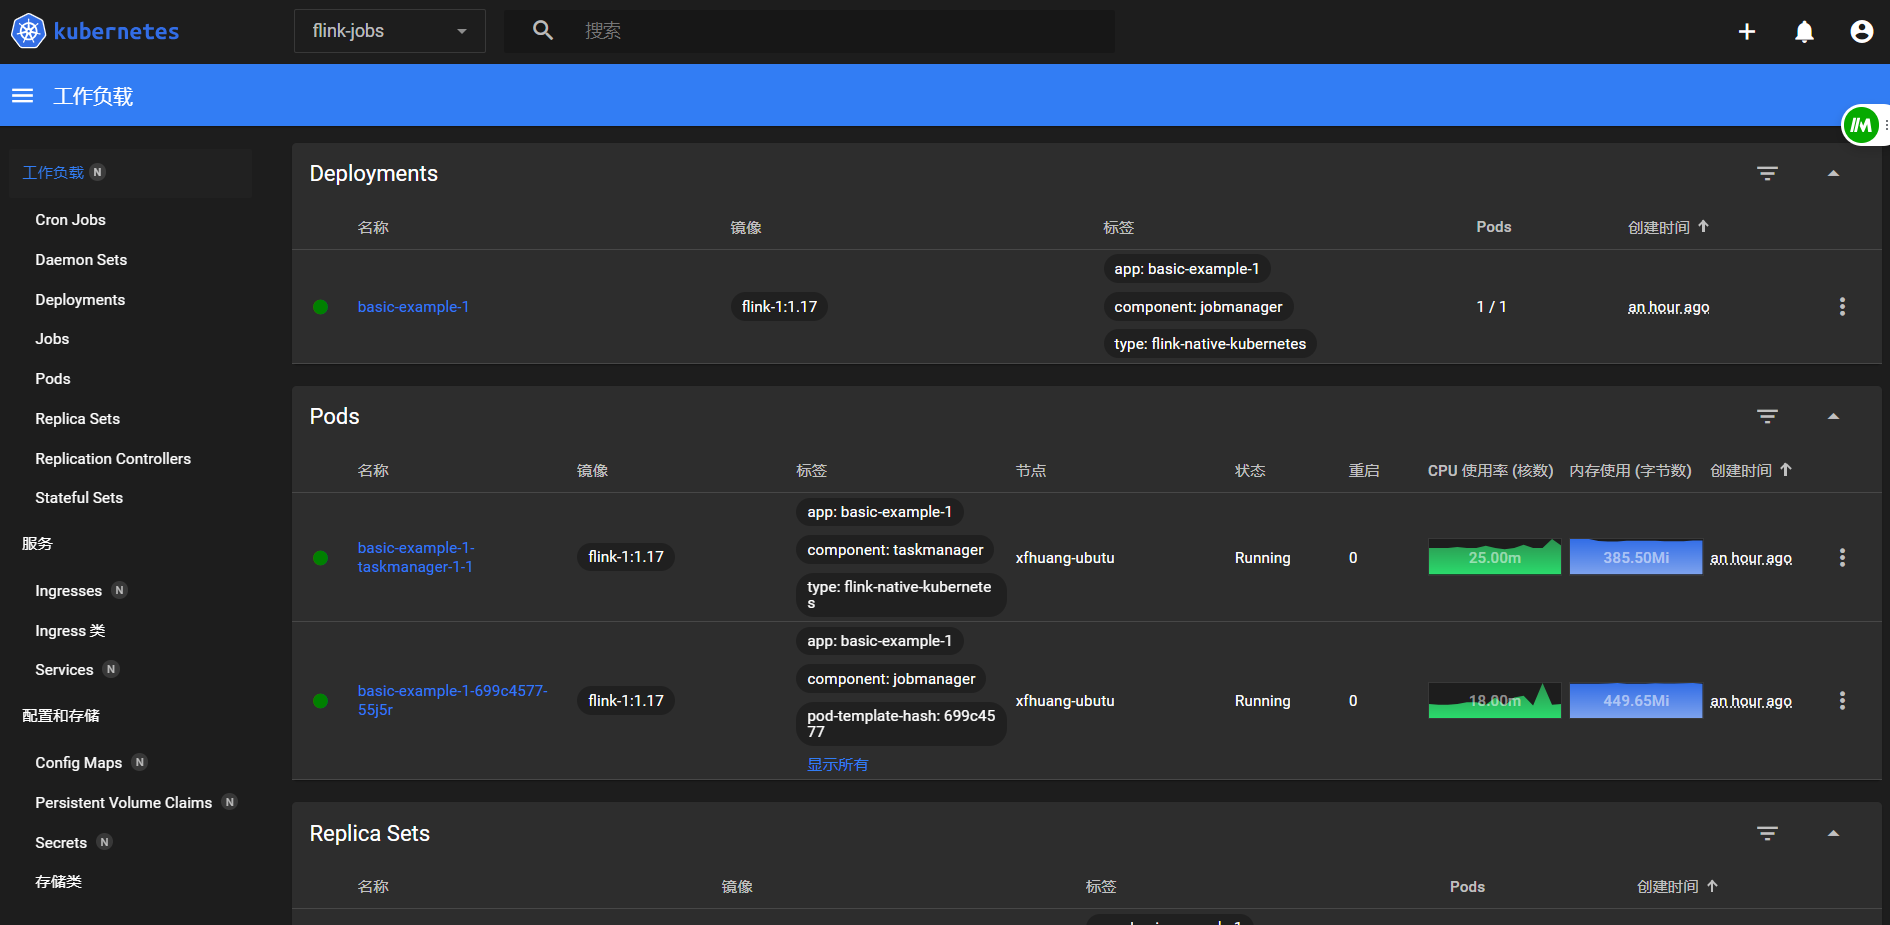
查看日志看看
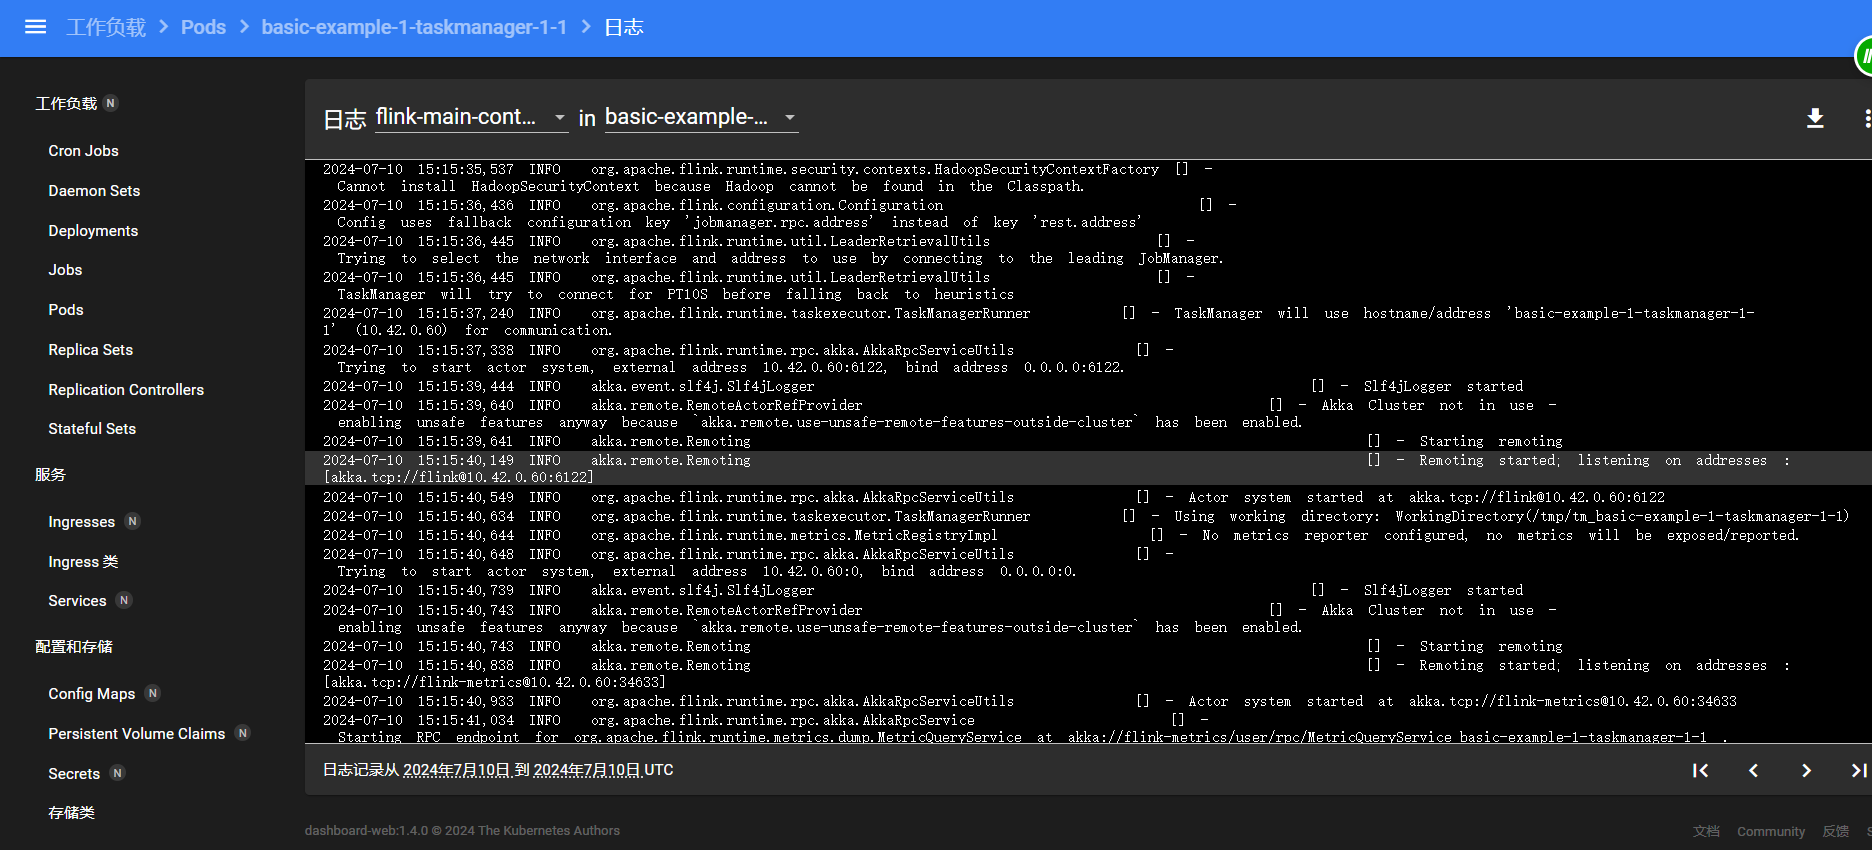
Flink Kubernetes Operator POD 时区配置
在之前的 Blog “Flink on Kubernetes - Kubernetes Operator - 安装 Operator” 介绍了使用 helm 方式 安装 flink operator, 若要重新安装,则需要先卸载,那flink operator 卸载后,会影响正在运行的 Flink Job?
接下来,一起探索…
1.卸载 flink-kubernetes-operator
1
2
3
4
5
6
7
8
|
[root@k8s01 k8s_yaml]# helm uninstall flink-kubernetes-operator -n flink
These resources were kept due to the resource policy:
[RoleBinding] flink-role-binding
[Role] flink
[ServiceAccount] flink

release "flink-kubernetes-operator" uninstalled
[root@k8s01 k8s_yaml]#
|
执行完后,
- 1.Flink Job 运行正常(kubectl -n flink get pod |grep “basic-application-deployment-only” )
1
2
3
|
[root@k8s01 k8s_yaml]# kubectl -n flink get pod |grep "basic-application-deployment-only"
basic-application-deployment-only-ingress-tz-bd954c447-s446f   1/1     Running   0               35m
basic-application-deployment-only-ingress-tz-taskmanager-1-1   1/1     Running   0               35m
|
- 2.FlinkDeployment 也正常展示 (kubectl get flinkdeployment -n flink)
1
2
3
|
[root@k8s01 k8s_yaml]# kubectl get flinkdeployment -n flink
NAME                                           JOB STATUS   LIFECYCLE STATE
basic-application-deployment-only-ingress-tz   RUNNING      STABLE
|
1
2
3
|
[root@k8s01 k8s_yaml]# kubectl get crd -n flink |grep flink
flinkdeployments.flink.apache.org                     2024-03-29T13:05:39Z
flinksessionjobs.flink.apache.org                     2024-03-29T13:05:39Z
|
- 4.但 flink-kubernetes-operator POD 已删除。
接下来,使用 helm 安装 flink-kubernetes-operator
2.安装 flink-kubernetes-operator 且指定配置参数
大家可访问https://nightlies.apache.org/flink/flink-kubernetes-operator-docs-release-1.8/docs/operations/helm/#overriding-configuration-parameters-during-helm-install,了解官网的介绍,在 helm install 的时候,我们可以通过指定配置参数来安装。例如,现在我们需要对 flink-kubernetes-operator的 POD 增加 TZ 环境变量,内容如下:
1
2
3
|
  env:
    - name: TZ
      value: Asia/Shanghai
|
通过 operatorPod 指定 env 参数
1
|
helm install flink-kubernetes-operator flink-operator-repo/flink-kubernetes-operator --namespace flink-operator --set 'operatorPod.env[0].name=TZ,operatorPod.env[0].value=Asia/Shanghai'
|
Output logs:
1
2
3
4
5
6
7
8
9
|
[root@k8s01 k8s_yaml]# helm install flink-kubernetes-operator flink-operator-repo/flink-kubernetes-operator --namespace flink-operator --set 'operatorPod.env[0].name=TZ,operatorPod.env[0].value=Asia/Shanghai'
WARNING: Kubernetes configuration file is group-readable. This is insecure. Location: /home/###/.kube/config
WARNING: Kubernetes configuration file is world-readable. This is insecure. Location: /home/###/.kube/config
NAME: flink-kubernetes-operator
LAST DEPLOYED: Fri Jul
NAMESPACE: flink-operator
STATUS: deployed
REVISION: 1
TEST SUITE: None
|
此时 查看 flink-kubernetes-operator logs 是正确。
1
2
3
4
5
6
|
[root@k8s01 k8s_yaml]# kubectl get pod -n flink
NAME                                                           READY   STATUS    RESTARTS        AGE
basic-application-deployment-only-ingress-tz-bd954c447-s446f   1/1     Running   0               42m
basic-application-deployment-only-ingress-tz-taskmanager-1-1   1/1     Running   0               41m
busybox                                                        1/1     Running   649 (24m ago)   38d
flink-kubernetes-operator-7d5d8dcb64-bqnpp                     2/2     Running   0               117s
|
查看 YAML
1
|
kubectl get pod flink-kubernetes-operator-7d5d8dcb64-bqnpp -n flink -o yaml
|
查看在 containers 包含以下配置:
1
2
|
    - name: TZ
      value: Asia/Shanghai
|
总结
目前来看,Operator 和 Flink Job 时区都已设置完成。
得到的结论,卸载 flink-kubernetes-operator,并没有影响正在运行的 Flink Job。
别忘记,在 Java 程序部署 Flink Job 的方法中,添加 时区配置。
 1
 2
 3
 4
 5
 6
 7
 8
 9
10
11
|
PodTemplateSpec podTemplateSpec = new PodTemplateSpec();
PodSpec podSpec = new PodSpec();
Container container = new Container();
container.setName("flink-main-container"); // container name 不可修改
EnvVar envVar01 = new EnvVar();
envVar01.setName("TZ");
envVar01.setValue("Asia/Shanghai");
container.setEnv(Collections.singletonList(envVar01));
podSpec.setContainers(Collections.singletonList(container));
podTemplateSpec.setSpec(podSpec);
flinkDeploymentSpec.setPodTemplate(podTemplateSpec);
|
juicefs 作业
 1
 2
 3
 4
 5
 6
 7
 8
 9
10
11
12
13
14
15
16
17
18
19
20
|
juicefs format --storage=minio --bucket=http://10.7.3.100:31889/juicefs --access-key=minioadmin --secret-key=minioadmin "mysql://root:root@(10.7.3.100:30006)/juicefs" juicefsminio
2024/07/10 17:13:58.051333 juicefs[2598847] <INFO>: Meta address: mysql://root:****@(10.7.3.100:30006)/juicefs [interface.go:497]
2024/07/10 17:13:58.058010 juicefs[2598847] <WARNING>: The latency to database is too high: 6.002499ms [sql.go:260]
2024/07/10 17:13:58.062734 juicefs[2598847] <INFO>: Data use minio://10.7.3.100:31889/juicefs/juicefsminio/ [format.go:471]
2024/07/10 17:13:58.978178 juicefs[2598847] <INFO>: Volume is formatted as {
  "Name": "juicefsminio",
  "UUID": "b1f089b9-4e22-4e80-8746-7d55ea9688b0",
  "Storage": "minio",
  "Bucket": "http://10.7.3.100:31889/juicefs",
  "AccessKey": "minioadmin",
  "SecretKey": "removed",
  "BlockSize": 4096,
  "Compression": "none",
  "EncryptAlgo": "aes256gcm-rsa",
  "KeyEncrypted": true,
  "TrashDays": 1,
  "MetaVersion": 1,
  "MinClientVersion": "1.1.0-A",
  "DirStats": true
} [format.go:508]
|
创建一个 file 看看
 1
 2
 3
 4
 5
 6
 7
 8
 9
10
11
12
13
14
15
16
17
18
19
20
21
22
23
24
25
26
27
28
29
30
31
32
33
34
35
36
37
38
39
40
41
42
43
44
45
46
47
48
49
50
51
52
|
apiVersion: flink.apache.org/v1beta1
kind: FlinkDeployment
metadata:
  namespace: flink-jobs
  name: basic-example
spec:
  image:  10.7.20.12:5000/flink-juicefs:v1.1.3
  flinkVersion: v1_17
  flinkConfiguration:
    taskmanager.numberOfTaskSlots: "1"
    s3.endpoint: "http://10.43.180.28:9000"
    s3.path.style.access: "true"
    s3.access.key: "MpCurbSf0FdWTbO9XCzB"
    s3.secret.key: "d6VSjJAAyHqszi3RFif4Yg1UEBd9T4nL6hLcyK71"
    state.backend.incremental: "true"
    execution.checkpointing.interval: "300000ms"
    state.savepoints.dir: "s3://flink-data/savepoints"
    state.checkpoints.dir: "s3://flink-data/checkpoints"
    env.java.opts.jobmanager: -Duser.timezone=GMT+08
    env.java.opts.taskmanager: -Duser.timezone=GMT+08
  serviceAccount: flink
  jobManager:
    resource:
      memory: "2048m"
      cpu: 1
  taskManager:
    resource:
      memory: "2048m"
      cpu: 1
  podTemplate:
    spec:
      containers:
        - name: flink-main-container
          env:
            - name: TZ
              value: Asia/Shanghai
  job:
    jarURI: local:///opt/flink/lib/flink-sql-submit-1.0-SNAPSHOT.jar
    args: ["-f", "s3://flink-tasks/hudi2mysql.sql", "-m", "streaming", "-e", "http://10.43.180.28:9000", "-a", "MpCurbSf0FdWTbO9XCzB", "-s", "d6VSjJAAyHqszi3RFif4Yg1UEBd9T4nL6hLcyK71"]
    parallelism: 1
    upgradeMode: stateless
  podTemplate:
    spec:
      containers:
        - name: flink-main-container
          volumeMounts:
            - mountPath: /opt/hadoop/etc/hadoop/
              name: core-site
      volumes:
        - name: core-site
          configMap:
            name: core-site
|
这个任务提交报错最多的是不认识 jfs,以及 class not found 解决办法注意如下
Dockerfile
  1
  2
  3
  4
  5
  6
  7
  8
  9
 10
 11
 12
 13
 14
 15
 16
 17
 18
 19
 20
 21
 22
 23
 24
 25
 26
 27
 28
 29
 30
 31
 32
 33
 34
 35
 36
 37
 38
 39
 40
 41
 42
 43
 44
 45
 46
 47
 48
 49
 50
 51
 52
 53
 54
 55
 56
 57
 58
 59
 60
 61
 62
 63
 64
 65
 66
 67
 68
 69
 70
 71
 72
 73
 74
 75
 76
 77
 78
 79
 80
 81
 82
 83
 84
 85
 86
 87
 88
 89
 90
 91
 92
 93
 94
 95
 96
 97
 98
 99
100
101
102
103
104
105
|
# 省略了 License,特此声明

#FROM adoptopenjdk/openjdk11:jre-11.0.9_11.1-alpine
#
## 安装需要的软件
## snappy 是一个压缩库
## libc6-compat 是 ANSI C 的函数库
#RUN sed -i 's/dl-cdn.alpinelinux.org/mirrors.ustc.edu.cn/g' /etc/apk/repositories
## RUN apk add --no-cache bash snappy libc6-compat \
#RUN apk add --no-cache bash snappy gnupg   \
# && apk add gettext
## Flink 容器里的环境变量
## Flink 软件的安装目录在 /opt
#ENV FLINK_INSTALL_PATH=/opt
## Flikn 的解压目录在 /opt/flink
#ENV FLINK_HOME $FLINK_INSTALL_PATH/flink
## Flink 的依赖包目录在 /opt/flink/lib
#ENV FLINK_LIB_DIR $FLINK_HOME/lib
## Flink 的插件目录在 /opt/flink/plugins
#ENV FLINK_PLUGINS_DIR $FLINK_HOME/plugins
## 这个不知道是什么目录
#ENV FLINK_OPT_DIR $FLINK_HOME/opt
## 这是用户代码的 Jar 包目录,/opt/flink/artifacts
#ENV FLINK_JOB_ARTIFACTS_DIR $FLINK_INSTALL_PATH/artifacts
## 更新一下 PATH,把 Flink 的二进制文件的目录加上 /opt/flink/bin
#ENV PATH $PATH:$FLINK_HOME/bin
#
## 这些 ARG 可以在构建镜像的时候输入参数,默认值都是 NOT_SET,如果设置了就会去找对应的目录,并且打入镜像里
## Flink 的发行版路径,可以在本地指定任何下载或者自行打包的 Flink 发行版包
#ARG flink_dist=NOT_SET
## 用户写的业务代码路径
#ARG job_artifacts=NOT_SET
## Python 的版本,填2或者3
#ARG python_version=NOT_SET
## Hadoop Jar 包的依赖路径
#ARG hadoop_jar=NOT_SET*
#
## 安装 Python,根据前面填的 python_version 这个环境变量,不填就不装
#RUN \
#  if [ "$python_version" = "2" ]; then \
#    apk add --no-cache python; \
#  elif [ "$python_version" = "3" ]; then \
#    apk add --no-cache python3 && ln -s /usr/bin/python3 /usr/bin/python; \
#  fi
#
## 把 Flink 发行版和 Hadoop jar(不一定有 Hadoop)放在 /opt/flink 目录
#ADD $flink_dist $hadoop_jar $FLINK_INSTALL_PATH/
## 用户代码放在 /opt/artifacts
#ADD $job_artifacts/* $FLINK_JOB_ARTIFACTS_DIR/
#ENV GOSU_VERSION 1.11
#COPY gosu-amd64 /usr/local/bin/gosu
#COPY gosu-amd64.asc /usr/local/bin/gosu.asc
#
#RUN set -ex; \
#  export GNUPGHOME="$(mktemp -d)"; \
#  for server in ha.pool.sks-keyservers.net $(shuf -e \
#                          hkp://p80.pool.sks-keyservers.net:80 \
#                          keyserver.ubuntu.com \
#                          hkp://keyserver.ubuntu.com:80 \
#                          pgp.mit.edu) ; do \
#      gpg --batch --keyserver "$server" --recv-keys B42F6819007F00F88E364FD4036A9C25BF357DD4 && break || : ; \
#  done && \
#  gpg --batch --verify /usr/local/bin/gosu.asc /usr/local/bin/gosu; \
#  gpgconf --kill all; \
#  rm -rf "$GNUPGHOME" /usr/local/bin/gosu.asc; \
#  chmod +x /usr/local/bin/gosu; \
#  gosu nobody true
#RUN set -x && \
#  ln -s $FLINK_INSTALL_PATH/flink-[0-9]* $FLINK_HOME && \
#  for jar in $FLINK_JOB_ARTIFACTS_DIR/*.jar; do [ -f "$jar" ] || continue; ln -s $jar $FLINK_LIB_DIR; done && \
#  if [ -n "$python_version" ]; then ln -s $FLINK_OPT_DIR/flink-python-*-java-binding.jar $FLINK_LIB_DIR; fi && \
#  if [ -f ${FLINK_INSTALL_PATH}/flink-shaded-hadoop* ]; then ln -s ${FLINK_INSTALL_PATH}/flink-shaded-hadoop* $FLINK_LIB_DIR; fi && \
#  # 创建 flink 用户组和 flink 用户,并且更改下面目录的用户权限
#  addgroup -S flink && adduser -D -S -H -G flink -h $FLINK_HOME flink && \
#  chown -R flink:flink ${FLINK_INSTALL_PATH}/flink-* && \
#  chown -R flink:flink ${FLINK_JOB_ARTIFACTS_DIR}/ && \
#  chown -h flink:flink $FLINK_HOME  && \
#  sed -i 's/rest.address: localhost/rest.address: 0.0.0.0/g' $FLINK_HOME/conf/flink-conf.yaml && \
#  sed -i 's/rest.bind-address: localhost/rest.bind-address: 0.0.0.0/g' $FLINK_HOME/conf/flink-conf.yaml && \
#  sed -i 's/jobmanager.bind-host: localhost/jobmanager.bind-host: 0.0.0.0/g' $FLINK_HOME/conf/flink-conf.yaml && \
#  sed -i 's/taskmanager.bind-host: localhost/taskmanager.bind-host: 0.0.0.0/g' $FLINK_HOME/conf/flink-conf.yaml && \
#  sed -i '/taskmanager.host: localhost/d' $FLINK_HOME/conf/flink-conf.yaml
## 把这个脚本拷贝到镜像
#COPY docker/flink/docker-entrypoint.sh /
FROM flink:1.17.2-SN #注意jdk版本的影响
COPY  juicefs-hadoop-1.1-dev.jar  /opt/flink/lib/ # 这个jar包是自己编译的。
#COPY  flink-s3-fs-hadoop-1.17.2.jar /opt/flink/lib/
COPY  target/flink-sql-submit-1.0-SNAPSHOT.jar /opt/flink/lib/
#install hadoop
RUN set -ex; \
    wget -nv -O /opt/flink/lib/hudi-flink.jar https://repo1.maven.org/maven2/org/apache/hudi/hudi-flink1.17-bundle/1.0.0-beta1/hudi-flink1.17-bundle-1.0.0-beta1.jar ; \
     wget -nv -O /opt/hadoop.tar.gz https://mirrors.tuna.tsinghua.edu.cn/apache/hadoop/common/hadoop-3.3.5/hadoop-3.3.5.tar.gz ; \
        tar -xzf /opt/hadoop.tar.gz -C /opt/ ; \
        rm -rf /opt/hadoop.tar.gz ; \
           mv /opt/hadoop-3.3.5 /opt/hadoop ; \
     cp /opt/hadoop/share/hadoop/mapreduce/hadoop-mapreduce-client-core-3.3.5.jar /opt/flink/lib/
RUN mkdir -p /opt/flink/plugins/flink-s3-fs-hadoop/ &&\
    mv -v /opt/flink/opt/flink-s3-fs-hadoop-*.jar /opt/flink/plugins/flink-s3-fs-hadoop/ &&\
    chown -R flink:flink /opt/flink/plugins/flink-s3-fs-hadoop
COPY juicefs-hadoop-1.1-dev.jar /opt/hadoop/share/hadoop/common/lib/
COPY juicefs-hadoop-1.1-dev.jar /opt/hadoop/share/hadoop/mapreduce/lib/


ENV HADOOP_HOME=/opt/hadoop
ENV HADOOP_CLASSPATH=/opt/hadoop/etc/hadoop:/opt/hadoop/share/hadoop/common/lib/*:/opt/hadoop/share/hadoop/common/*:/opt/hadoop/share/hadoop/hdfs:/opt/hadoop/share/hadoop/hdfs/lib/*:/opt/hadoop/share/hadoop/hdfs/*:/opt/hadoop/share/hadoop/mapreduce/*:/opt/hadoop/share/hadoop/yarn:/opt/hadoop/share/hadoop/yarn/lib/*:/opt/hadoop/share/hadoop/yarn/*
|
1
|
docker build -t flink-juicefs:v1.17.4 . -f Dockerfile.flink17
|
项目路径在:
1
|
git@github.com:huangxiaofeng10047/flink-sql-submit.git (fetch)
|
项目运行的地方
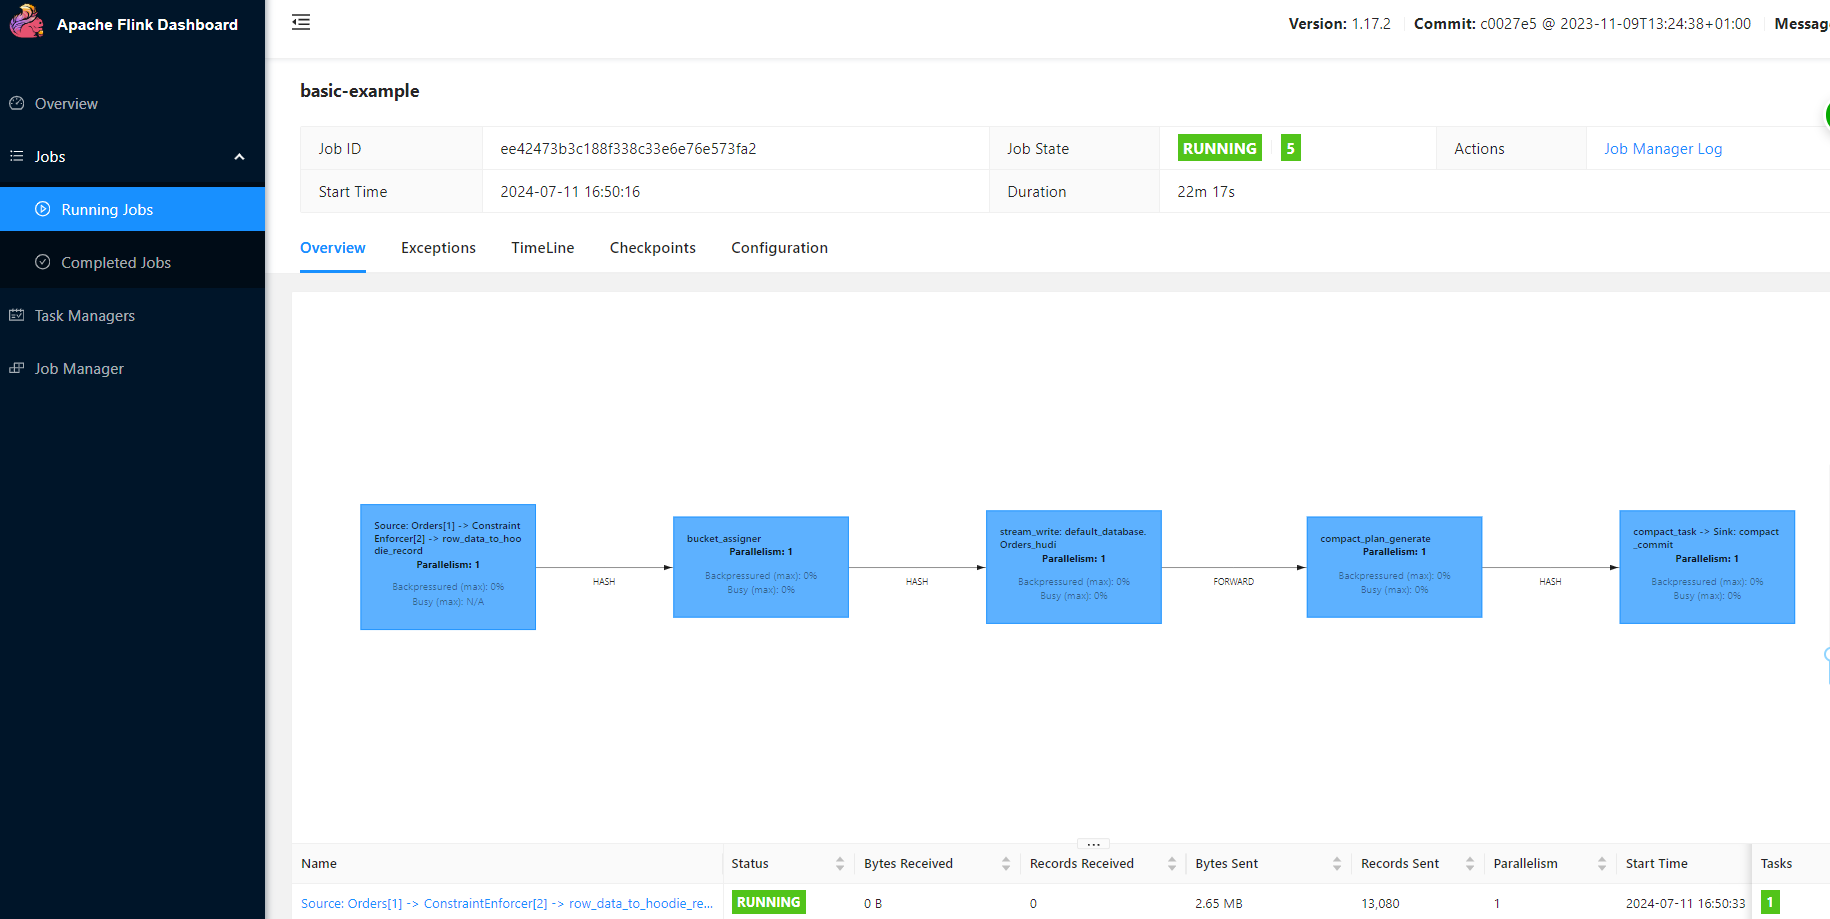
这个是 flink native job 作业提交方式,每一个任务独占 Flink。
记录一下时区的问题,刚开始采用的是 podTemplate 下放置时区,不生效,最后是在 flinkConf 中添加如下
 1
 2
 3
 4
 5
 6
 7
 8
 9
10
11
12
13
14
|
flinkVersion: v1_17
  flinkConfiguration:
    taskmanager.numberOfTaskSlots: "1"
    s3.endpoint: "http://10.43.180.28:9000"
    s3.path.style.access: "true"
    s3.access.key: "MpCurbSf0FdWTbO9XCzB"
    s3.secret.key: "d6VSjJAAyHqszi3RFif4Yg1UEBd9T4nL6hLcyK71"
    state.backend.incremental: "true"
    execution.checkpointing.interval: "300000ms"
    state.savepoints.dir: "s3://flink-data/savepoints"
    state.checkpoints.dir: "s3://flink-data/checkpoints"
 # 这个位置是新增的。
    env.java.opts.jobmanager: -Duser.timezone=GMT+08
    env.java.opts.taskmanager: -Duser.timezone=GMT+08
|
新增之后时间正常了。

在启动一个作业打印一下结果
 1
 2
 3
 4
 5
 6
 7
 8
 9
10
11
12
13
14
15
16
17
18
19
20
21
22
23
24
25
26
27
28
29
30
31
32
33
34
35
36
37
38
39
40
41
42
43
44
45
46
47
48
49
50
51
52
|
apiVersion: flink.apache.org/v1beta1
kind: FlinkDeployment
metadata:
  namespace: flink-jobs
  name: basic-example-show
spec:
  image:  10.7.20.12:5000/flink-juicefs:v1.1.3
  flinkVersion: v1_17
  flinkConfiguration:
    taskmanager.numberOfTaskSlots: "1"
    s3.endpoint: "http://10.43.180.28:9000"
    s3.path.style.access: "true"
    s3.access.key: "MpCurbSf0FdWTbO9XCzB"
    s3.secret.key: "d6VSjJAAyHqszi3RFif4Yg1UEBd9T4nL6hLcyK71"
    state.backend.incremental: "true"
    execution.checkpointing.interval: "300000ms"
    state.savepoints.dir: "s3://flink-data/savepoints"
    state.checkpoints.dir: "s3://flink-data/checkpoints"
    env.java.opts.jobmanager: -Duser.timezone=GMT+08
    env.java.opts.taskmanager: -Duser.timezone=GMT+08
  serviceAccount: flink
  jobManager:
    resource:
      memory: "2048m"
      cpu: 1
  taskManager:
    resource:
      memory: "2048m"
      cpu: 1
  podTemplate:
    spec:
      containers:
        - name: flink-main-container
          env:
            - name: TZ
              value: Asia/Shanghai
  job:
    jarURI: local:///opt/flink/lib/flink-sql-submit-1.0-SNAPSHOT.jar
    args: ["-f", "s3://flink-tasks/k8s-flink-sql-test-show.sql", "-m", "streaming", "-e", "http://10.43.180.28:9000", "-a", "MpCurbSf0FdWTbO9XCzB", "-s", "d6VSjJAAyHqszi3RFif4Yg1UEBd9T4nL6hLcyK71"]
    parallelism: 1
    upgradeMode: stateless
  podTemplate:
    spec:
      containers:
        - name: flink-main-container
          volumeMounts:
            - mountPath: /opt/hadoop/etc/hadoop/
              name: core-site
      volumes:
        - name: core-site
          configMap:
            name: core-site
|
core-site.xml
  1
  2
  3
  4
  5
  6
  7
  8
  9
 10
 11
 12
 13
 14
 15
 16
 17
 18
 19
 20
 21
 22
 23
 24
 25
 26
 27
 28
 29
 30
 31
 32
 33
 34
 35
 36
 37
 38
 39
 40
 41
 42
 43
 44
 45
 46
 47
 48
 49
 50
 51
 52
 53
 54
 55
 56
 57
 58
 59
 60
 61
 62
 63
 64
 65
 66
 67
 68
 69
 70
 71
 72
 73
 74
 75
 76
 77
 78
 79
 80
 81
 82
 83
 84
 85
 86
 87
 88
 89
 90
 91
 92
 93
 94
 95
 96
 97
 98
 99
100
101
102
103
104
105
106
107
108
109
110
111
112
113
114
115
116
117
118
119
120
121
122
123
124
125
126
127
128
129
|
<?xml version="1.0" encoding="UTF-8"?>
<?xml-stylesheet type="text/xsl" href="configuration.xsl"?>
<!--
  Licensed under the Apache License, Version 2.0 (the "License");
  you may not use this file except in compliance with the License.
  You may obtain a copy of the License at

    http://www.apache.org/licenses/LICENSE-2.0

  Unless required by applicable law or agreed to in writing, software
  distributed under the License is distributed on an "AS IS" BASIS,
  WITHOUT WARRANTIES OR CONDITIONS OF ANY KIND, either express or implied.
  See the License for the specific language governing permissions and
  limitations under the License. See accompanying LICENSE file.
-->

<!-- Put site-specific property overrides in this file. -->

<configuration>

    <property>
        <name>fs.s3a.endpoint</name>
        <value>http://10.43.180.28:9000</value>
        <description>AWS S3 endpoint to connect to. An up-to-date list is
            provided in the AWS Documentation: regions and endpoints. Without this
            property, the standard region (s3.amazonaws.com) is assumed.
        </description>
    </property>

    <property>
        <name>fs.s3a.access.key</name>
        <value>MpCurbSf0FdWTbO9XCzB</value>
    </property>

    <property>
        <name>fs.s3a.secret.key</name>
        <value>d6VSjJAAyHqszi3RFif4Yg1UEBd9T4nL6hLcyK71</value>
    </property>

    <property>
        <name>fs.s3a.path.style.access</name>
        <value>true</value>
        <description>Enable S3 path style access ie disabling the default virtual hosting behaviour.
            Useful for S3A-compliant storage providers as it removes the need to set up DNS for virtual hosting.
        </description>
    </property>

    <property>
        <name>fs.s3a.aws.credentials.provider</name>
        <value>
            org.apache.hadoop.fs.s3a.SimpleAWSCredentialsProvider
        </value>
        <description>
            Comma-separated class names of credential provider classes which implement
            com.amazonaws.auth.AWSCredentialsProvider.

            When S3A delegation tokens are not enabled, this list will be used
            to directly authenticate with S3 and DynamoDB services.
            When S3A Delegation tokens are enabled, depending upon the delegation
            token binding it may be used
            to communicate with the STS endpoint to request session/role
            credentials.

            These are loaded and queried in sequence for a valid set of credentials.
            Each listed class must implement one of the following means of
            construction, which are attempted in order:
            * a public constructor accepting java.net.URI and
            org.apache.hadoop.conf.Configuration,
            * a public constructor accepting org.apache.hadoop.conf.Configuration,
            * a public static method named getInstance that accepts no
            arguments and returns an instance of
            com.amazonaws.auth.AWSCredentialsProvider, or
            * a public default constructor.

            Specifying org.apache.hadoop.fs.s3a.AnonymousAWSCredentialsProvider allows
            anonymous access to a publicly accessible S3 bucket without any credentials.
            Please note that allowing anonymous access to an S3 bucket compromises
            security and therefore is unsuitable for most use cases. It can be useful
            for accessing public data sets without requiring AWS credentials.

            If unspecified, then the default list of credential provider classes,
            queried in sequence, is:
            * org.apache.hadoop.fs.s3a.TemporaryAWSCredentialsProvider: looks
            for session login secrets in the Hadoop configuration.
            * org.apache.hadoop.fs.s3a.SimpleAWSCredentialsProvider:
            Uses the values of fs.s3a.access.key and fs.s3a.secret.key.
            * com.amazonaws.auth.EnvironmentVariableCredentialsProvider: supports
            configuration of AWS access key ID and secret access key in
            environment variables named AWS_ACCESS_KEY_ID, AWS_SECRET_ACCESS_KEY,
            and AWS_SESSION_TOKEN as documented in the AWS SDK.
            * org.apache.hadoop.fs.s3a.auth.IAMInstanceCredentialsProvider: picks up
            IAM credentials of any EC2 VM or AWS container in which the process is running.
        </description>
    </property>

    <property>
        <name>fs.defaultFS</name>
        <value>jfs://juicefsminio/hudi-dir</value>
        <description>Optional, you can also specify full path "jfs://myjfs/path-to-dir" with location to use JuiceFS</description>
    </property>
    <property>
        <name>fs.jfs.impl</name>
        <value>io.juicefs.JuiceFileSystem</value>
    </property>
    <property>
        <name>fs.AbstractFileSystem.jfs.impl</name>
        <value>io.juicefs.JuiceFS</value>
    </property>
    <property>
        <name>juicefs.meta</name>
        <value>mysql://root:root@(10.43.211.245:3306)/juicefs</value>
    </property>
    <property>
        <name>juicefs.cache-dir</name>
        <value>/tmp/juicefs-cache-dir</value>
    </property>
    <property>
        <name>juicefs.cache-size</name>
        <value>1024</value>
    </property>
    <property>
        <name>juicefs.access-log</name>
        <value>/tmp/juicefs.access.log</value>
    </property>
    <property>
      <name>juicefs.superuser</name>
      <value>flink</value>
    </property>
</configuration>
|


