首先使用 springboot 开启网站,建立一个初始化的 gradle 的 springboot 项目。
什么是 starter,starter 就是插件,即插即用,很方便做项目代码的复用,这里实现的一个功能为使用 zk 作为分布式锁,来进行定时任务的分解处理。
编写 starter demo
使用https://start.spring.io/
创建一个 gradle 项目: demo-spring-boot-zk-starter
引入以下依赖:
 1
 2
 3
 4
 5
 6
 7
 8
 9
10
11
12
13
14
15
16
17
18
19
20
21
22
|
dependencies {
	testImplementation 'junit:junit:4.13.1'
	annotationProcessor("org.projectlombok:lombok:1.18.20")
	testAnnotationProcessor("org.projectlombok:lombok:1.18.20")
	implementation 'org.springframework.boot:spring-boot-starter'
	implementation 'org.springframework.boot:spring-boot-configuration-processor'
	annotationProcessor "org.springframework.boot:spring-boot-configuration-processor"
	//springboot-aop
	implementation 'org.springframework.boot:spring-boot-starter-aop'
	//lombok
	implementation 'org.projectlombok:lombok'
	//curator-framework
	implementation 'org.apache.curator:curator-framework:5.5.0'
	//zookeeper
	implementation 'org.apache.zookeeper:zookeeper:3.7.1'
	//curator-client
	implementation 'org.apache.curator:curator-client:5.5.0'
	//curator-recipes
	implementation 'org.apache.curator:curator-recipes:5.5.0'
	testImplementation 'org.springframework.boot:spring-boot-starter-test'

}
|
属性类
新建一个属性类 ScheduledProperties,通过 @ConfigurationProperties 注解指定这是一个配置类,并设置注解的 prefix 属性值指定配置项的前缀。
1
2
3
4
5
6
|
@Data
@ConfigurationProperties(prefix = "scheduled.zk")
public class ScheduledProperties {
    boolean enable;
    String zkHosts;
}
|
注解类
新建一个注解类 ScheduledLeader,注解类是用来注解这个方式的开始使用地方,并且配合 aop 进行前向和后向操作
build.gradle
 1
 2
 3
 4
 5
 6
 7
 8
 9
10
11
12
13
14
15
16
17
18
19
20
21
22
23
24
25
26
27
28
29
30
31
32
33
34
35
36
37
38
39
40
41
42
43
44
45
46
47
48
49
50
51
52
53
54
55
56
57
58
59
60
61
62
63
64
65
66
67
68
69
70
71
72
73
74
75
76
77
78
79
80
81
82
83
|
plugins {
	id 'java'
	id 'org.springframework.boot' version '3.1.1'
	id 'io.spring.dependency-management' version '1.1.0'
	id 'maven-publish'
}

group = 'com.example'
version = '0.0.6-SNAPSHOT'
apply plugin: 'org.springframework.boot'
sourceCompatibility = JavaVersion.VERSION_17
targetCompatibility = JavaVersion.VERSION_17
bootJar {
	enabled = false
}
java {
	//withJavadocJar() //生成java-doc
	withSourcesJar() //生成源码,上传后方便查看
}

jar {
	enabled = true //生成依赖jar包
	archiveClassifier = '' //取消原来plain的后缀
}

repositories {
	mavenLocal()
	maven { url 'https://maven.aliyun.com/repository/google' }
	maven { url 'https://maven.aliyun.com/repository/public/' }
}

dependencyManagement {
	resolutionStrategy {
		cacheChangingModulesFor 0, 'seconds'
	}
}
dependencies {
	testImplementation 'junit:junit:4.13.1'
	annotationProcessor("org.projectlombok:lombok:1.18.20")
	testAnnotationProcessor("org.projectlombok:lombok:1.18.20")
	implementation 'org.springframework.boot:spring-boot-starter'
	implementation 'org.springframework.boot:spring-boot-configuration-processor'
	annotationProcessor "org.springframework.boot:spring-boot-configuration-processor"
	//springboot-aop
	implementation 'org.springframework.boot:spring-boot-starter-aop'
	//lombok
	implementation 'org.projectlombok:lombok'
	//curator-framework
	implementation 'org.apache.curator:curator-framework:5.5.0'
	//zookeeper
	implementation 'org.apache.zookeeper:zookeeper:3.7.1'
	//curator-client
	implementation 'org.apache.curator:curator-client:5.5.0'
	//curator-recipes
	implementation 'org.apache.curator:curator-recipes:5.5.0'
	testImplementation 'org.springframework.boot:spring-boot-starter-test'
}

tasks.named('test') {
	useJUnitPlatform()
}
publishing {
	publications {
		// 定义一个名为 Production 的发布
		MyProduction(MavenPublication) {
			groupId = project.group
			artifactId ='springboot-starter-zk'
			version = project.version
			from components.java
		}
	}
	repositories {
		maven {
			name = "nexus"
			allowInsecureProtocol = true
			url = "http://XXXXXX/repository/testSnapShot/"
			credentials {
				username = "YOURADMIN"
				password = "XXXXXX"
			}
		}
	}
}
|
参考文档:
https://xie.infoq.cn/article/3176824ed03fad5908005c9e9
https://www.jianshu.com/p/c63b8d1dead8
https://zhuanlan.zhihu.com/p/617446464
zk 操作
https://blog.csdn.net/yin380697242/article/details/79846112
报错
Zookeeper Curator KeeperErrorCode = Unimplemented for
版本不符合。
Java 中 InetAddress 的使用(二):获取本机 IP 地址的正确姿势
https://blog.csdn.net/liuxiao723846/article/details/125379946
生成的依赖 jar 包后带有 plain 后缀,其他项目依赖不成功
需要在 gradle.build 里面添加以下配置,就可以去除依赖 jar 包的 plain 后缀
1
2
3
4
|
jar {
   enabled = true
   archiveClassifier = '' //use empty string
}
|
发布到 nexus 私服中
 1
 2
 3
 4
 5
 6
 7
 8
 9
10
11
12
13
14
15
16
17
|
publishing {
    publications {
        mavenJava(MavenPublication) {
            from components.java
        }
    }
    repositories {
        maven {
            credentials {
                username MAVEN_REPOSITORY_USER // maven 仓库用户
                password MAVEN_REPOSITORY_PWD // maven 仓库密码
            }
            url MAVEN_REPOSITORY_TEST
            allowInsecureProtocol true // 允许访问非https仓库
        }
    }
}
|
java 带 source 上传
1
2
3
4
|
java {
    //withJavadocJar() //生成java-doc
    withSourcesJar() //生成源码,上传后方便查看
}
|

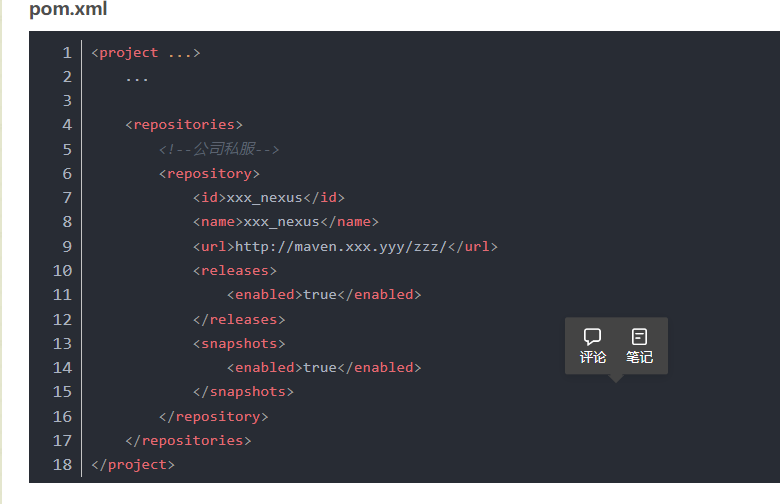
再 pom 中加入私服的地址即可。


