.zshrc 配置文件
 1
 2
 3
 4
 5
 6
 7
 8
 9
10
11
12
13
14
15
16
17
18
19
20
21
22
23
24
25
26
27
28
29
30
31
32
33
34
35
36
37
38
39
40
41
42
43
44
45
46
47
48
49
50
51
52
53
54
55
56
57
58
59
60
61
62
63
64
65
66
67
68
69
70
71
72
73
74
75
76
77
78
79
80
81
82
83
84
85
86
87
88
89
90
91
92
93
94
# Enable Powerlevel10k instant prompt. Should stay close to the top of ~/.zshrc.
# Initialization code that may require console input (password prompts, [y/n]
# confirmations, etc.) must go above this block; everything else may go below.
if [[ -r "${XDG_CACHE_HOME:-$HOME/.cache}/p10k-instant-prompt-${(%):-%n}.zsh" ]]; then
  source "${XDG_CACHE_HOME:-$HOME/.cache}/p10k-instant-prompt-${(%):-%n}.zsh"
fi

# 获取windows的ip
export WIN_IP=`cat /etc/resolv.conf | grep nameserver | awk '{print $2}'`
# 删除 ~/.proxychains.conf 中 [ProxyList] 所在行到文件末尾的全部内容
sed -i '/\[ProxyList\]/,$d' ~/.proxychains.conf
# 往文件末尾添加socks5设置,这个 7890 是我的 qv②ray 的 socks5 端口号,改成你自己的
echo '[ProxyList]\nsocks5 '${WIN_IP}' 10808' >> ~/.proxychains.conf
# 设置别名;使用 ~/.proxychains.conf 作为proxychains的配置文件;让proxychains quiet(不输出一大串东西)
alias pc='proxychains4 -q -f ~/.proxychains.conf'
# 用来手动开关代理,建议走 http 协议,因为 wget 不支持 socks5
my_proxy=http://${WIN_IP}:10809
alias p-on='export all_proxy='${my_proxy}' http_proxy='${my_proxy}' https_proxy='${my_proxy}''
alias p-off='unset all_proxy http_proxy https_proxy'
source /usr/share/zsh/share/antigen.zsh
# Load the oh-my-zsh's library
# oh-my-zsh 会启用历史命令、按键绑定等功能
antigen use oh-my-zsh
# 启用一些 bundle
antigen bundle zsh-users/zsh-syntax-highlighting
antigen bundle zsh-users/zsh-autosuggestions
antigen bundle zsh-users/zsh-completions
antigen bundle git
antigen bundle heroku
antigen bundle pip
antigen bundle lein
antigen bundle command-not-found
antigen bundle z
antigen bundle paulirish/git-open
antigen bundle kubernetes

# 语法高亮功能
antigen bundle zsh-users/zsh-syntax-highlighting

# 代码提示功能
antigen bundle zsh-users/zsh-autosuggestions

# 自动补全功能
antigen bundle zsh-users/zsh-completions
# Load the theme
antigen theme af-magic
antigen apply
# for ls colors
#LS_COLORS="di=34:ln=35:so=32:pi=33:ex=31:bd=34:cd=34:su=36:sg=36:tw=34:ow=34"
export LS_COLORS
#启用starship
# To customize prompt, run `p10k configure` or edit ~/.p10k.zsh.
[[ ! -f ~/.p10k.zsh ]] || source ~/.p10k.zsh

#THIS MUST BE AT THE END OF THE FILE FOR SDKMAN TO WORK!!!
export SDKMAN_DIR="$HOME/.sdkman"
[[ -s "$HOME/.sdkman/bin/sdkman-init.sh" ]] && source "$HOME/.sdkman/bin/sdkman-init.sh"
 source /home/xfhuang/.sdkman/bin/sdkman-init.sh
export NVM_DIR="$HOME/.nvm"
[ -s "$NVM_DIR/nvm.sh" ] && \. "$NVM_DIR/nvm.sh"  # This loads nvm
[ -s "$NVM_DIR/bash_completion" ] && \. "$NVM_DIR/bash_completion"  # This loads nvm bash_completion
if [[ -z $ranger ]];
then
  python $HOME/.script/rainbow-ascii-art.py
fi
eval "$(starship init zsh)"
 export NO_PROXY=localhost,127.0.0.1,10.0.37.153,qua.io
export GOPATH="/home/xfhuang/workspace/go"
export PATH=$PATH:$GOPATH/bin
alias blog='cd /mnt/e/myhugo'


 export INPUT_METHOD=fcitx
 export GTK_IM_MODULE=fcitx
 export QT_IM_MODULE=fcitx
 export XMODIFIERS=@im=fcitx
 if [ $SHLVL = 1 ] ; then
   (fcitx-autostart > /dev/null 2>&1 &)
   xset -r 49  > /dev/null 2>&1
 fi
export DISPLAY=`cat /etc/resolv.conf | grep nameserver | awk '{print $2}'`:0

export GOPROXY=https://goproxy.cn


source <(antibody init)

antibody bundle < ~/.zsh_plugins.txt
alias ls='colorls'

source /usr/lib/ruby/gems/3.0.0/gems/colorls-1.4.6/lib/tab_complete.sh

alias hyper="cmd.exe /c hyper"
.toml
  1
  2
  3
  4
  5
  6
  7
  8
  9
 10
 11
 12
 13
 14
 15
 16
 17
 18
 19
 20
 21
 22
 23
 24
 25
 26
 27
 28
 29
 30
 31
 32
 33
 34
 35
 36
 37
 38
 39
 40
 41
 42
 43
 44
 45
 46
 47
 48
 49
 50
 51
 52
 53
 54
 55
 56
 57
 58
 59
 60
 61
 62
 63
 64
 65
 66
 67
 68
 69
 70
 71
 72
 73
 74
 75
 76
 77
 78
 79
 80
 81
 82
 83
 84
 85
 86
 87
 88
 89
 90
 91
 92
 93
 94
 95
 96
 97
 98
 99
100
101
102
103
104
add_newline = false
command_timeout = 1000
[character]
success_symbol = "🌈"
error_symbol = "[✗](bold red) "
[time]
disabled = true
[cmd_duration]
disabled = true
[hostname]
disabled = true
[shell]
fish_indicator = "🦈"
bash_indicator = "🌞"
disabled = false
[aws]
symbol = " "
[conda]
symbol = " "
[dart]
symbol = " "
[directory]
read_only = " "
[docker_context]
symbol = " "
[elixir]
symbol = " "
[elm]
symbol = " "
[git_branch]
symbol = " "
[git_status]
format = "[$all_status$ahead_behind]($style)"
ahead = "⇡ $count "
behind = "⇣ $count "
deleted = "🗑 $count "
diverged = " $count "
stashed = "📦 $count "
modified = "פֿ $count "
staged = '[ $count ](green)'
renamed = " $count "
untracked = "🤷 $count "
style = "bold red"
[golang]
symbol = " "
[hg_branch]
symbol = " "
[java]
symbol = " "
[julia]
symbol = " "
[memory_usage]
symbol = " "
[nim]
symbol = " "
[nix_shell]
symbol = " "
[package]
symbol = " "
[perl]
symbol = " "
[php]
symbol = " "
[python]
symbol = " "
[ruby]
symbol = " "
[rust]
symbol = " "
[scala]
symbol = " "
[shlvl]
symbol = " "
[swift]
symbol = "ﯣ "
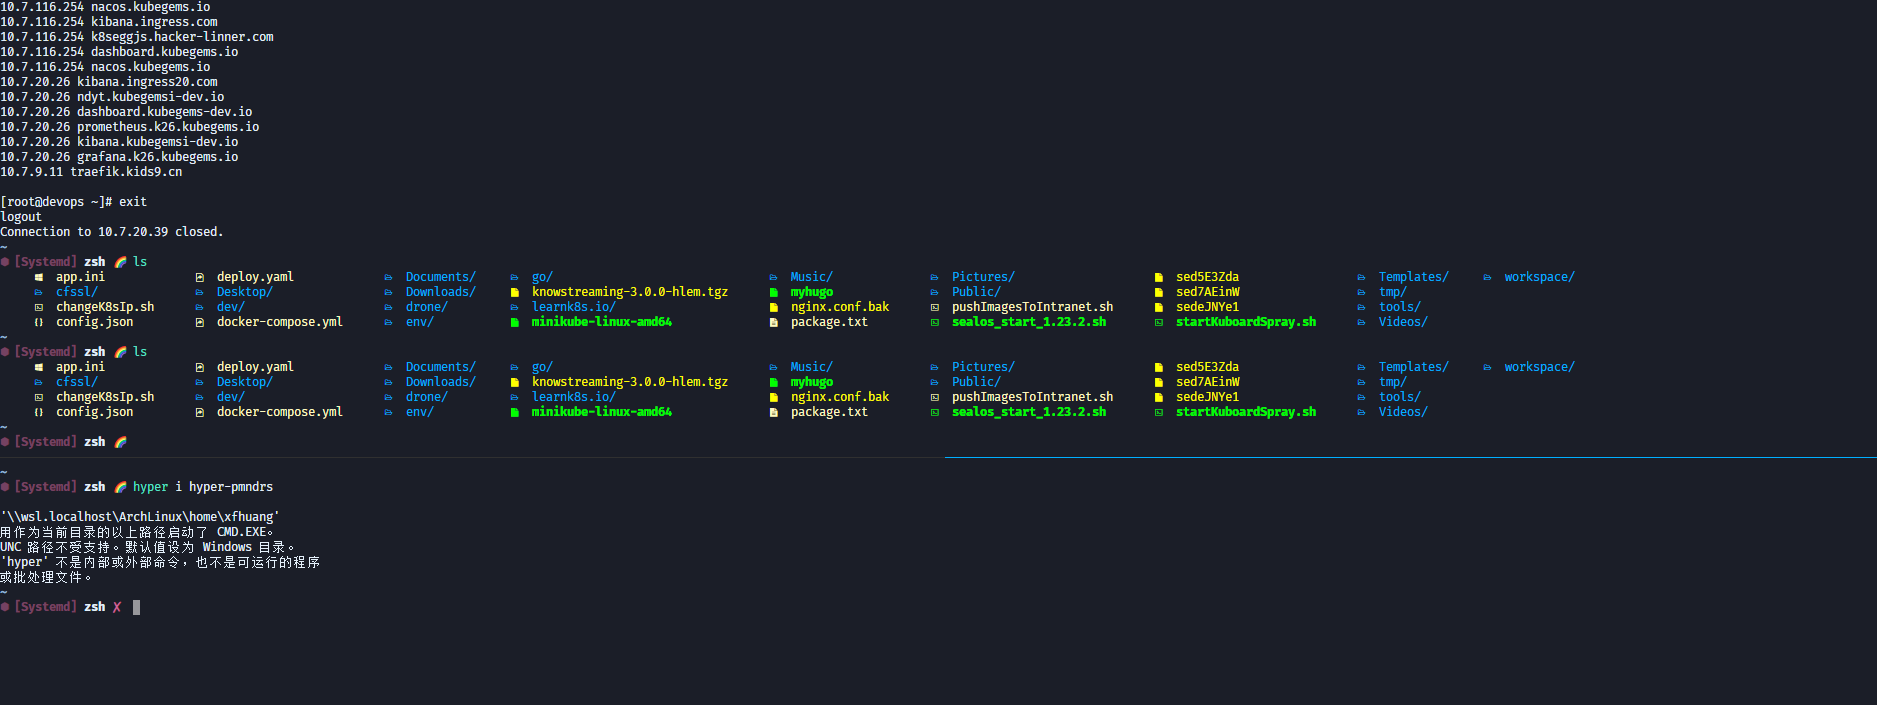
效果图
安装 colors
就会出现上面的效果。
安装 hyper
参考文档:
https://github.com/drcmda/poimandres-theme
zsh 的 plugins 的创建
1
touch ~/.zsh_plugins.txt && echo "# Adds autosuggestions \nzsh-users/zsh-autosuggestions \n\n# Adds a customised error when a command isn't found \nohmyzsh/ohmyzsh path:plugins/command-not-found \n\n# Colors our inputs as we type, oooooh \nzsh-users/zsh-syntax-highlighting \n\n# Activates substring search. If you start typing a \n# command and hit up and down, the commands will be \n# filtered to ones that match the string you have \n# already typed. Usage: https://github.com/zsh-users/zsh-history-substring-search#usage \nzsh-users/zsh-history-substring-search" >> ~/.zsh_plugins.txt && echo "\nantibody bundle < ~/.zsh_plugins.txt" >> ~/.zshrc
创建 auto-colorls
1
echo "alias ls='colorls'" >> ~/.zshrc && echo "\n\n#Automatically runs colorls on cd \ngretzky/auto-color-ls" >> ~/.zsh_plugins.txt && source ~/.zshrc
参考文档:
https://ironeko.com/posts/how-to-set-up-a-modern-terminal-for-developers
安装
1
python -m pip install --upgrade pip# 安装pip
Licensed under CC BY-NC-SA 4.0
最后更新于 Sep 10, 2025 02:16 UTC

